|
1. Check the battery to be charged to full capacity ... or at least have enough power to perform well during the entire time it takes to complete the competition.
2. Checking all External Exposed Areas Check that the track/treads, legs etc... are all in good shape and fully functional ... no jams or not sticking.
Check that there are no loose wires or other devices out of place that might jam during gaming competition.
- Initializing the R2PV1 brains for competition -
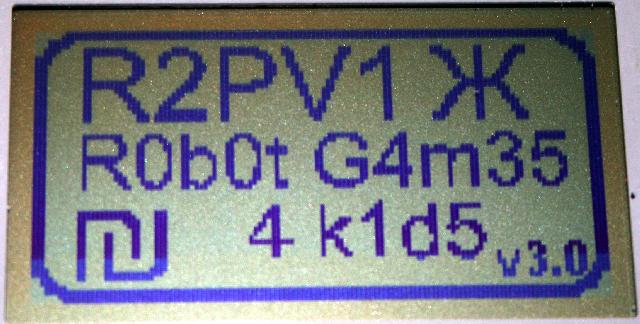
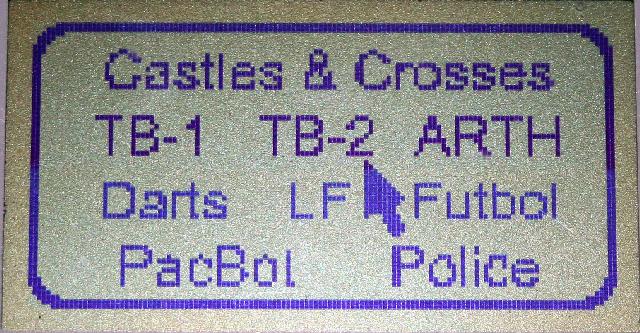
3. Power ON the R2PV1 Check to see the LCD screen display shows a “Splash Screen” first, then the Game List screen.
4. Choose a Game to Play – Move the arrow over the name of the game you want to play, then press down on the Joy/Button to select that game and continue into the PreFlight menus.
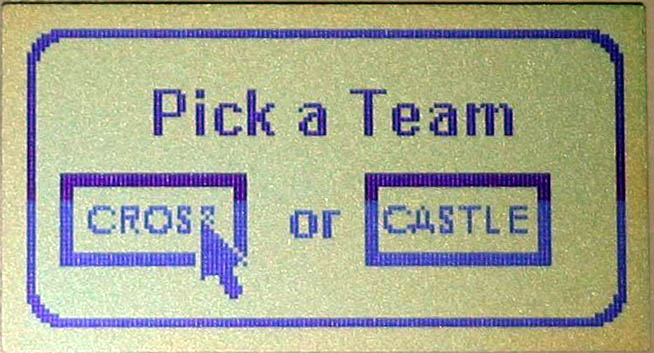
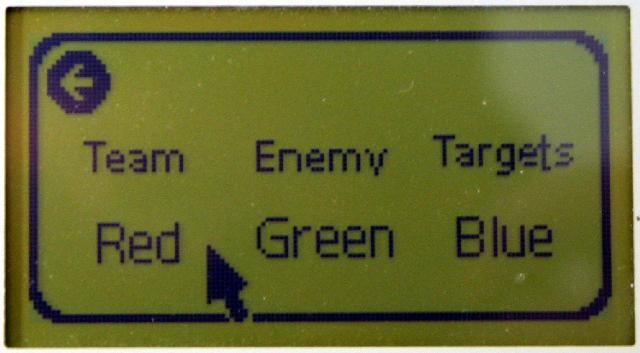
5. Pick a Team Here you must choose which team you will join.
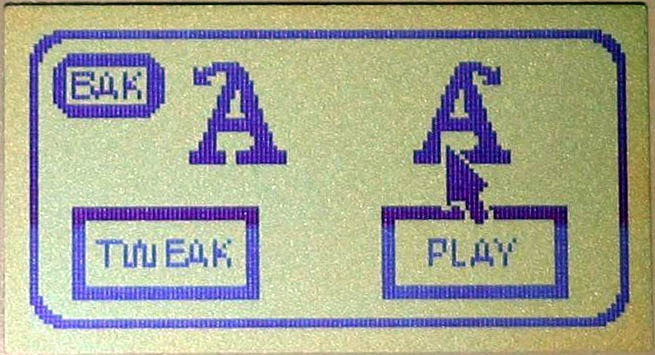
6. Tweak or Play Here you either get into the sub-menus and optimize the robot for best competitive results or just get into the game.
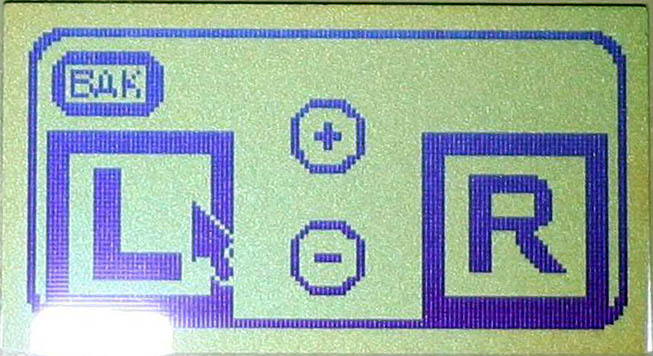
7. Team Color Set Because every camera sees colors slightly different than the next (the same for human eyes I’m sure) we can “set” the significant team colors by showing the colored object (TeamFlag/GamePiece) to the robot and click on the appropriate color button to create the base color setting in the robot for identification during competitions.
Tweak 1 AL or AR rule setting - This next screen brings up the first rule ... by default the robot is set to Always-Left ... but you can choose the Always-Right if you think this will bring your robot to the enemy HomeBase sooner than later.
Simply press the Joy/Button on either the AL or AR icon.
The history of this rule comes from cave explorers. Exploring a cave is very dangerous and one of the many rules successful cavers use is to always follow either the left or right wall through the cave. This helps to eventually return to the start if the cave ends and returns via the same side wall ... or that if your running out of time or your lights go out ... you can turn around and follow that same wall all the way back to the start.
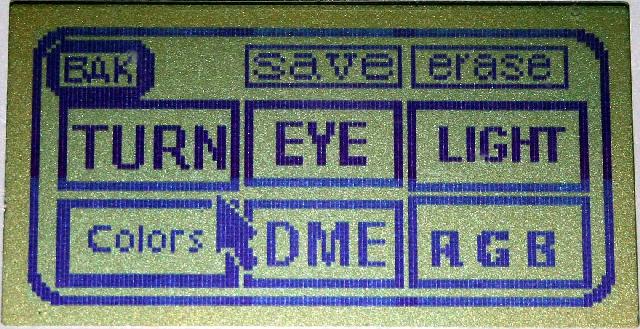
From here you can start playing the game ... go ahead and give it a try, but the importance of the PreFlight is you could next click on the “TWEAK” menu item and continue to optimize the robot and check robot functions before entering the gaming arena so that the robot can perform at its best.
After pressing down on the Joy/Button over the “TWEAK” menu the robot performance programming moves deeper into more detailed preflight setup functions. These are for adjusting the amount of “TURN” ... Adjusting the “EYE” level to the messages found on walls in the gaming arena ... testing the “LIGHTS” and LaserShotGun including checking the laser shotgun sighting for accuracy (this is a compromise between the eye level and the laser shotgun for target shooting/points.) Testing and setting the collision avoidance and DME systems.
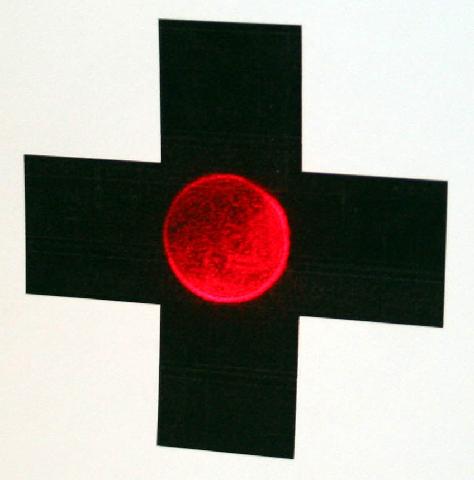
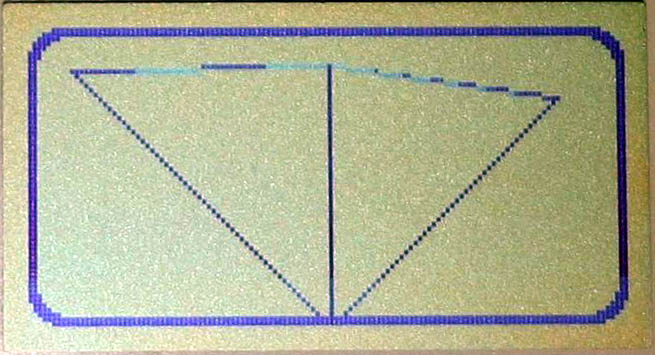
Tweak 2 Eye Level Adjustment is to insure that the robots forward cycloptic eye is set to look at the wall and have the clues it finds already vertically centered in the robots vision to increase both the speed and accuracy of recognition. First install the CROSS pattern into the “SetUp Area” ... then place the R2PV1 30cm or 1-foot away in front of the CROSS pattern.
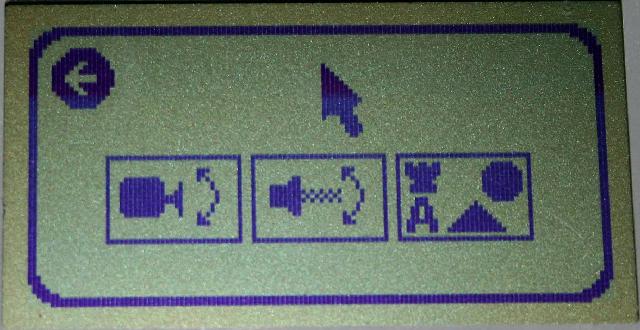
Tweak 3 Sighting the Laser ShotGun This is because the eye sees at one level and the Laser ShotGun sights to another level so we need to adjust the Laser ShotGun to be centered on the target exactly the same as the R2PV1 eye.
Tweak 4 Lights Testing is to insure the robots LaserShotGun, HeadLights and Team Color Lights are all working properly.

Tweak 5 DME Testing is to test each of the IR Range Finders to insure they are accurately working to prevent collisions with the gaming arena walls and other robots and objects during game competition.
Tweak 6 Turn Adjustment is to look at the angles inside the gaming arena and even if they are mostly 90ş the robot can be adjusted to make the most economical turn to increase the robots speed through the gaming arena.
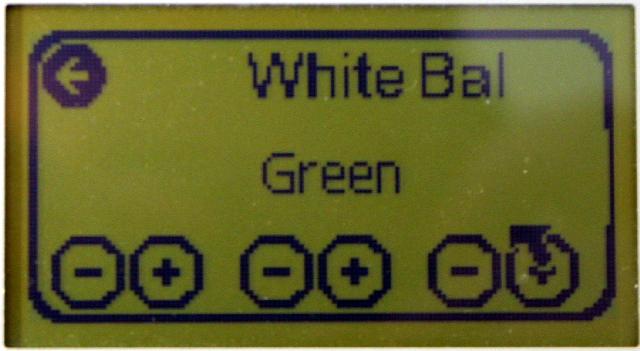
Tweak 7 RGB is to acclimate the camera to the current gaming arena lighting system. No two gaming arenas are equally lit by exactly the same light and digital cameras of any kind need to be shown a white space as a reference for balancing all the colors. Here we just put the robot 30cm in front of a blank white wall then click on the WhiteBal button to set the White Balance. Then the user can test the different team colors for accuracy.
Patents Pending
A Special Note:
The logbook or log file is very similar to a pilot’s logbook, but more importantly than just logging running time, the log file or logbook is used to help learn how your robot knowledge evolves with time and helps to understand and figure out new and better ways to optimize your robot or your robot budget.
Your logbook or log file should at least include:
|