Founded 2006 in Tucson, AZ. to explore Human/Robot Interactivity
“Drilling Brains for a New & Better Use of Technology”
Patents Pending
Give a child a toy and they're happy for an hour.
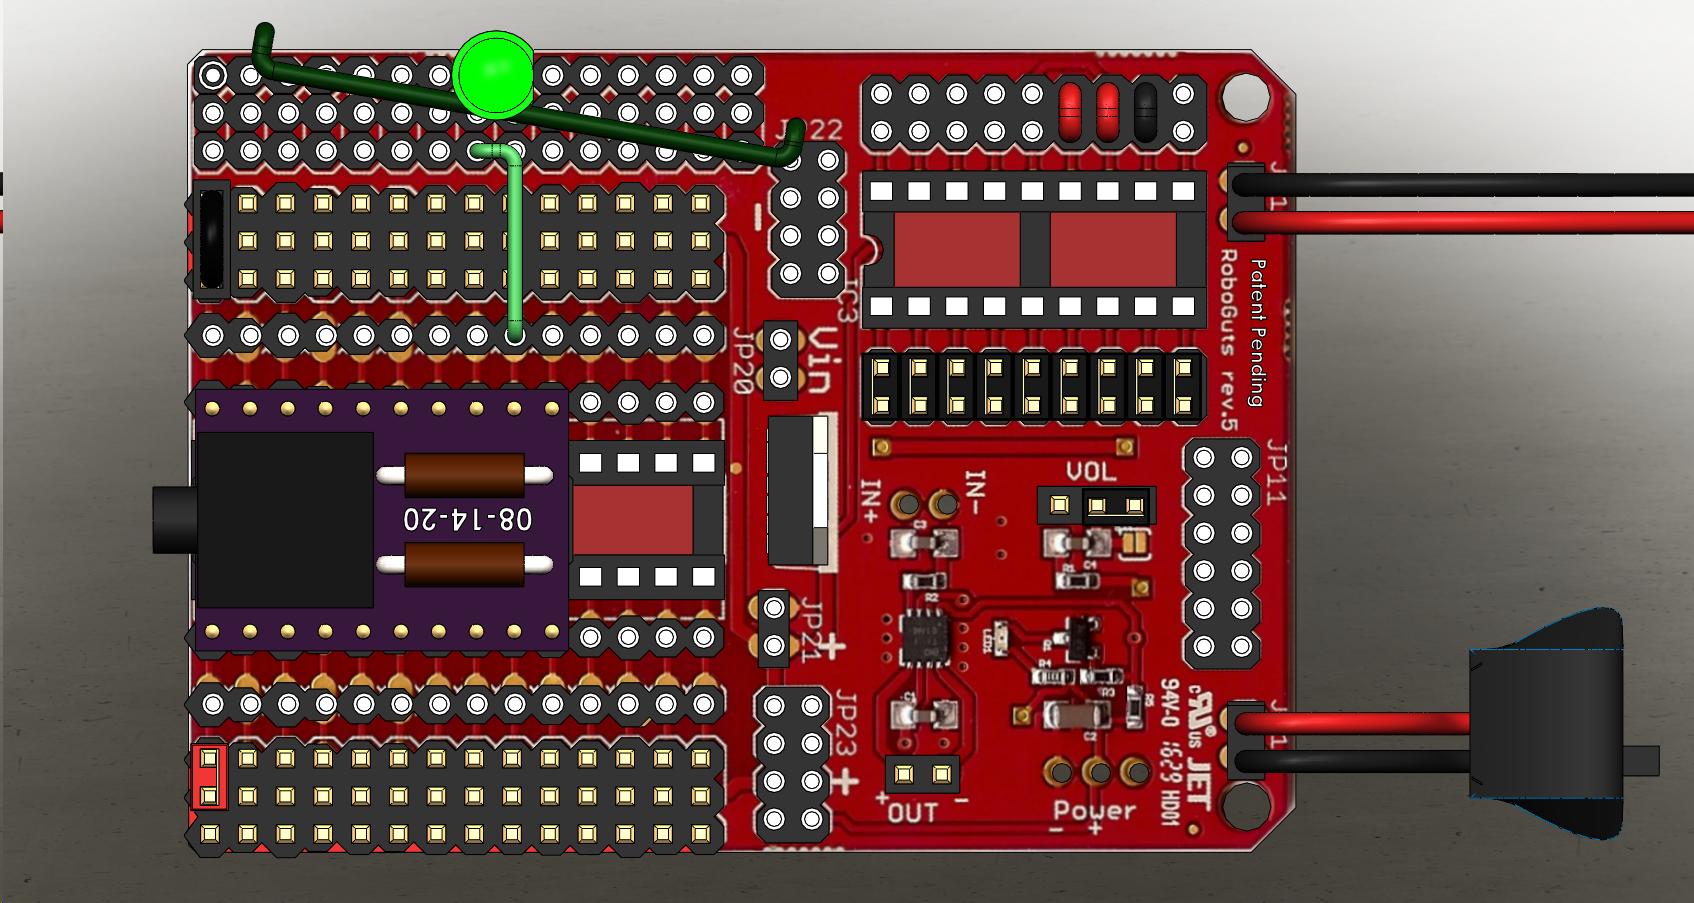
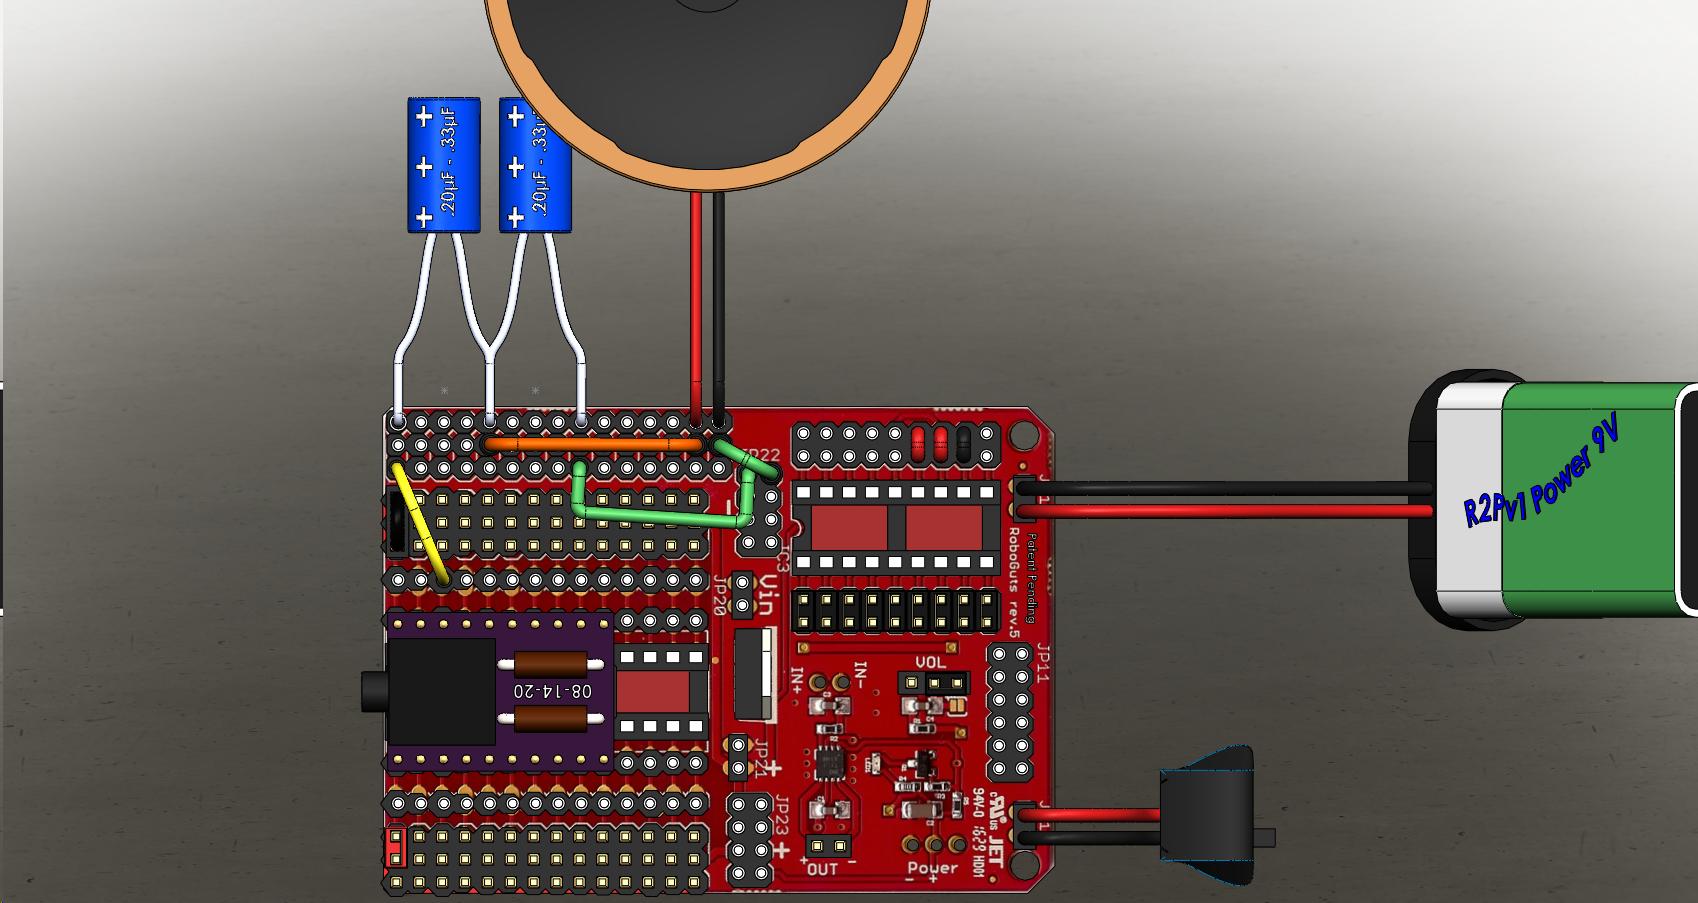
Lesson 00 Power IN
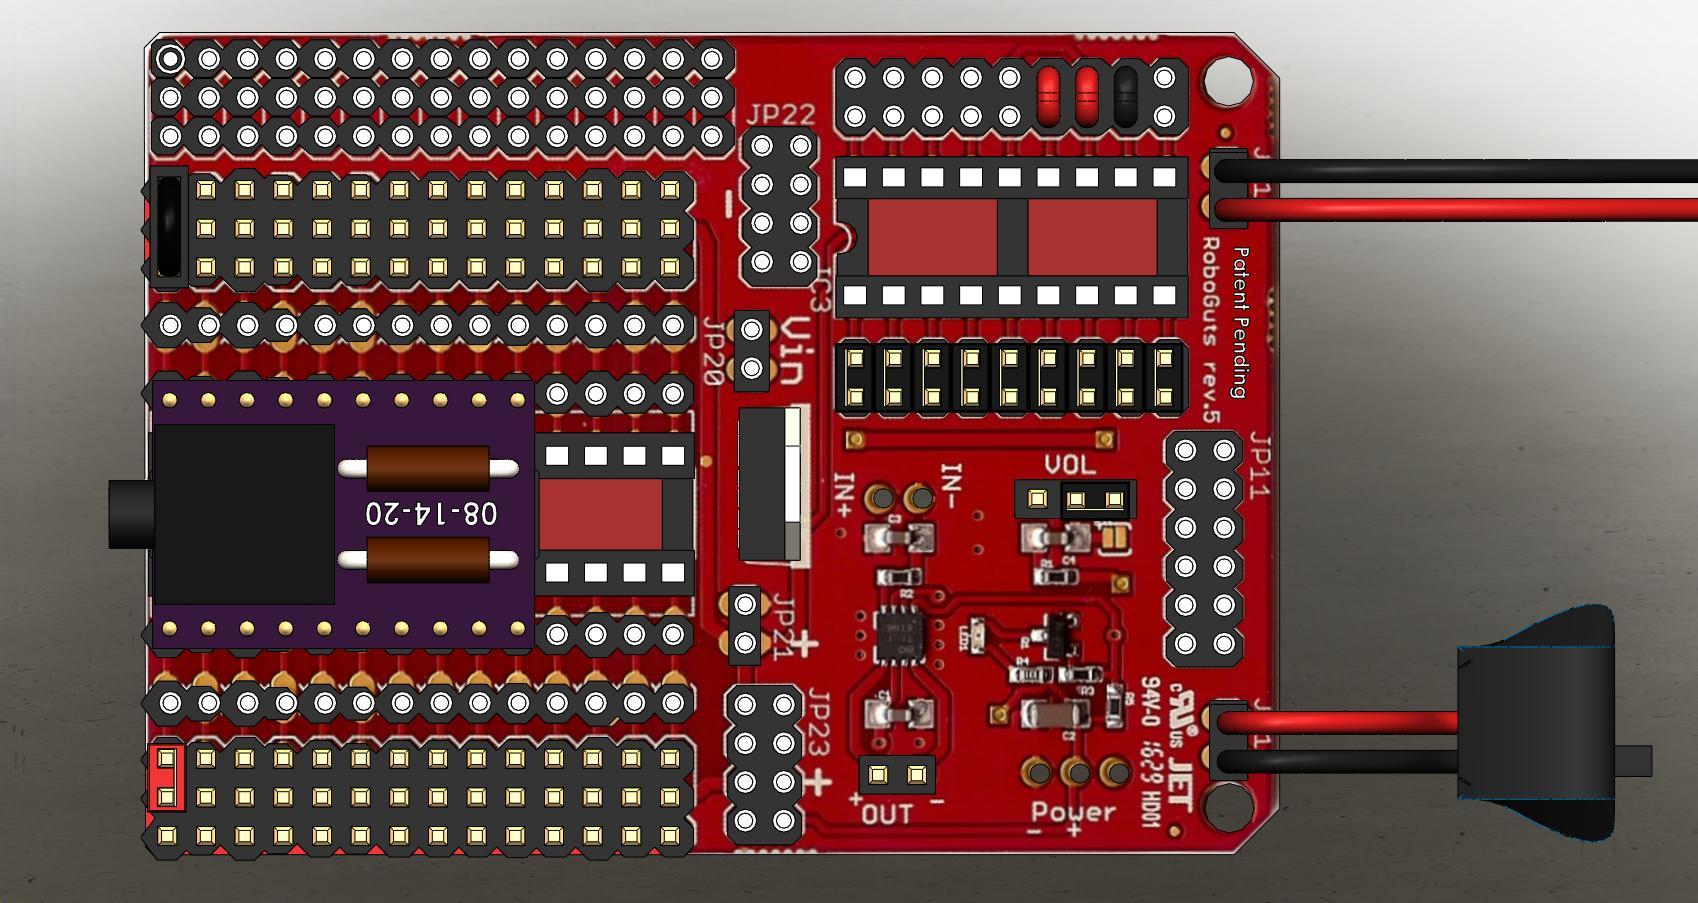
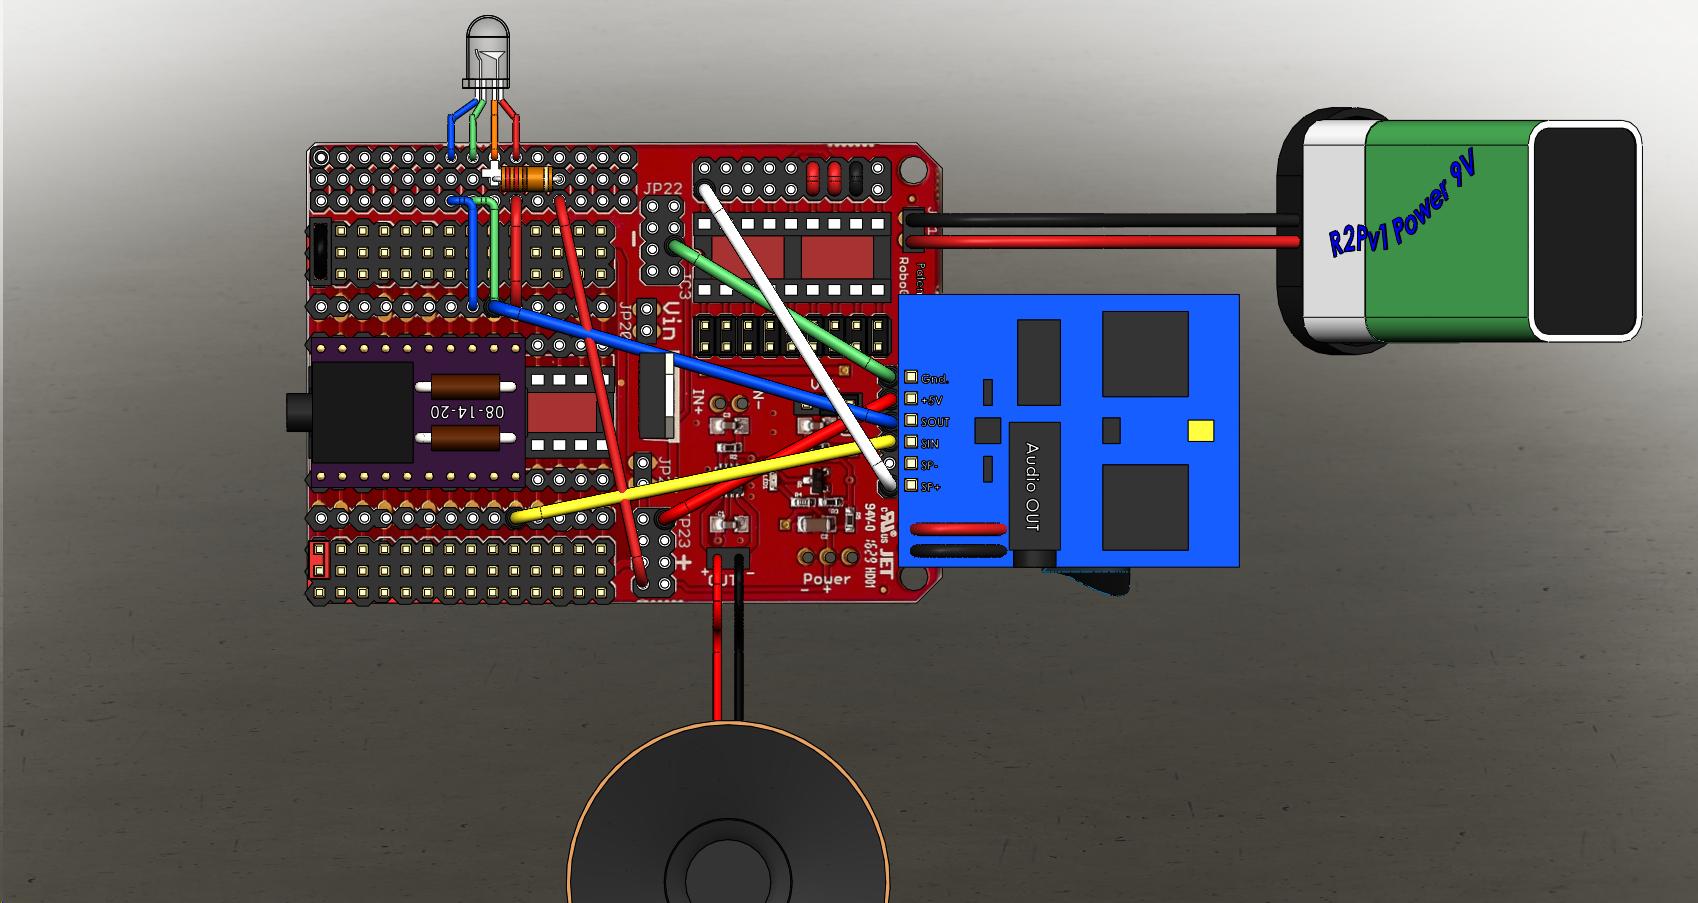
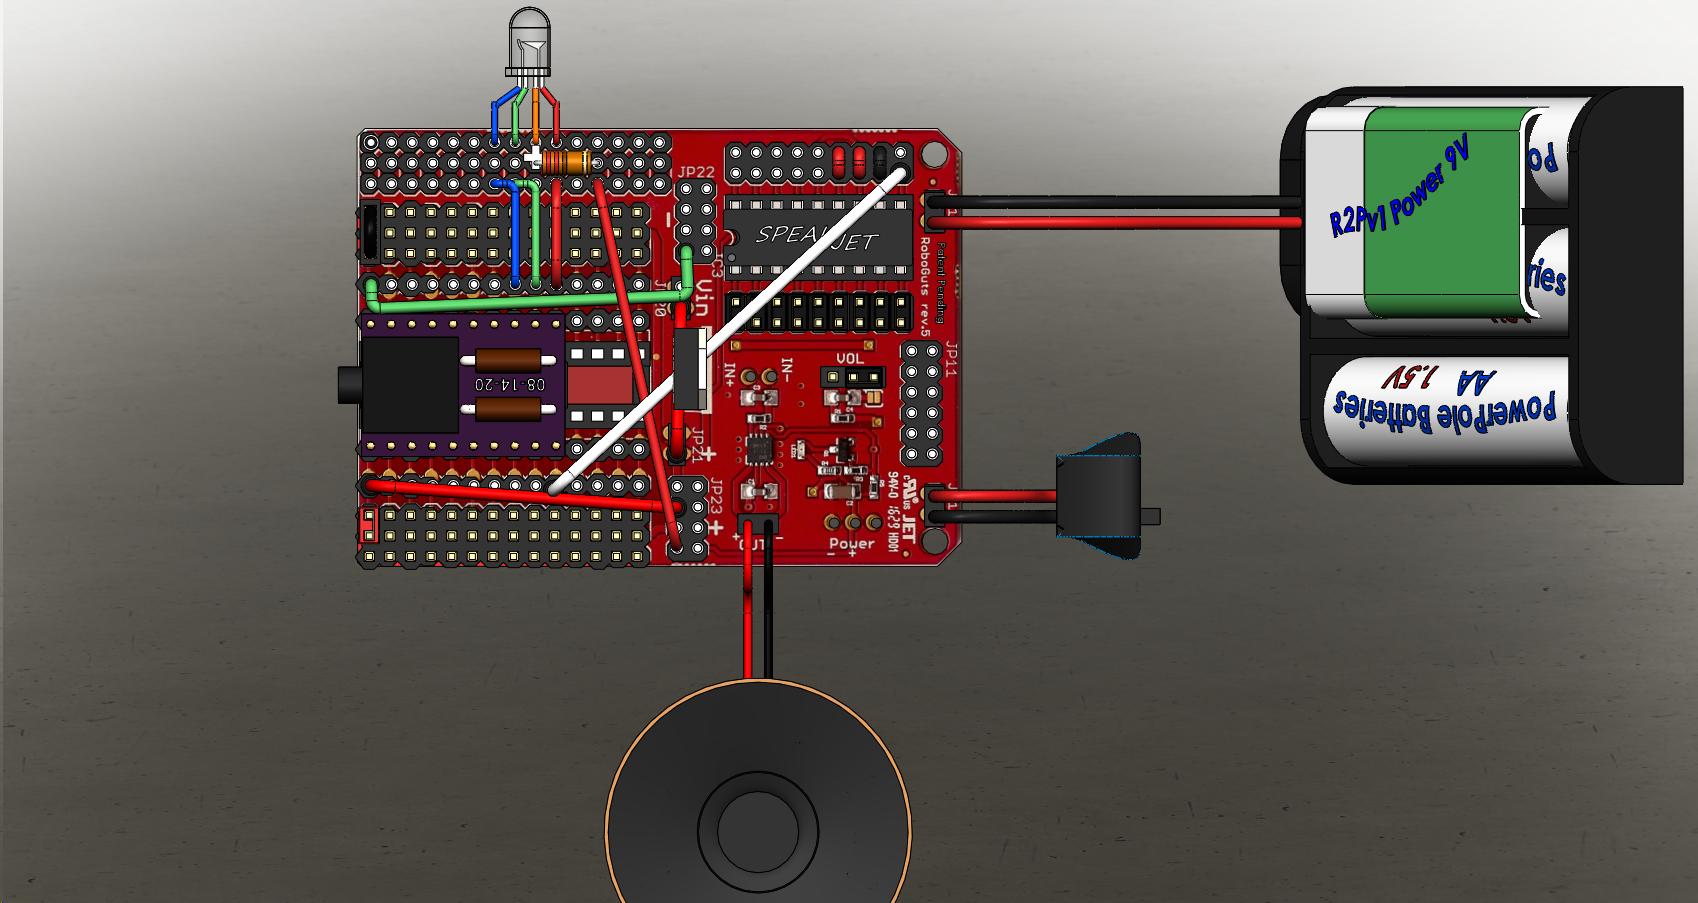
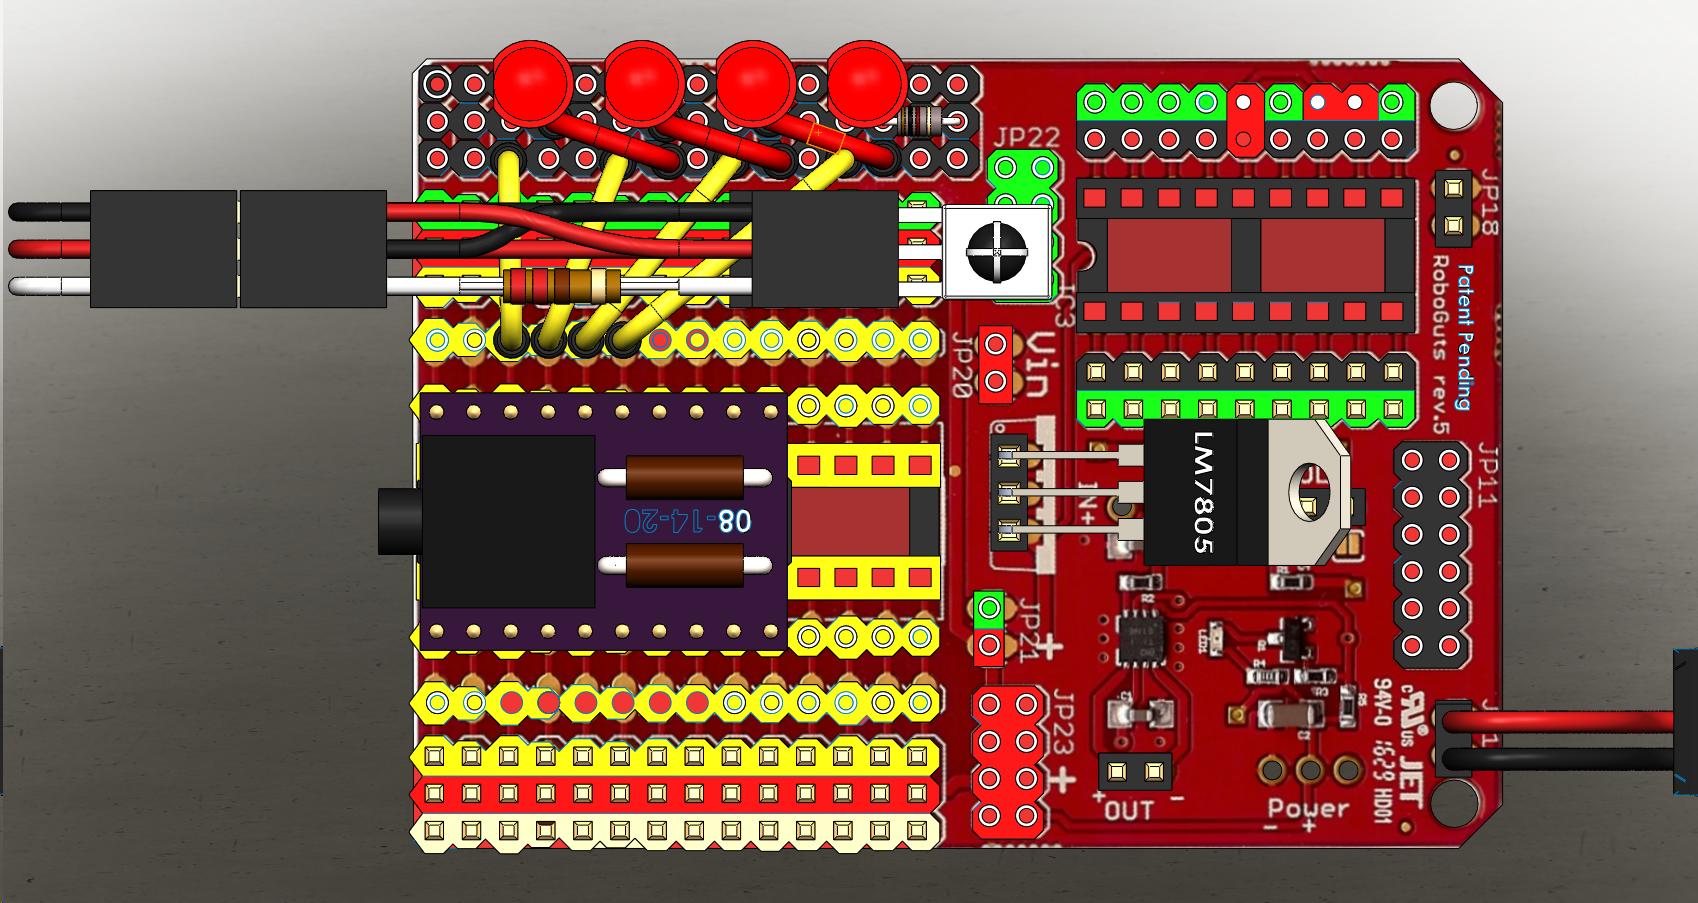
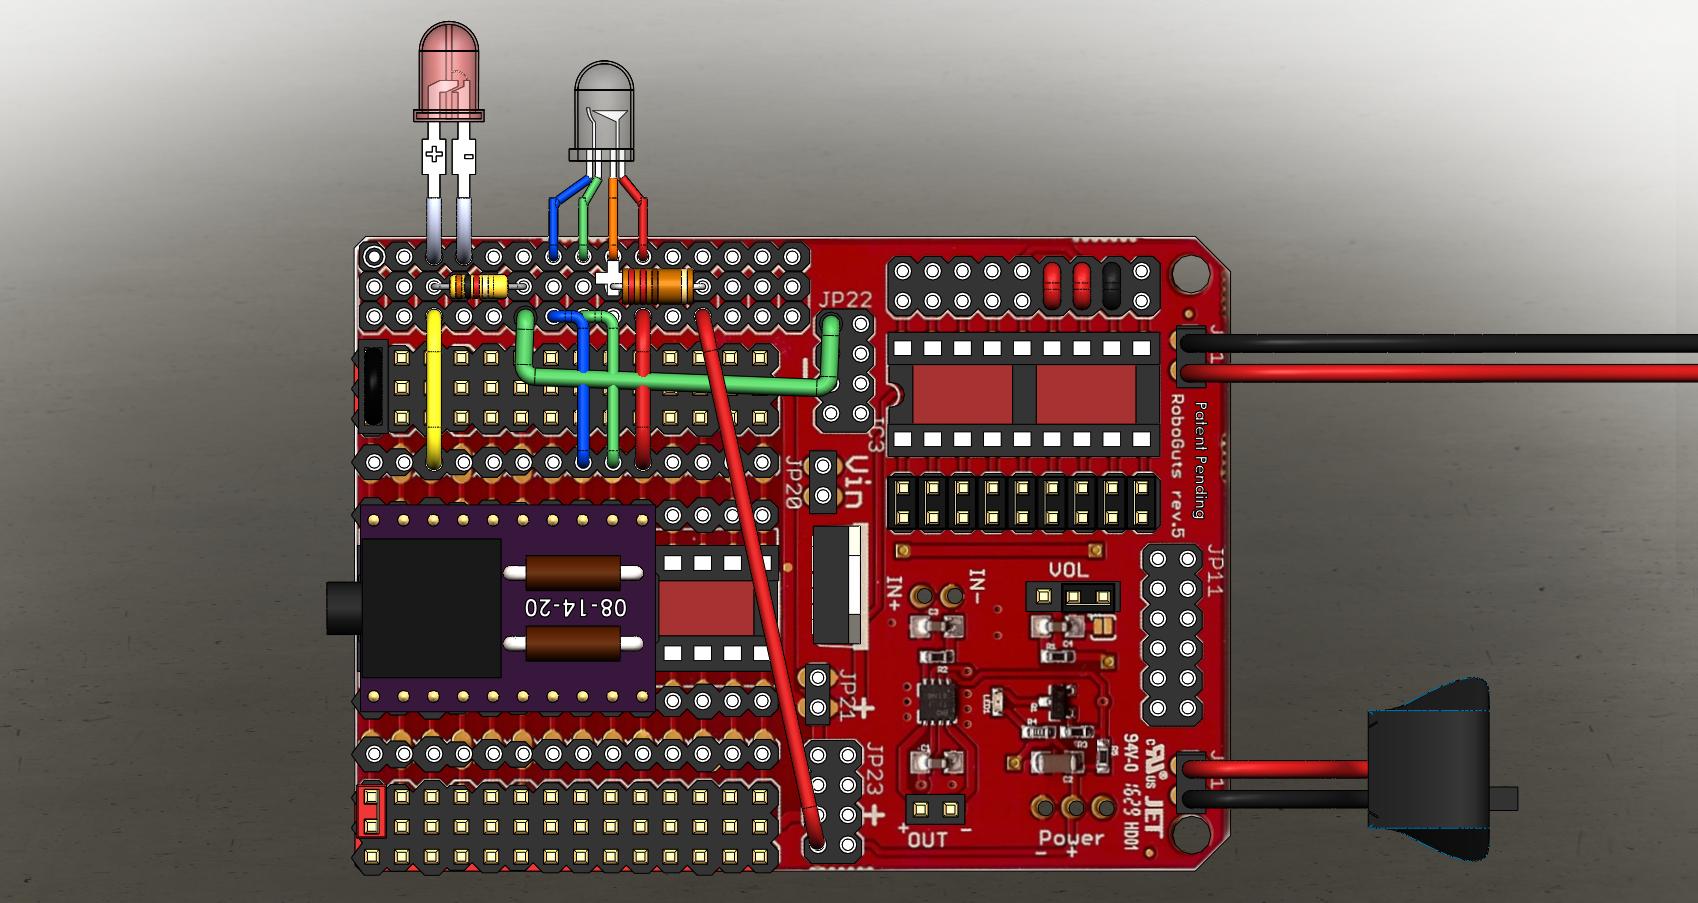
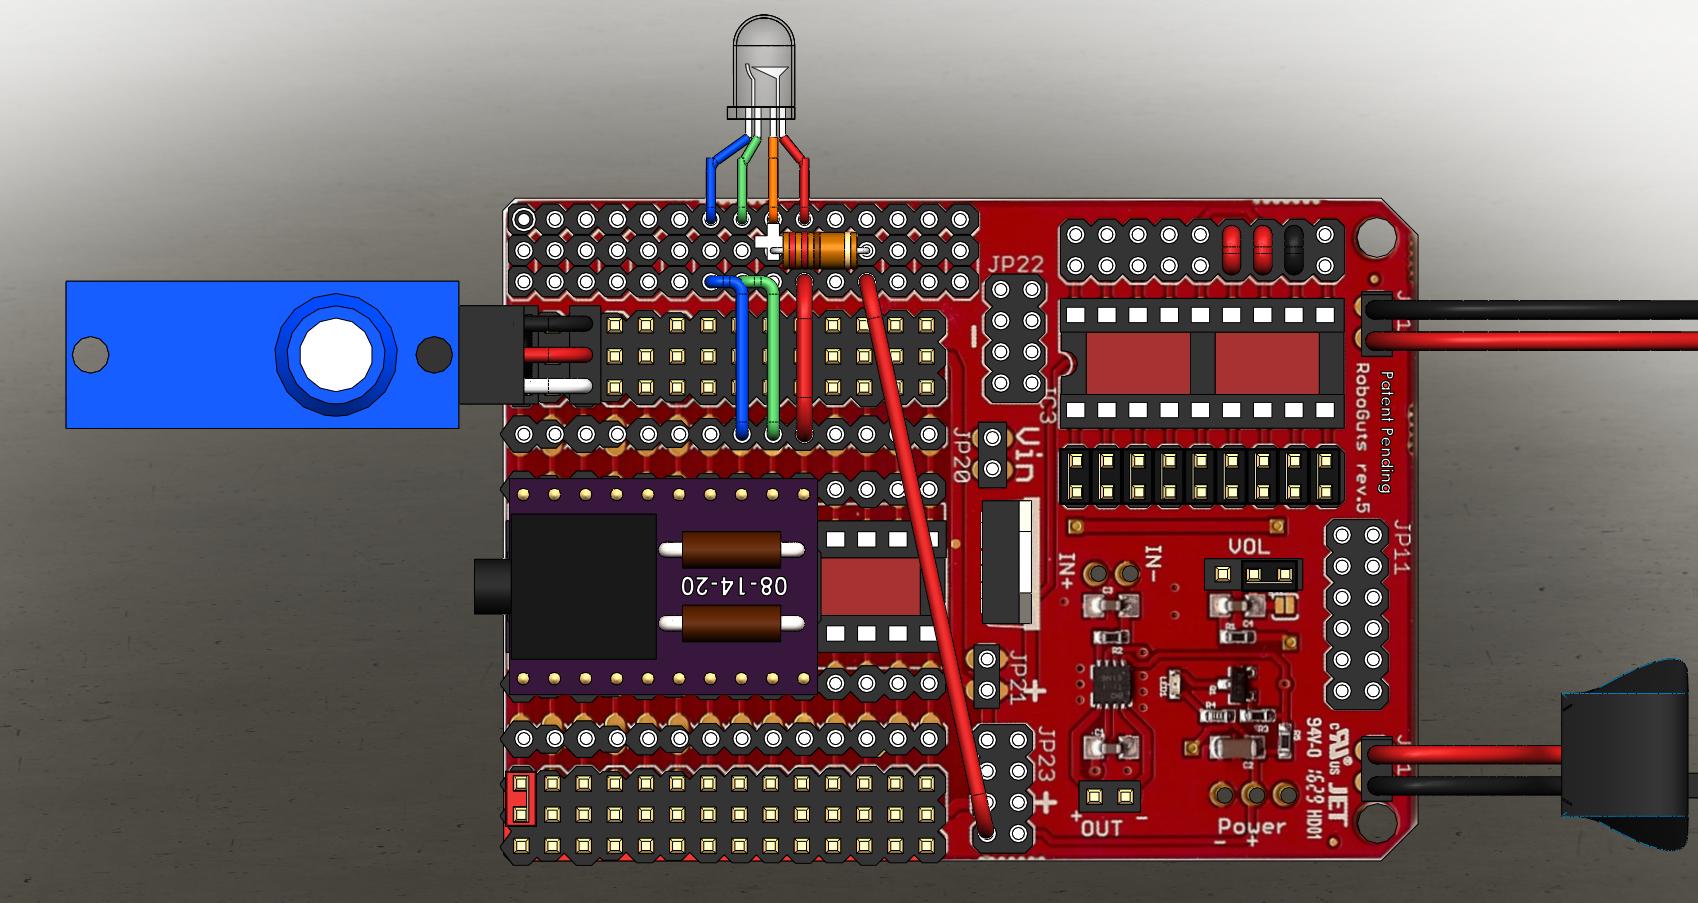
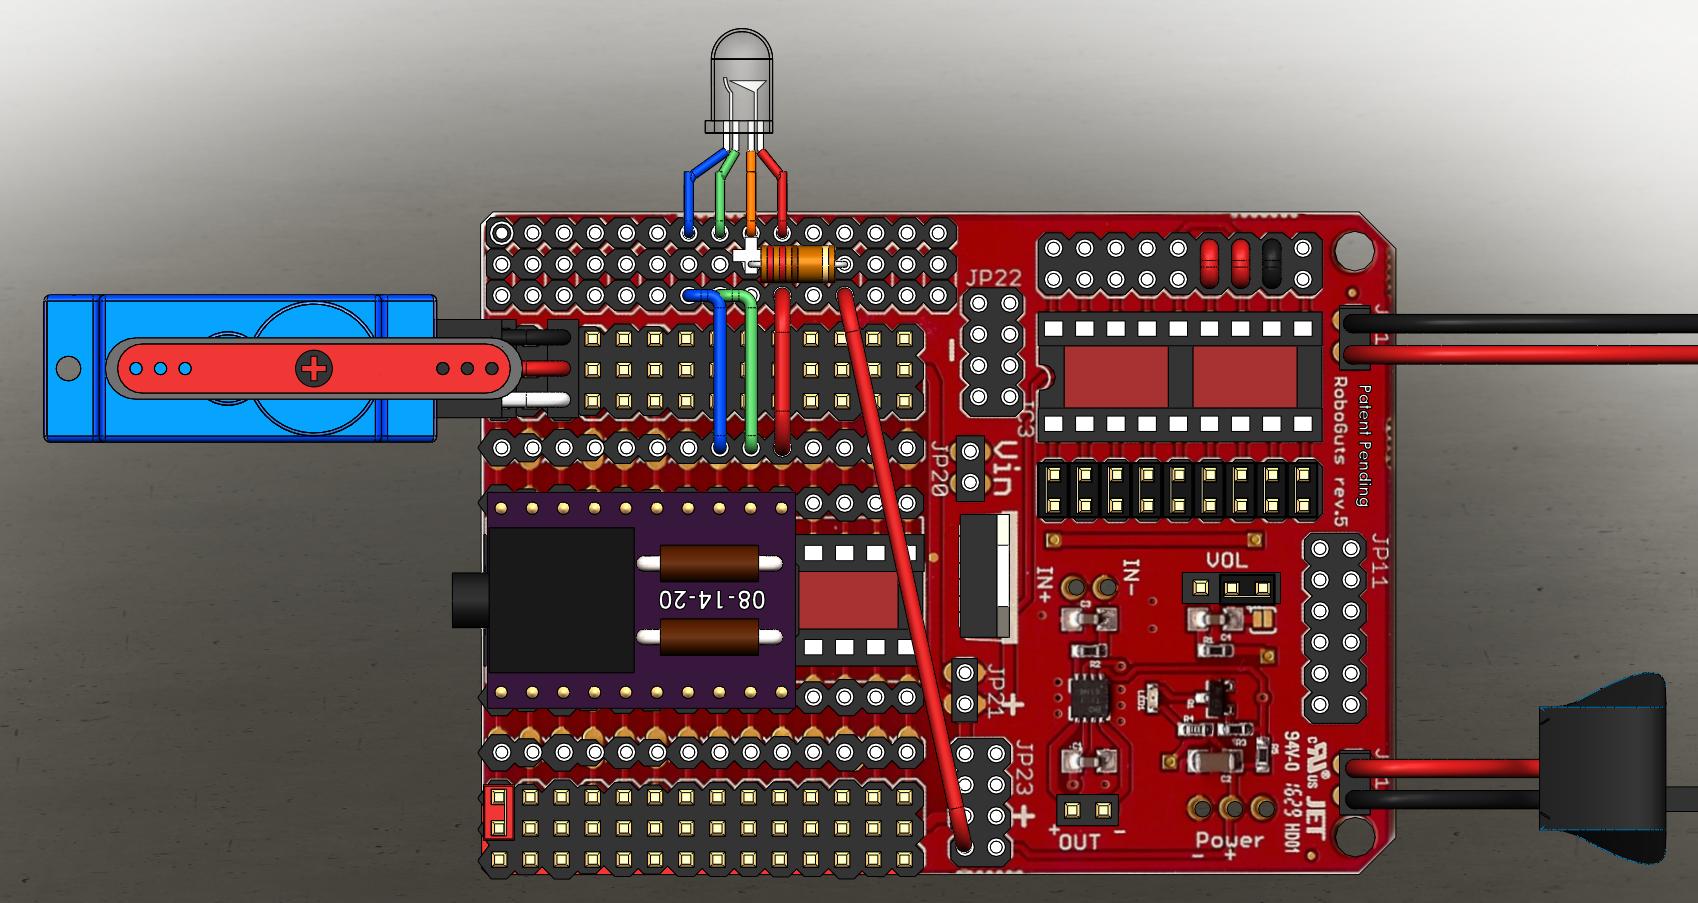
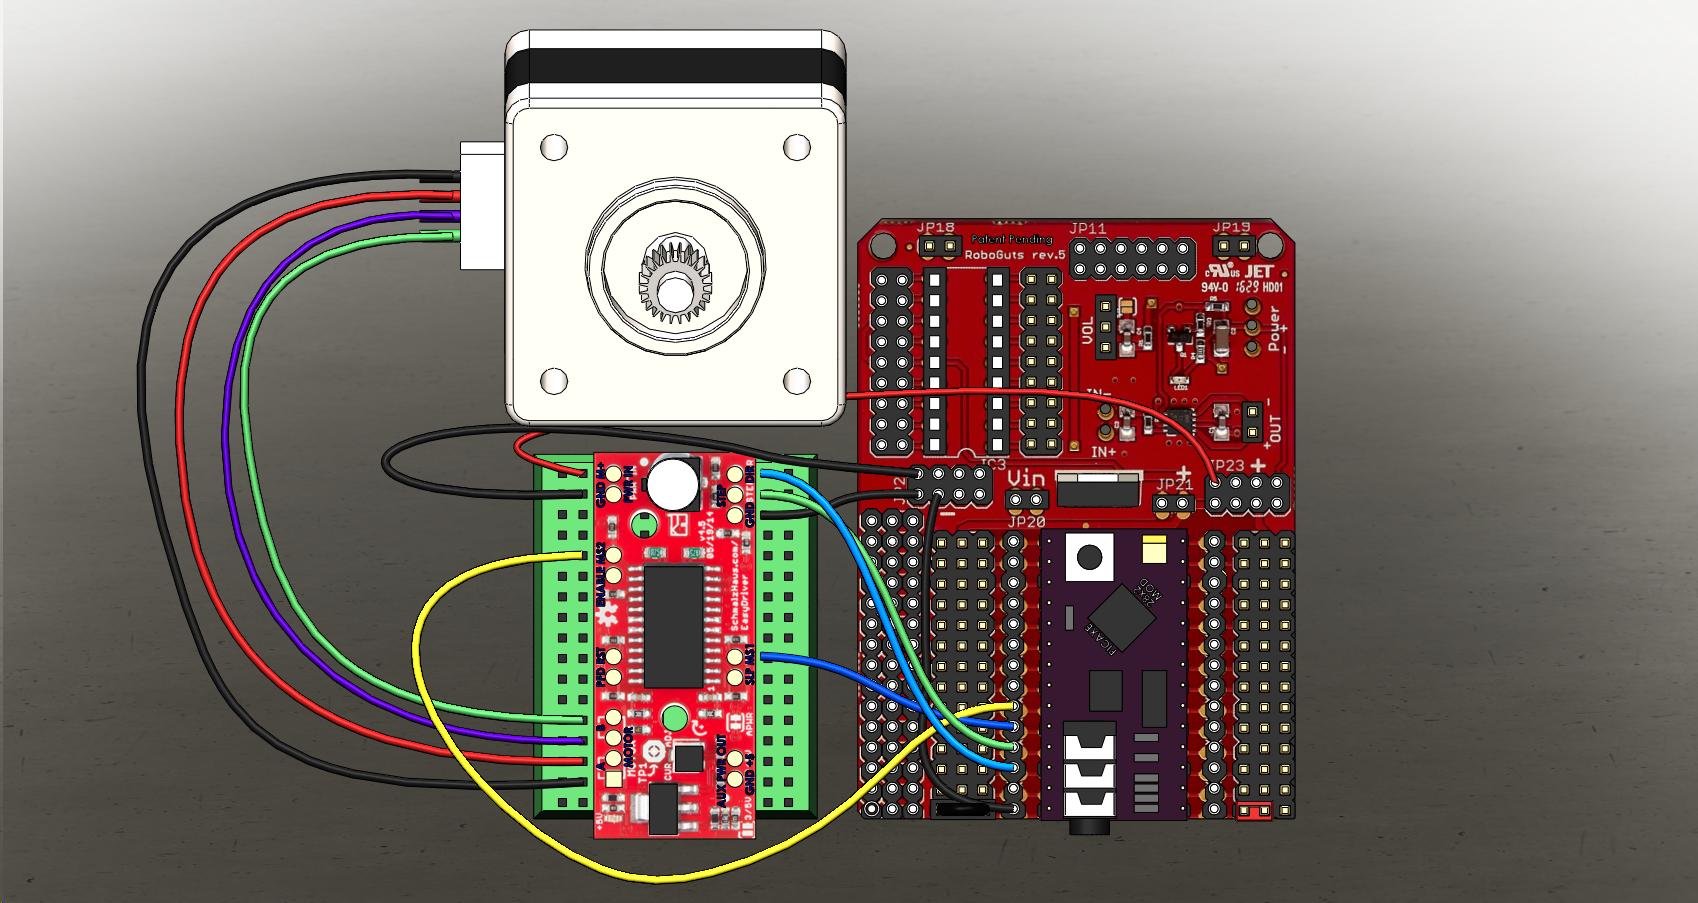
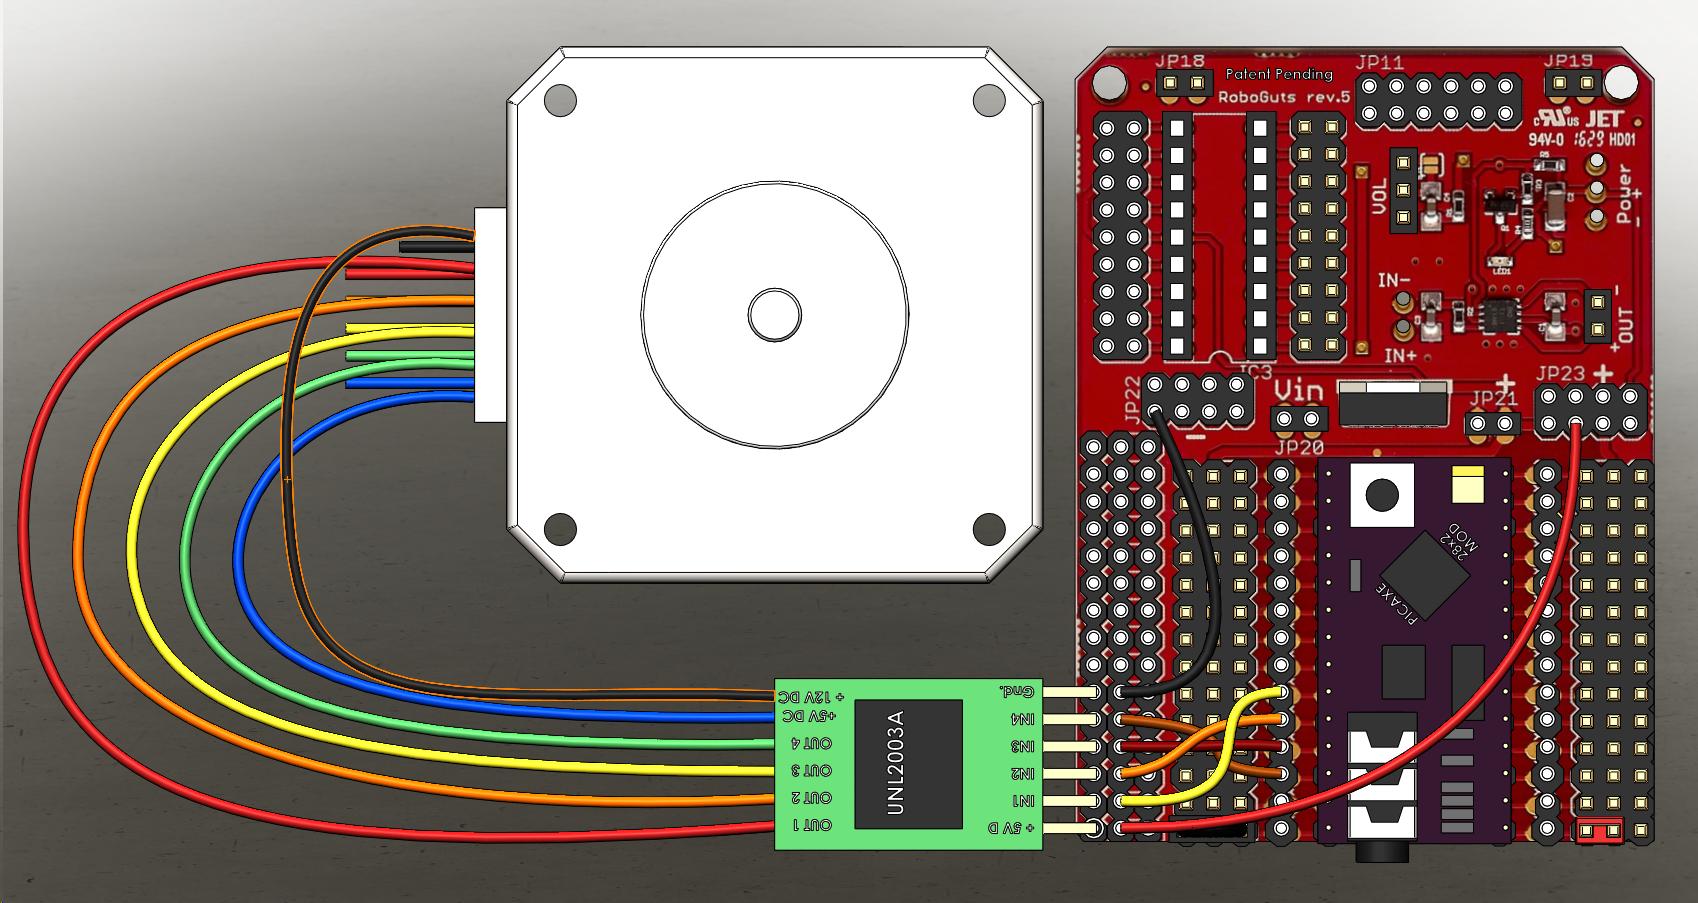
JP20 is tied directly to the Battery IN V+/Vin male header of RoboGuts™ circuit board at JP18
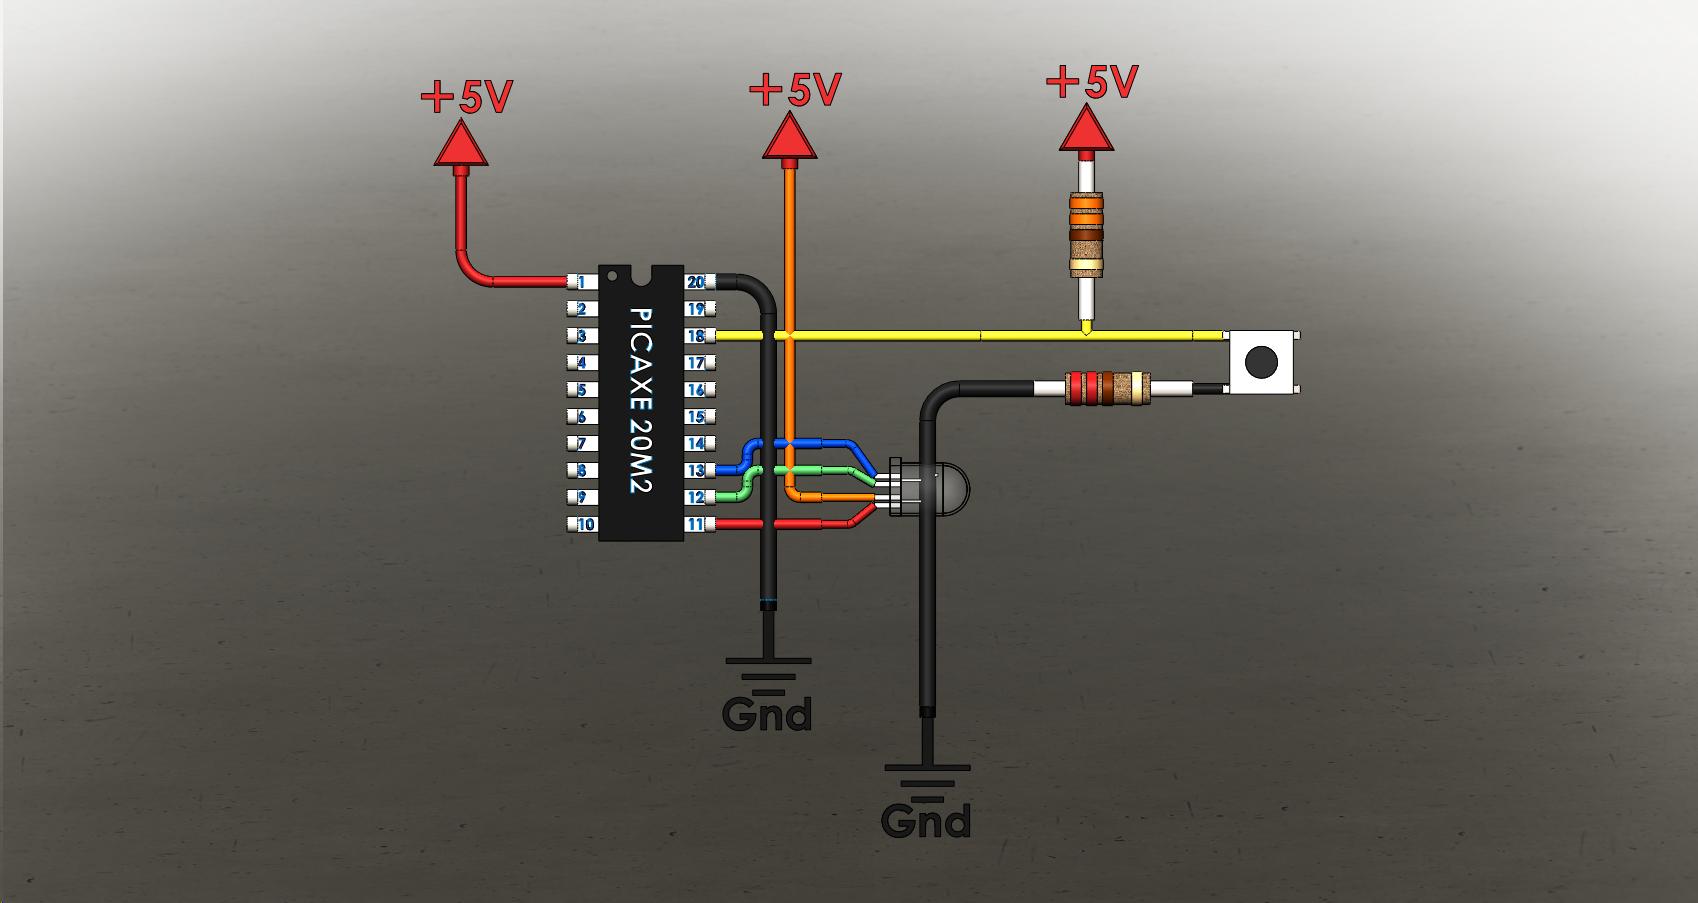
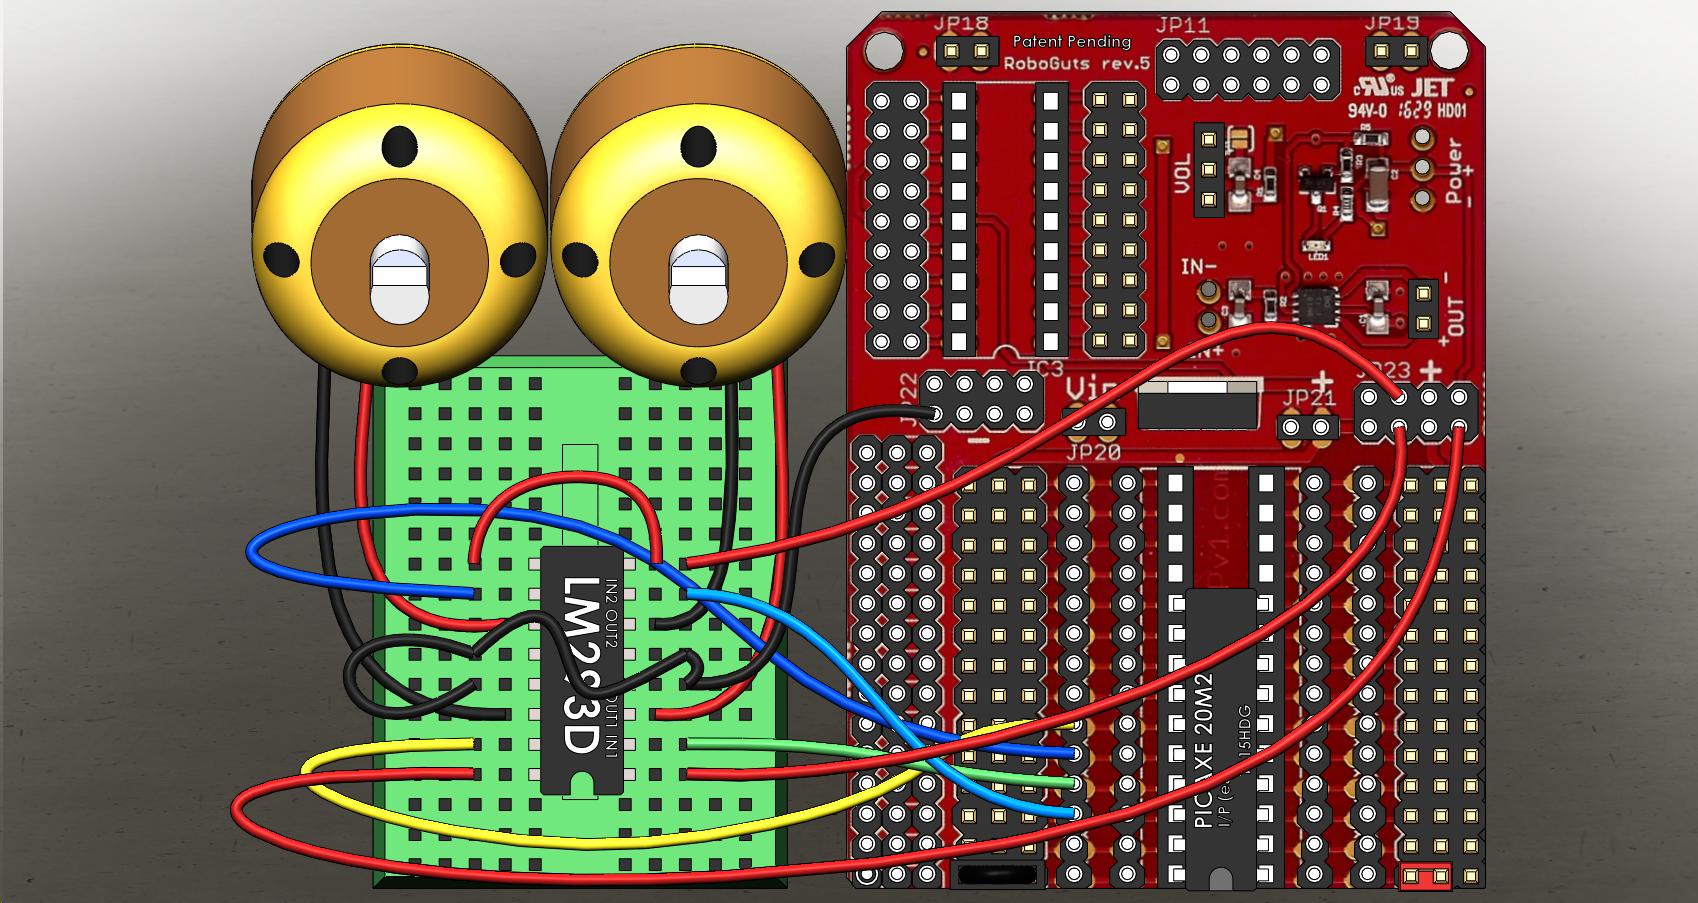
Animation 20M2 Experiment 00+6V 12V10fps
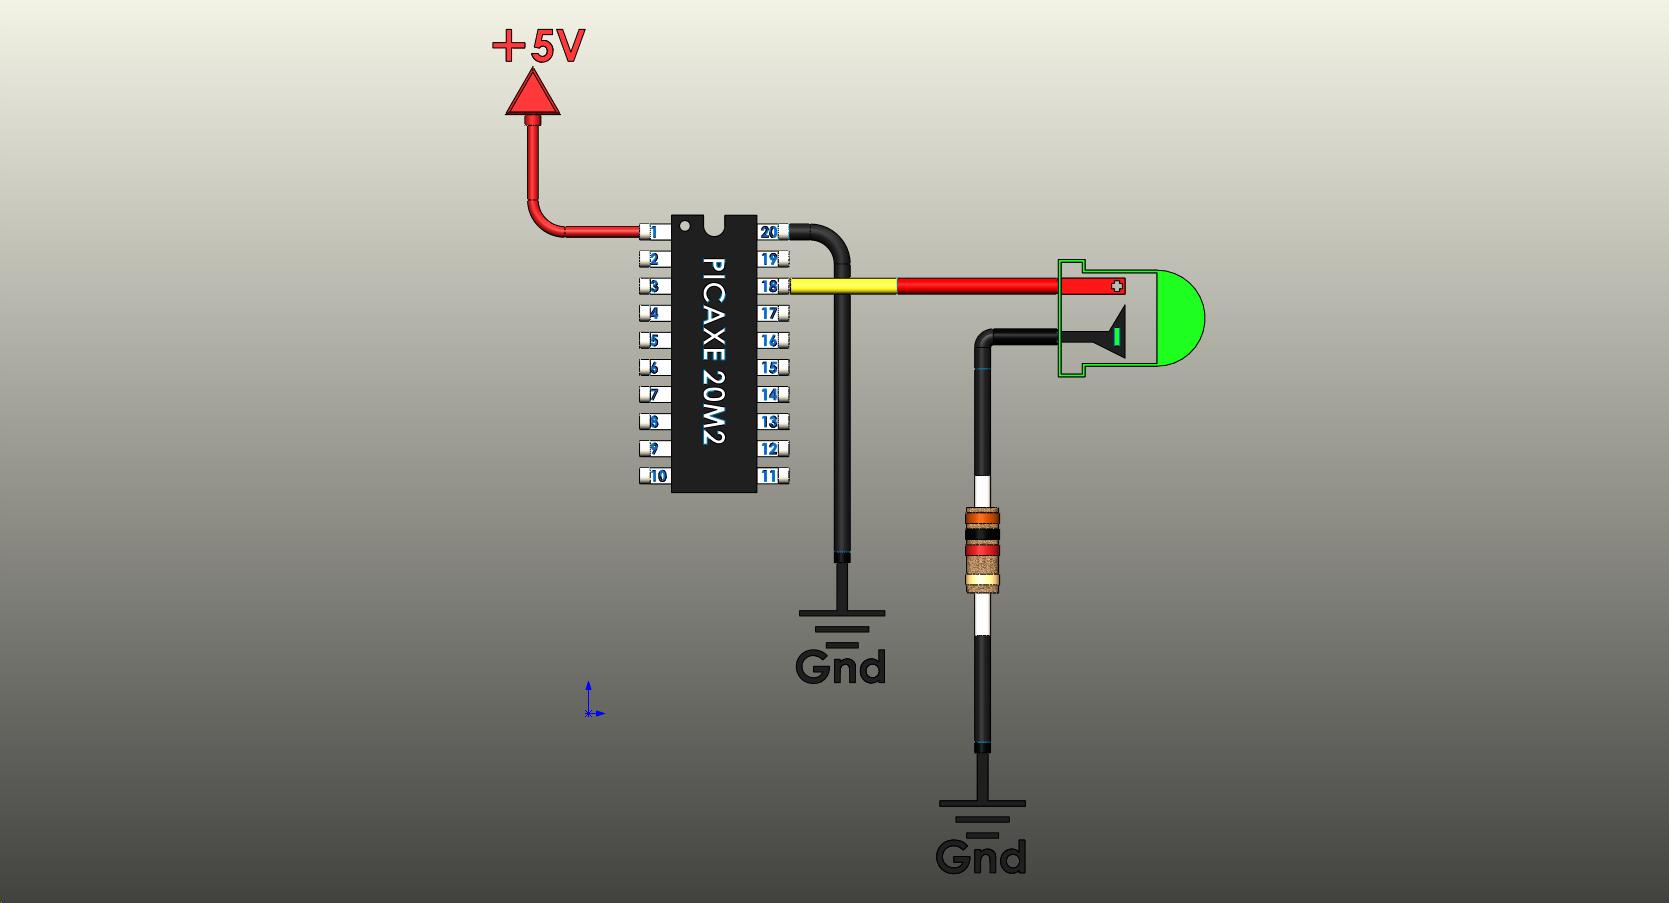
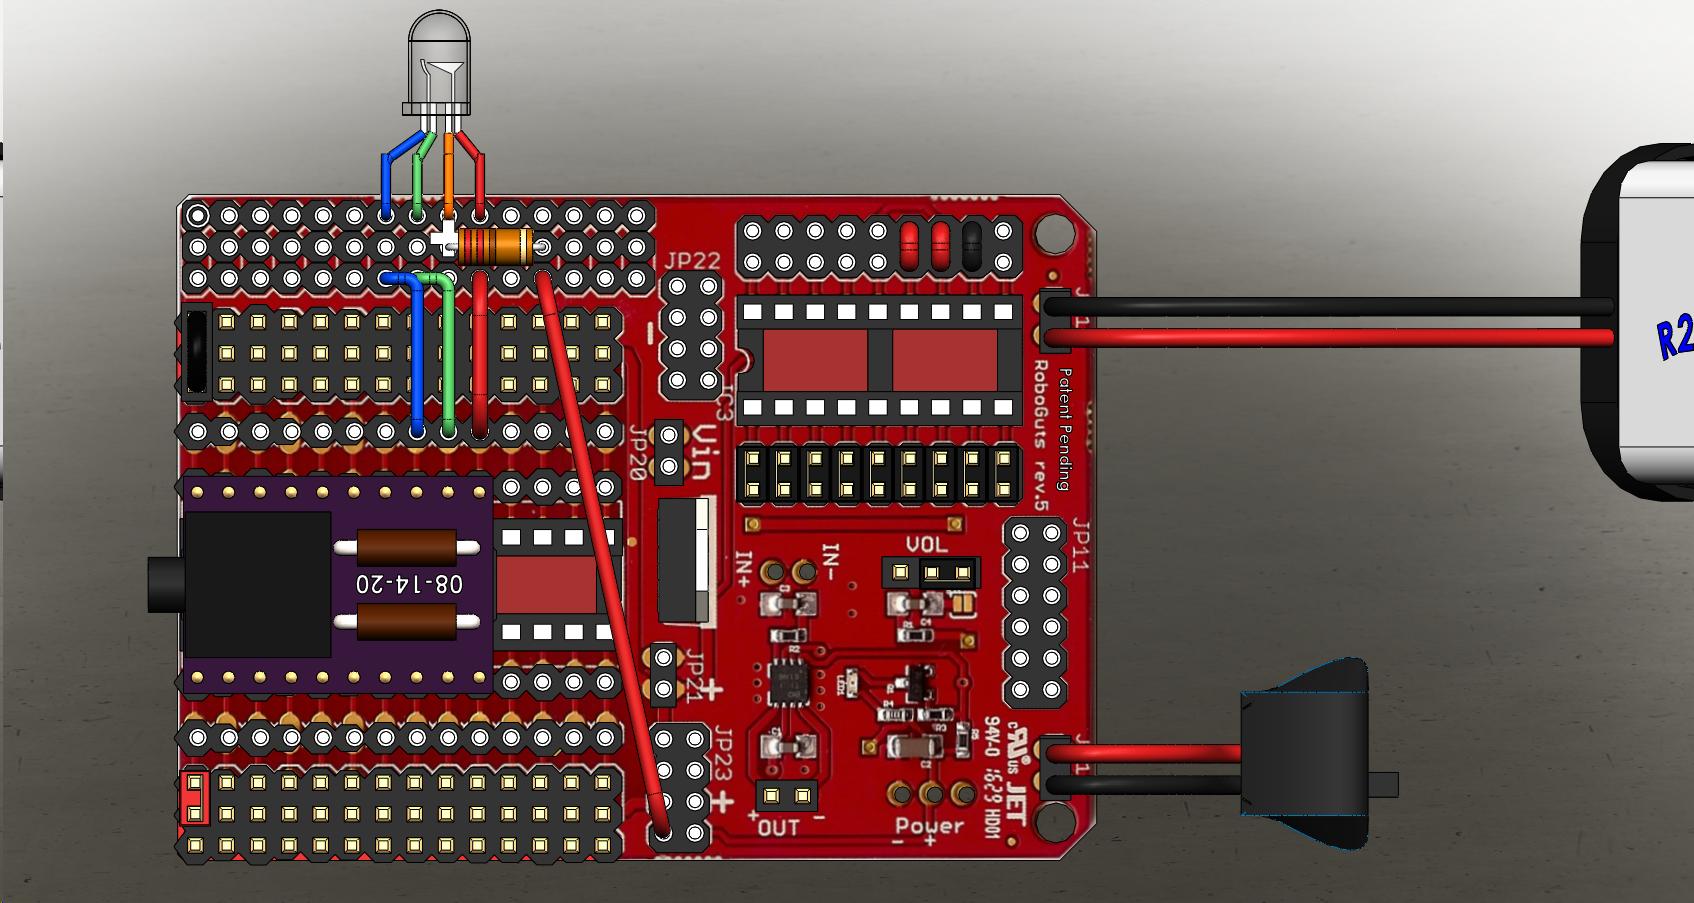
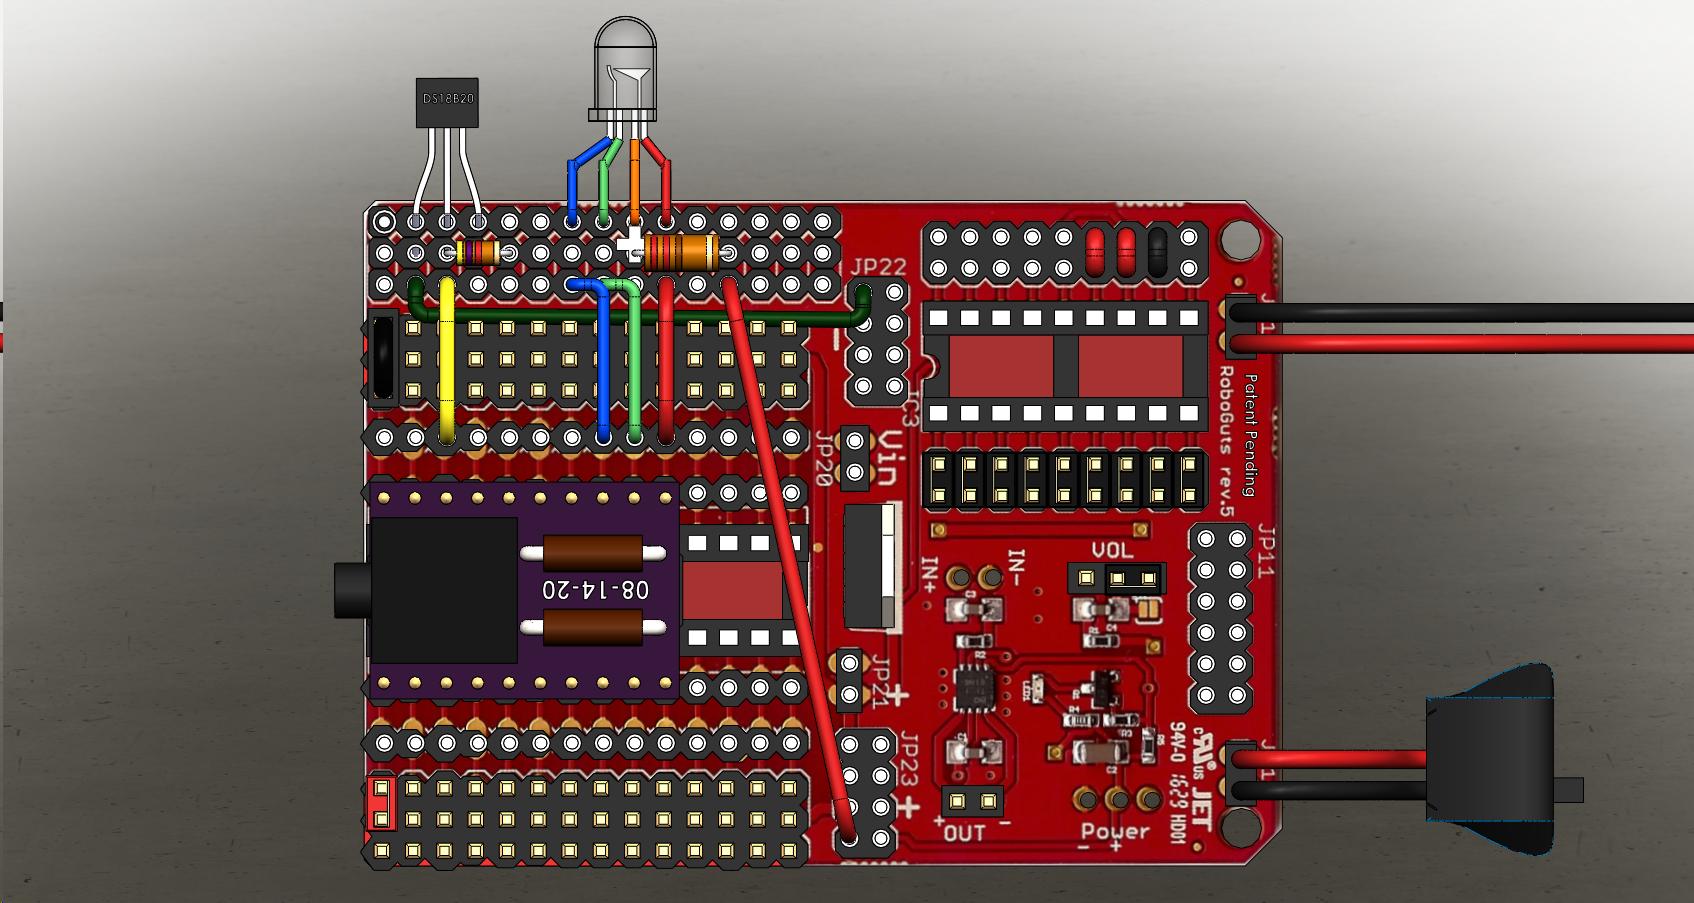
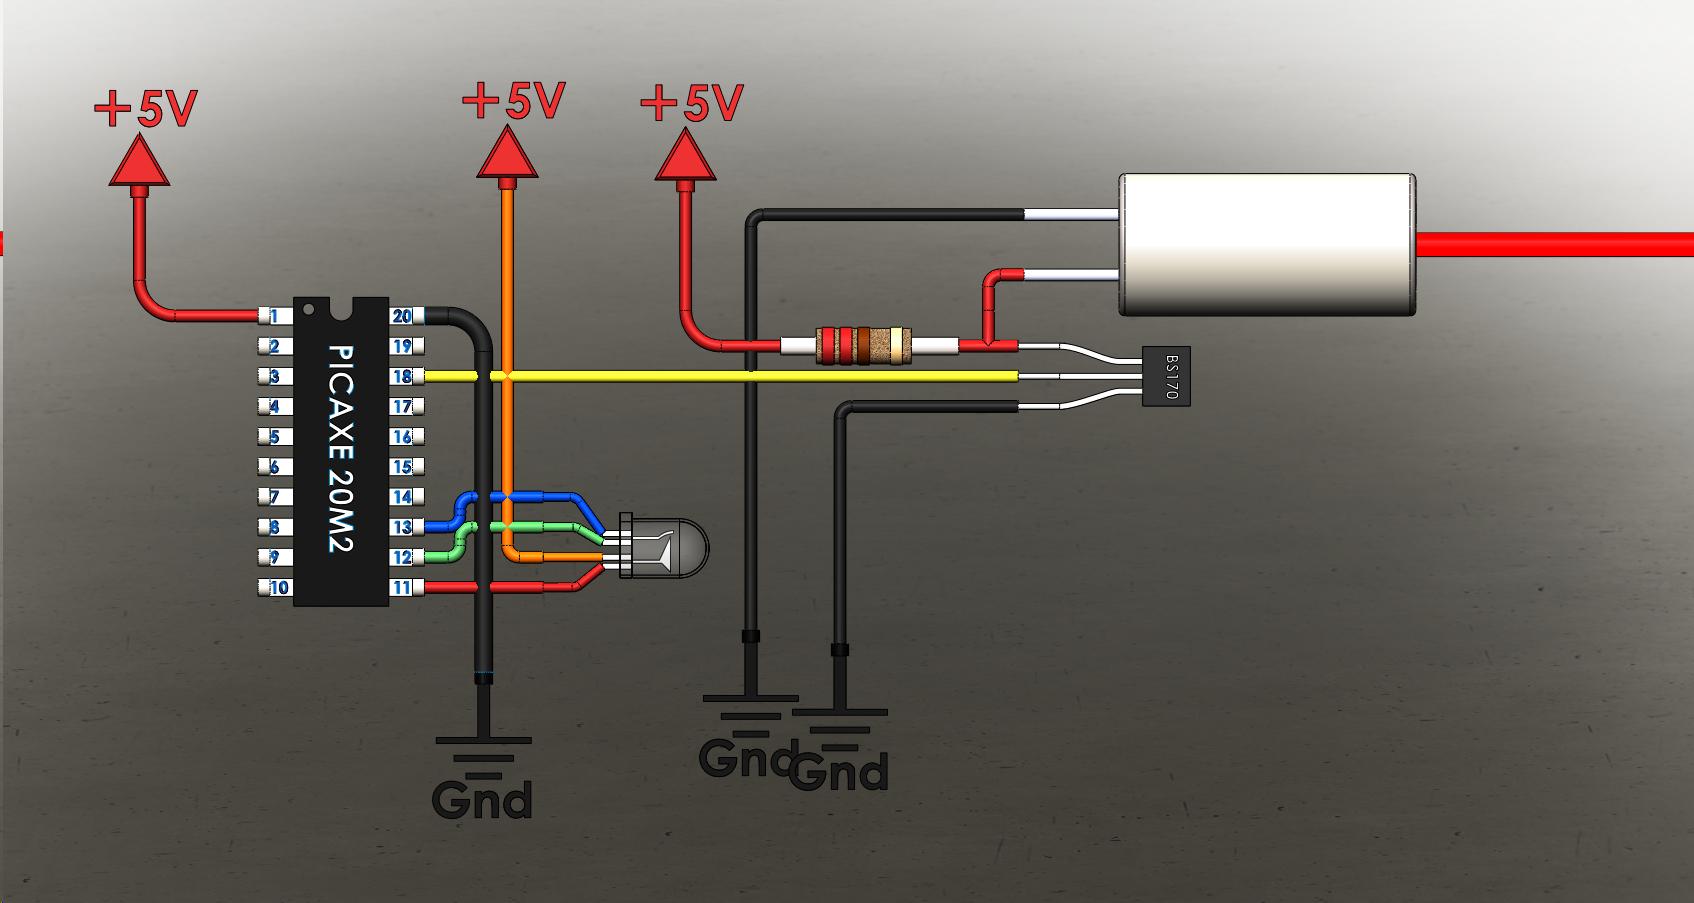
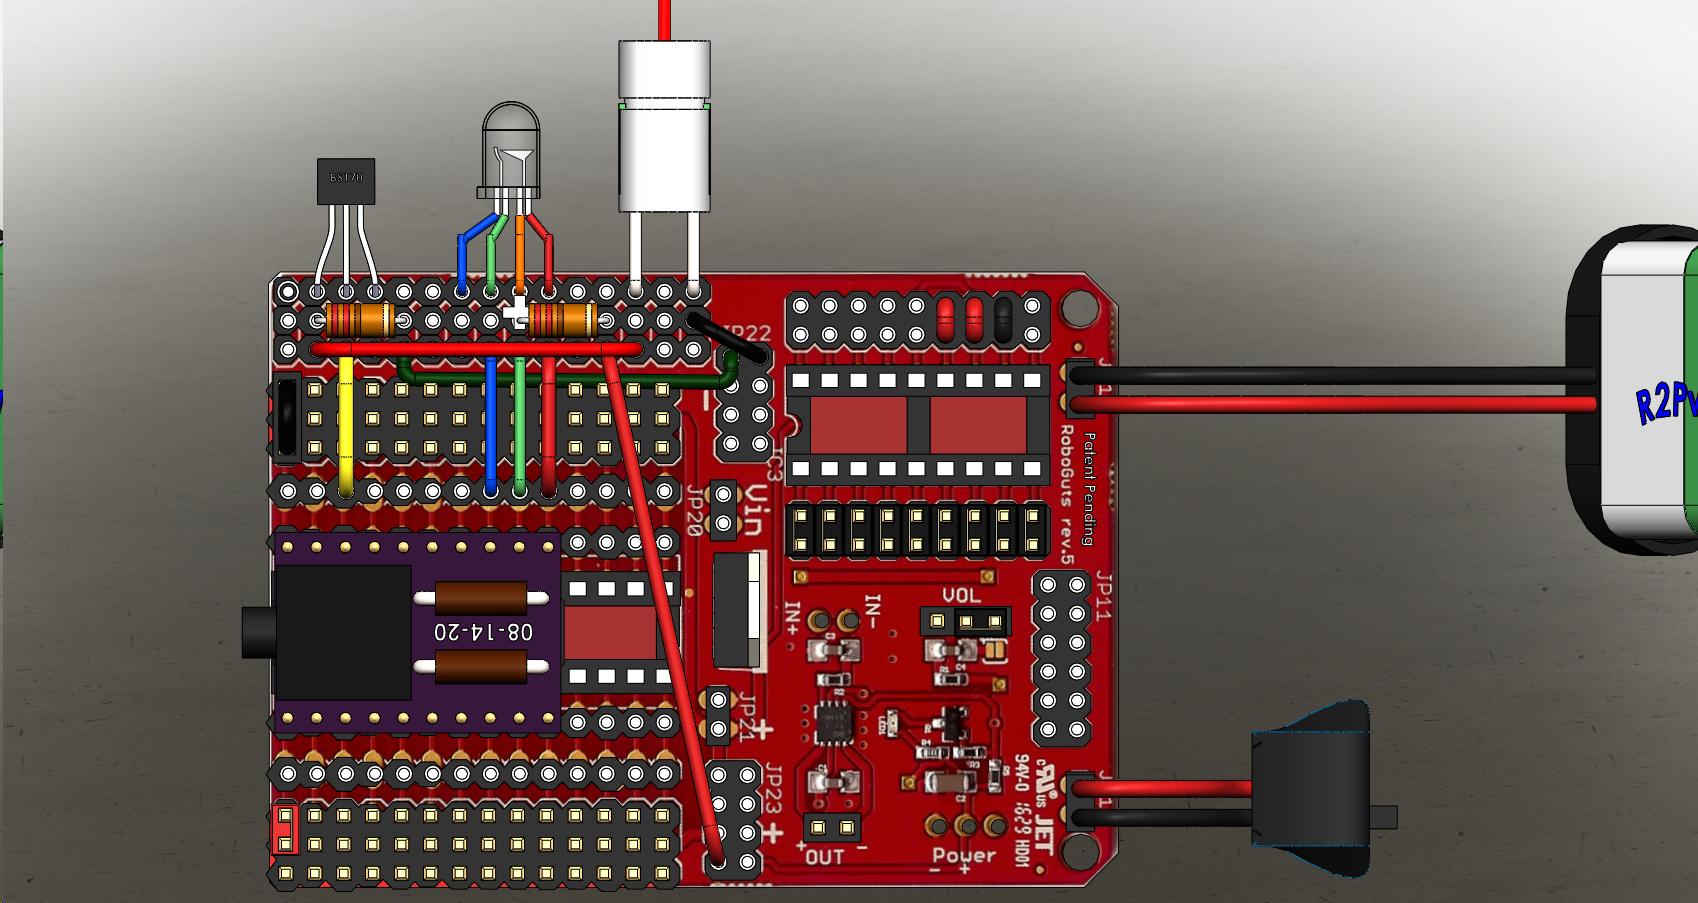
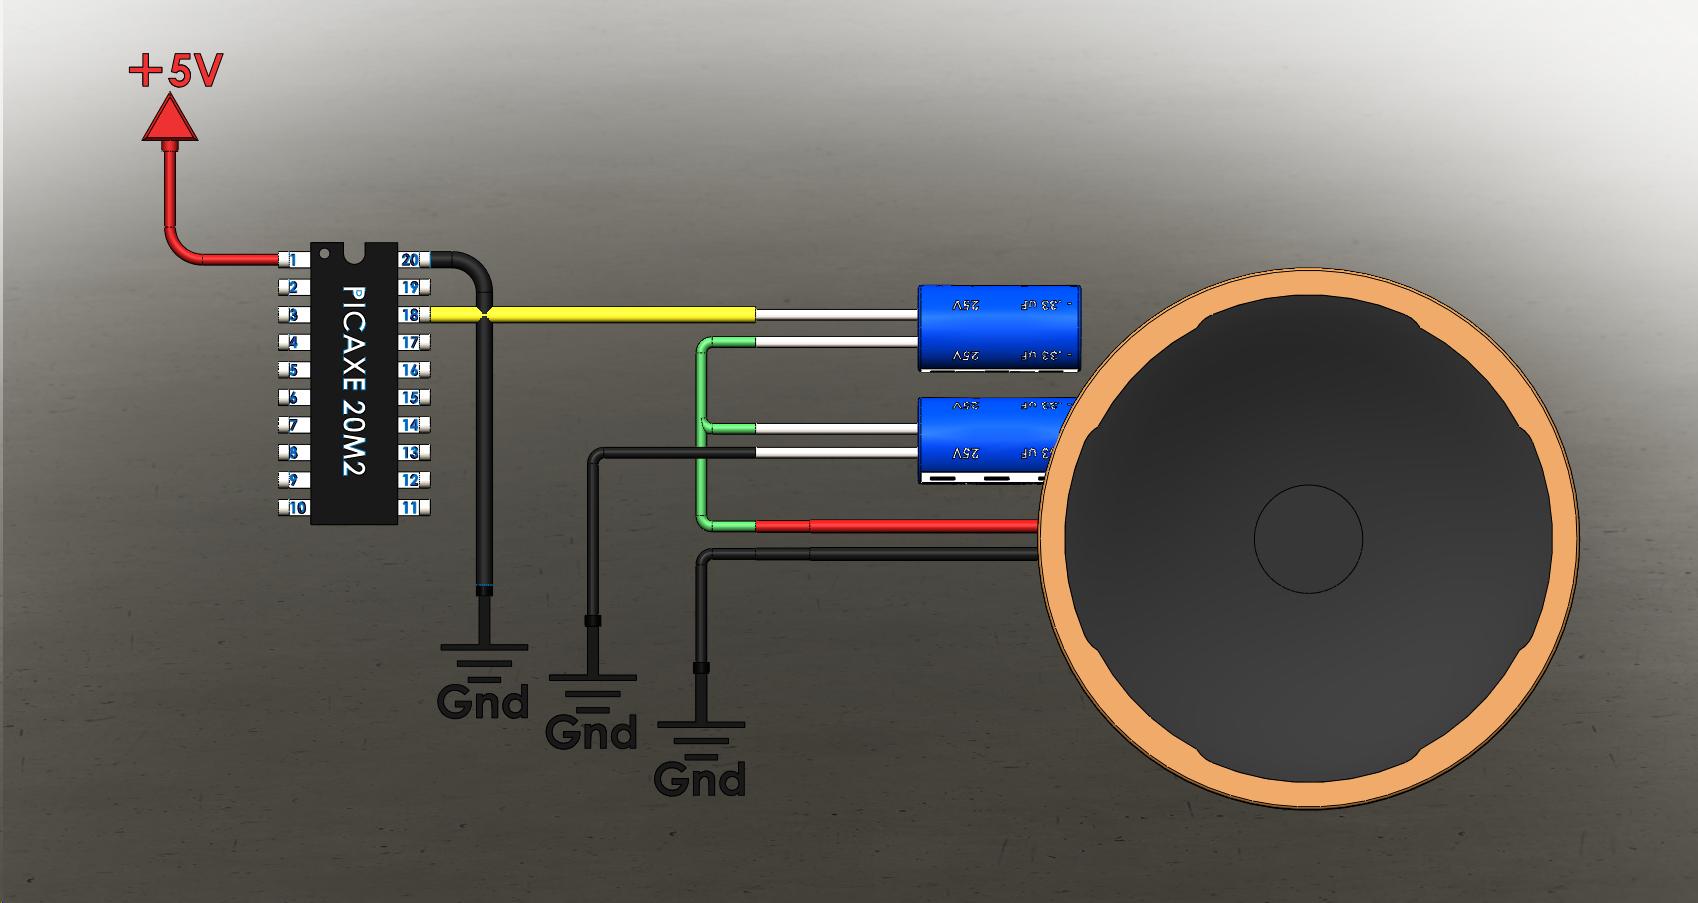
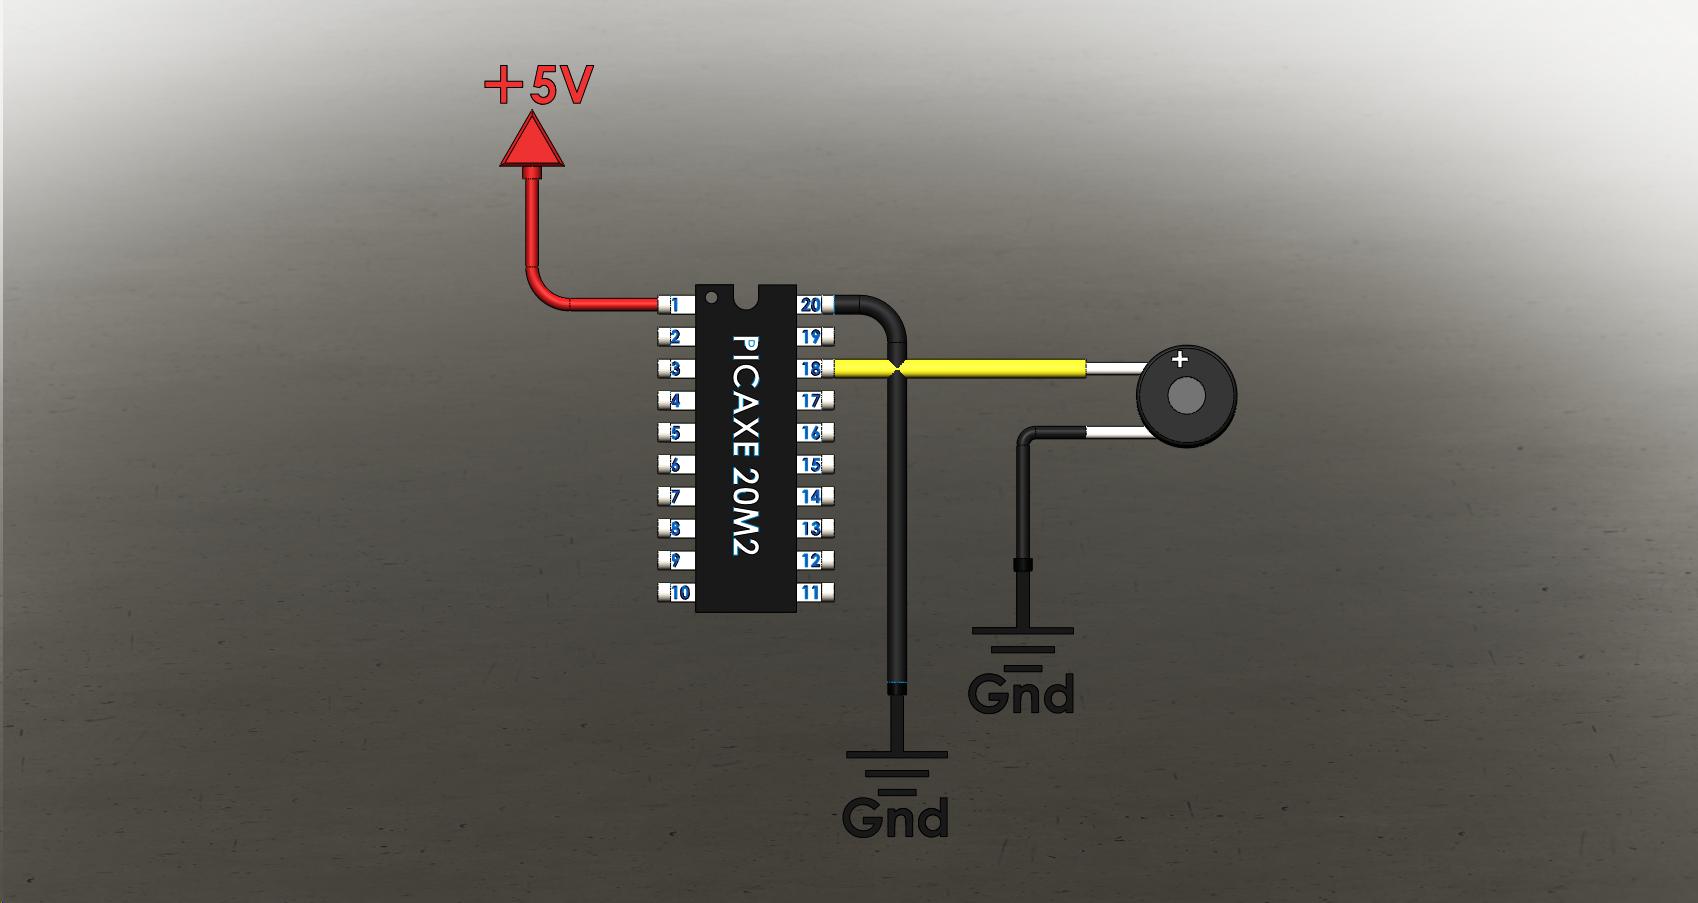
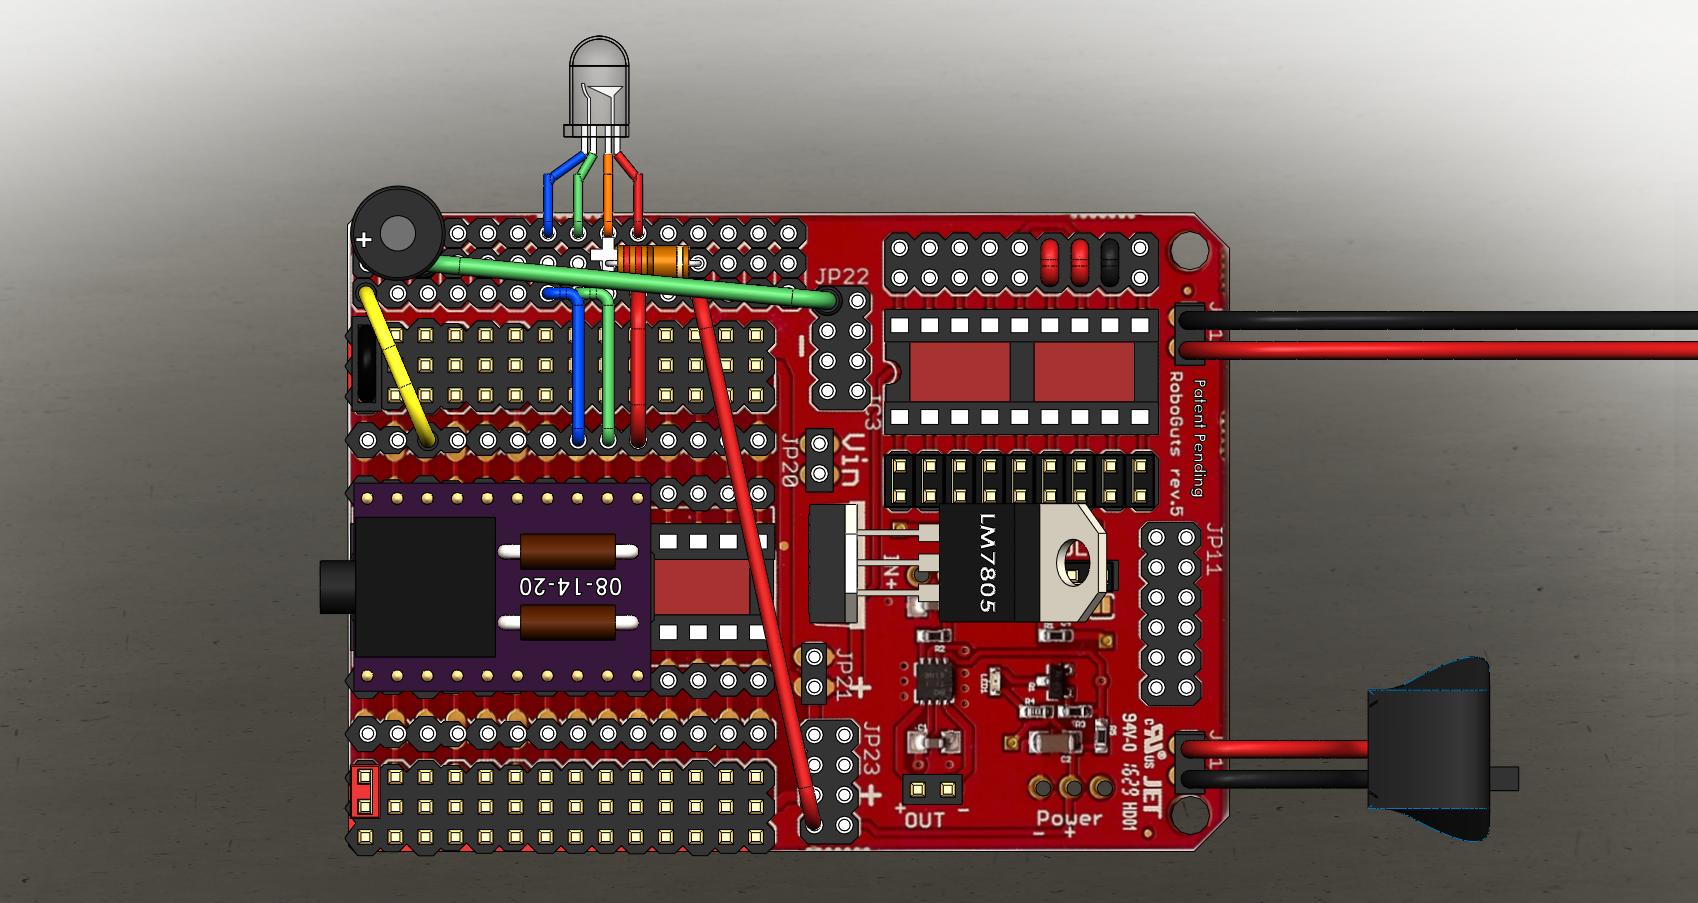
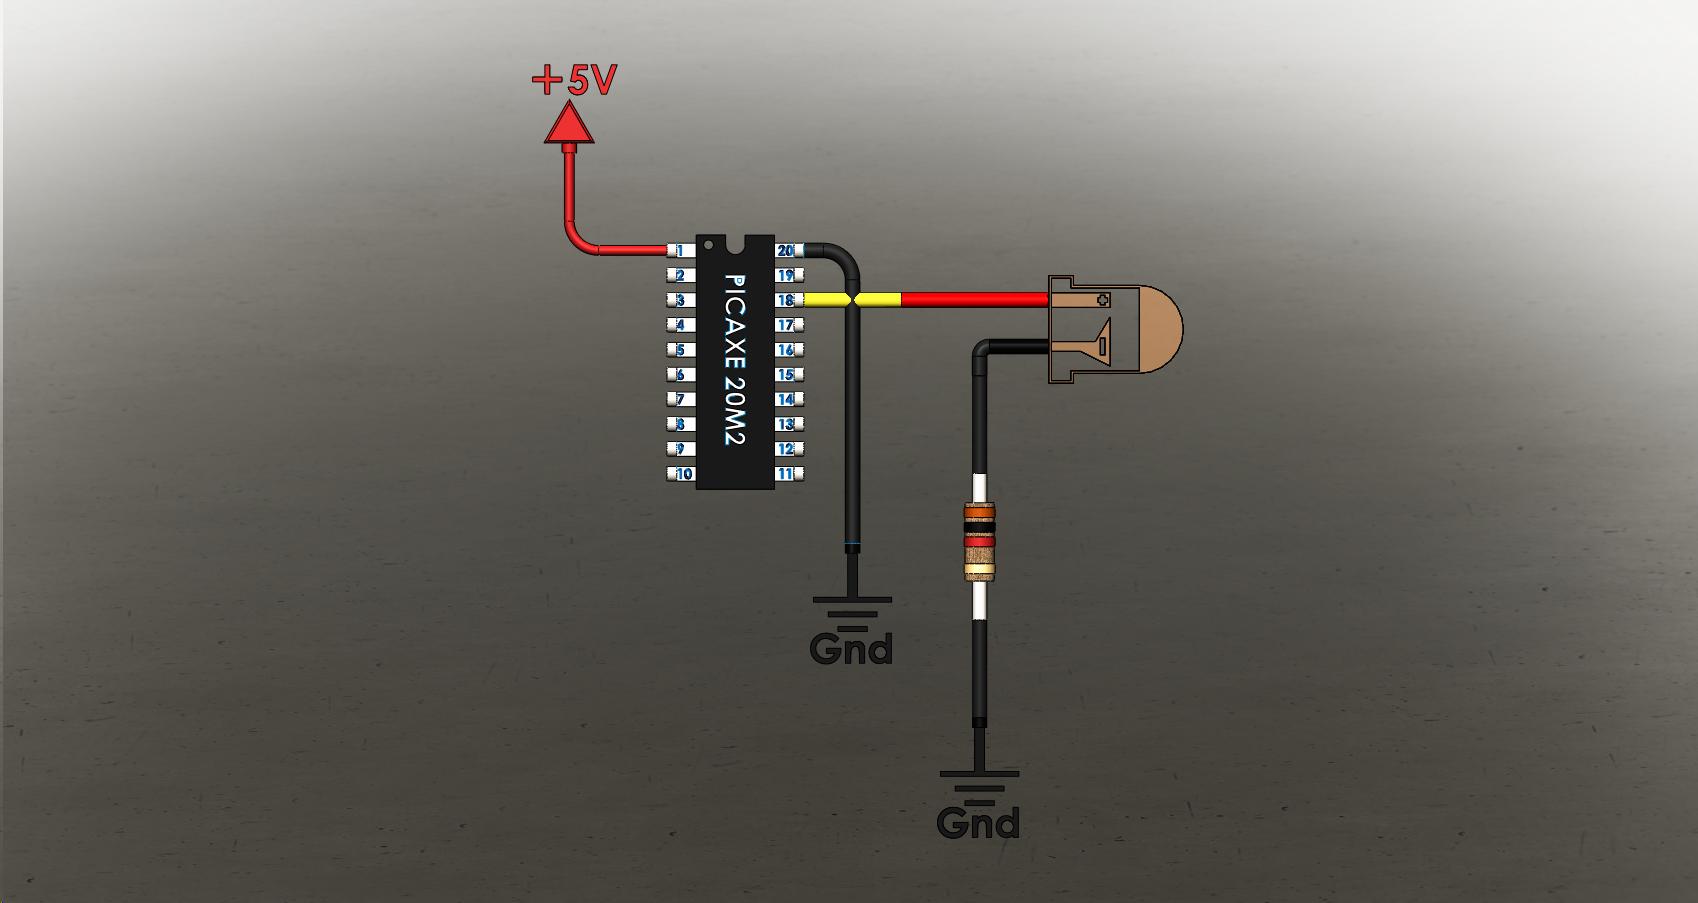
Lesson 1: LED ON & OFF
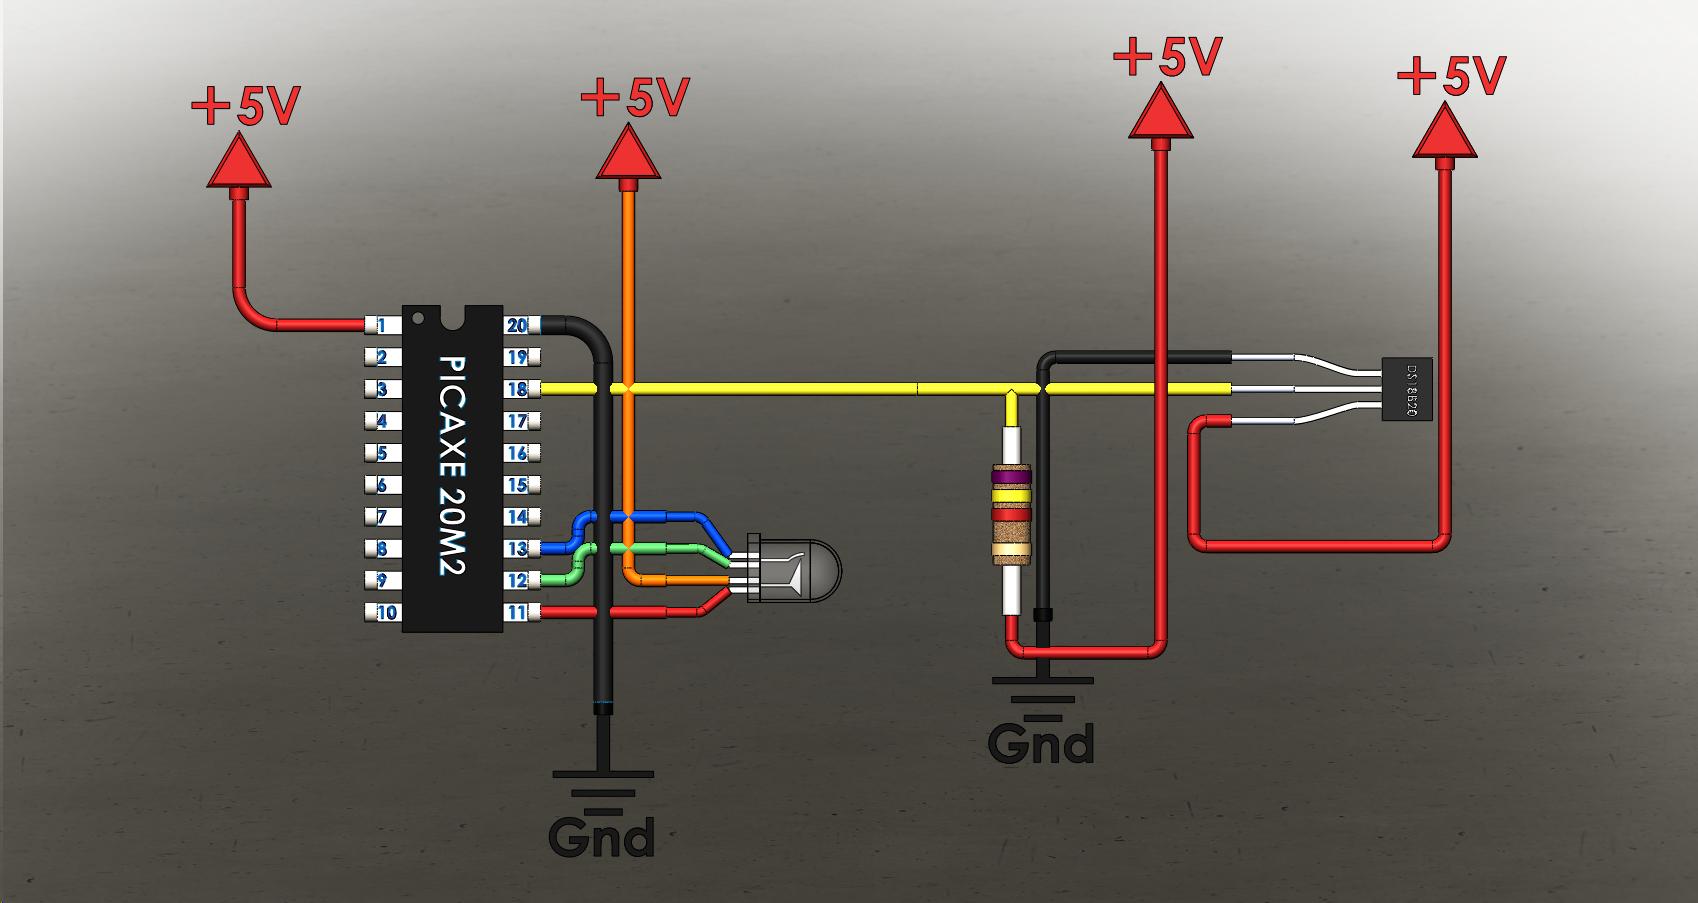
Animation 20M2 Experiment 01 sch10fps
Animation 20M2 Experiment 02+4 5V+Color
Animation 20M2 Experiment 03+4 5V+Color
Animation 20M2 Experiment 04+4 5V+Color
Animation 20M2 Experiment 05+4 5V+Color
Animation 20M2 Experiment 06+4 5V+Color
Animation 20M2 Experiment 07+4 5V+Color
Animation 20M2 Experiment 09+4 5V+Color
Animation 20M2 Experiment 10+4 5V+Color
Animation 20M2 Experiment 11+4 5V+Color
Animation 20M2 Experiment 12+4 5V+Color
Animation 20M2 Experiment 13+4 5V+Color
Animation 20M2 Experiment 14+4 5V+Color
Animation 20M2 Experiment 15+4 5V+Color
Animation 20M2 Experiment 16+4 5V+Color
Animation 20M2 Experiment 17+4 5V+Color
Animation 20M2 Experiment 18+4 5V+Color
Animation 20M2 Experiment 19+4 5V+Color
Animation 20M2 Experiment 20+4 5V+Color
Animation 20M2 Experiment 21+4 5V+Color
Body box, 2 Wheels, Top, Skid and Face ... the whole kit can be 3D printed on most printers in one day.
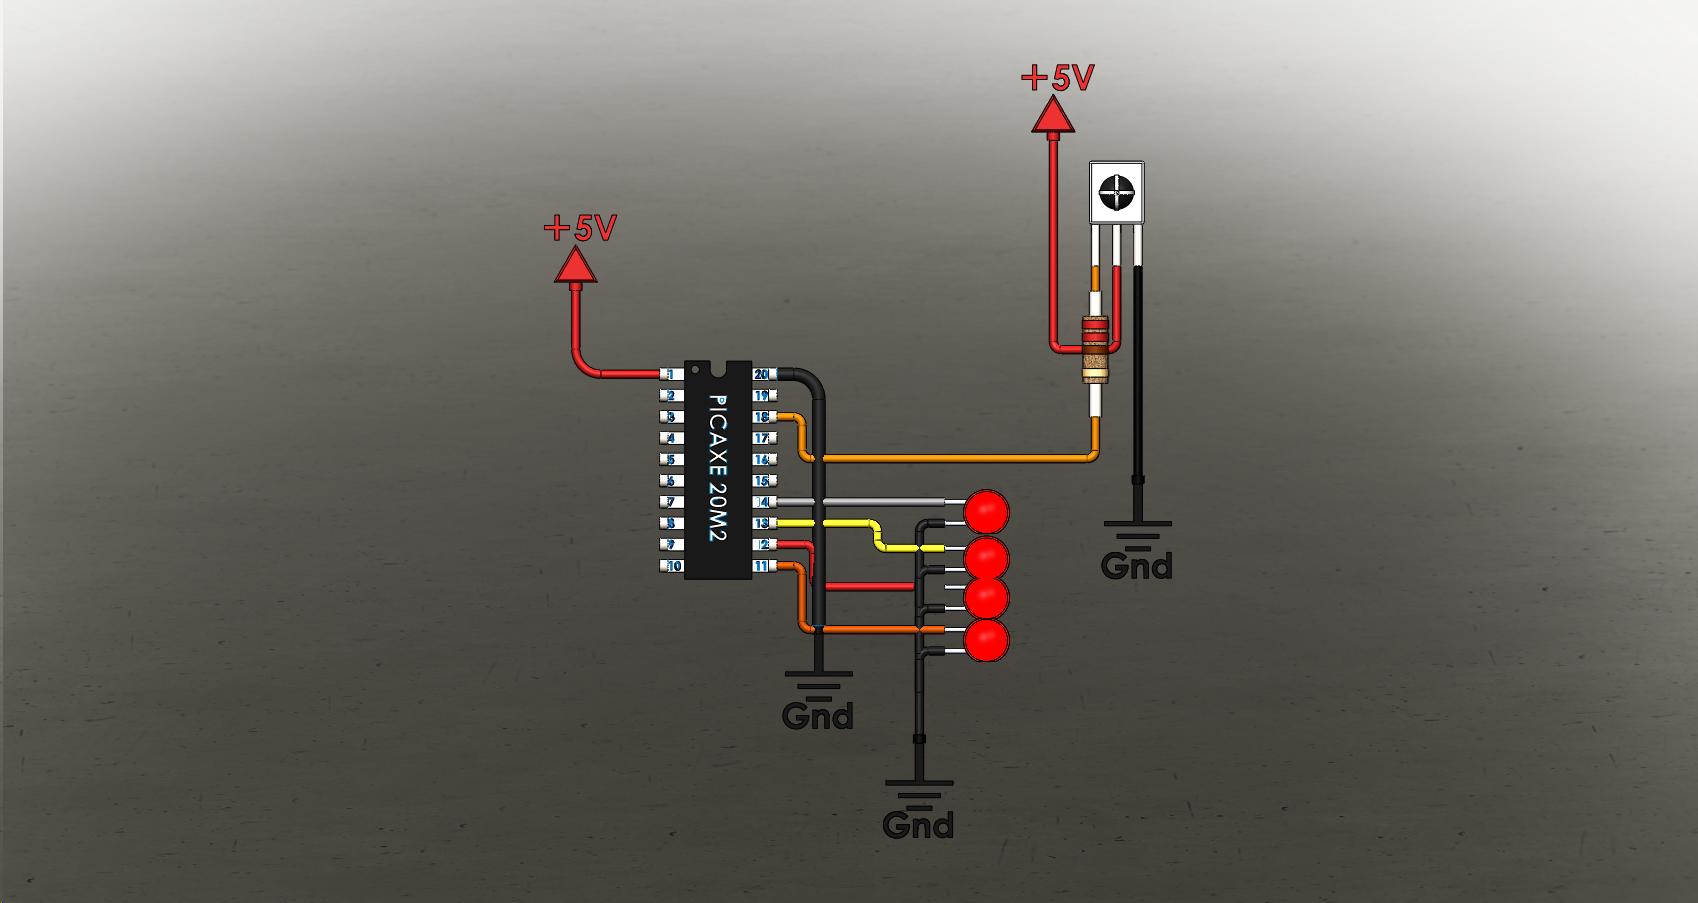
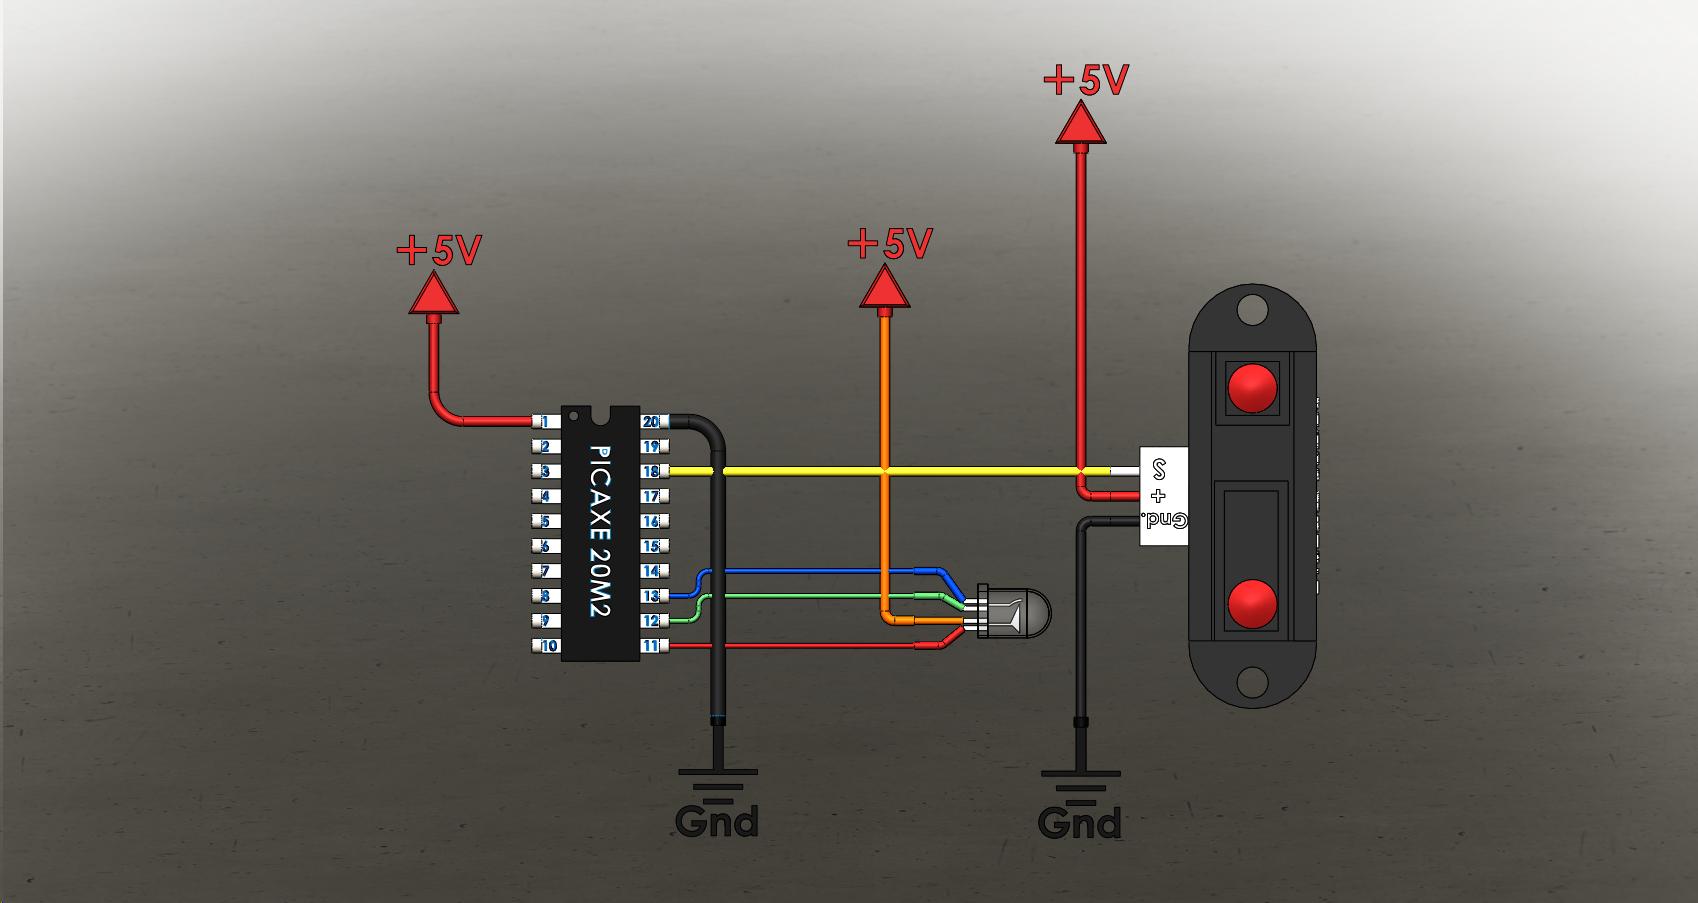
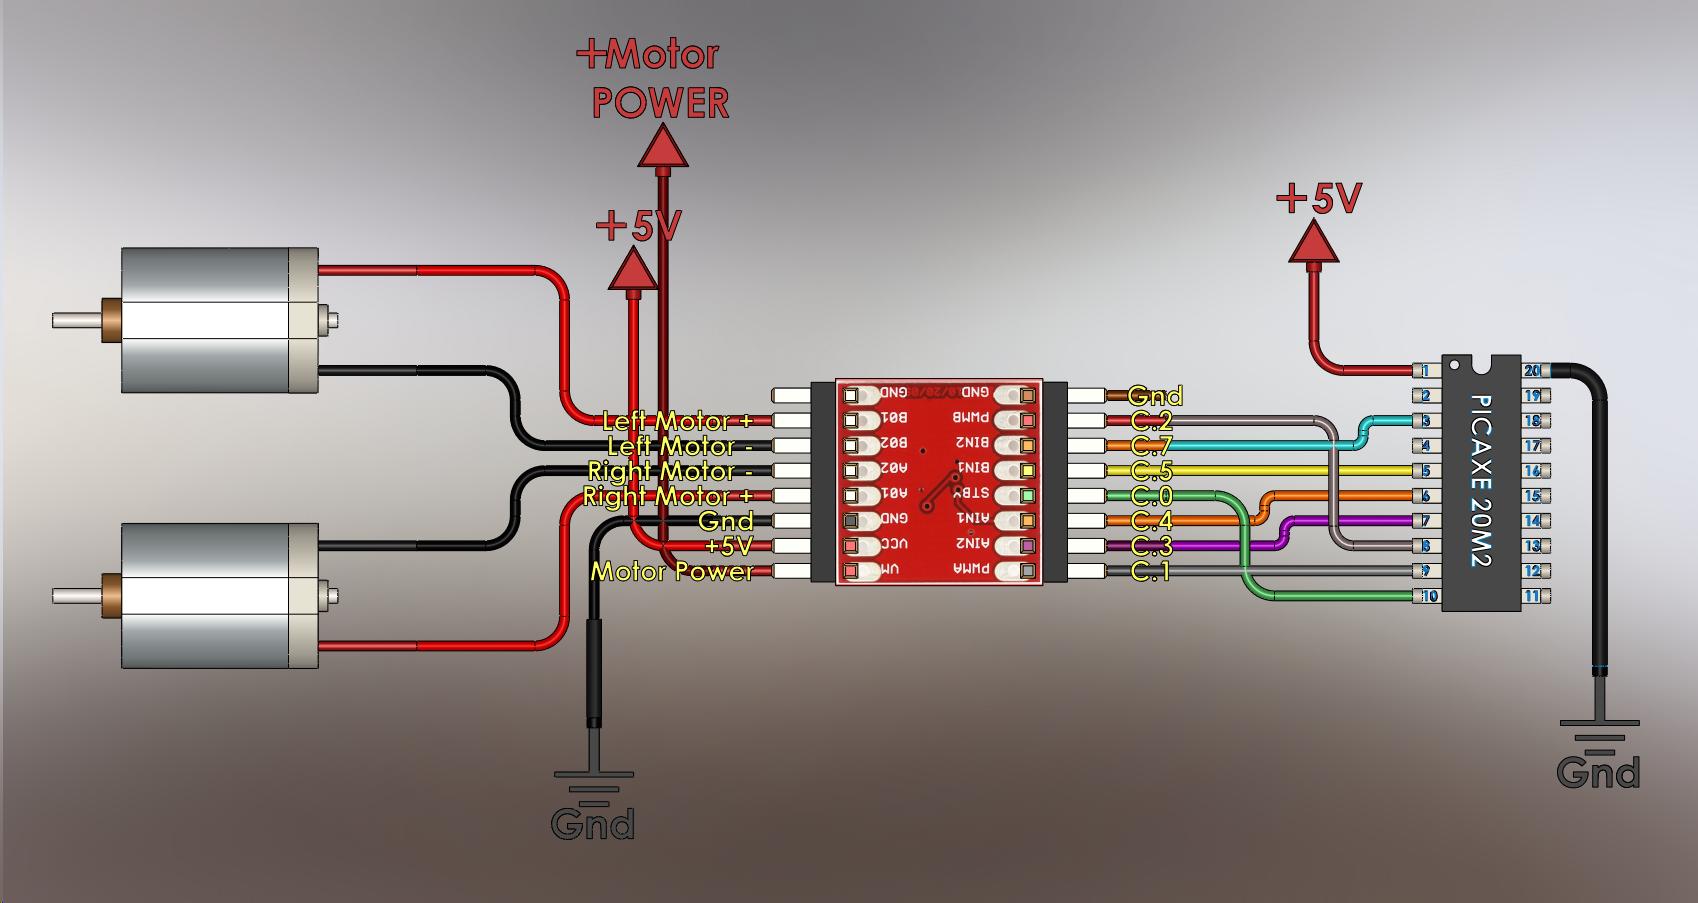
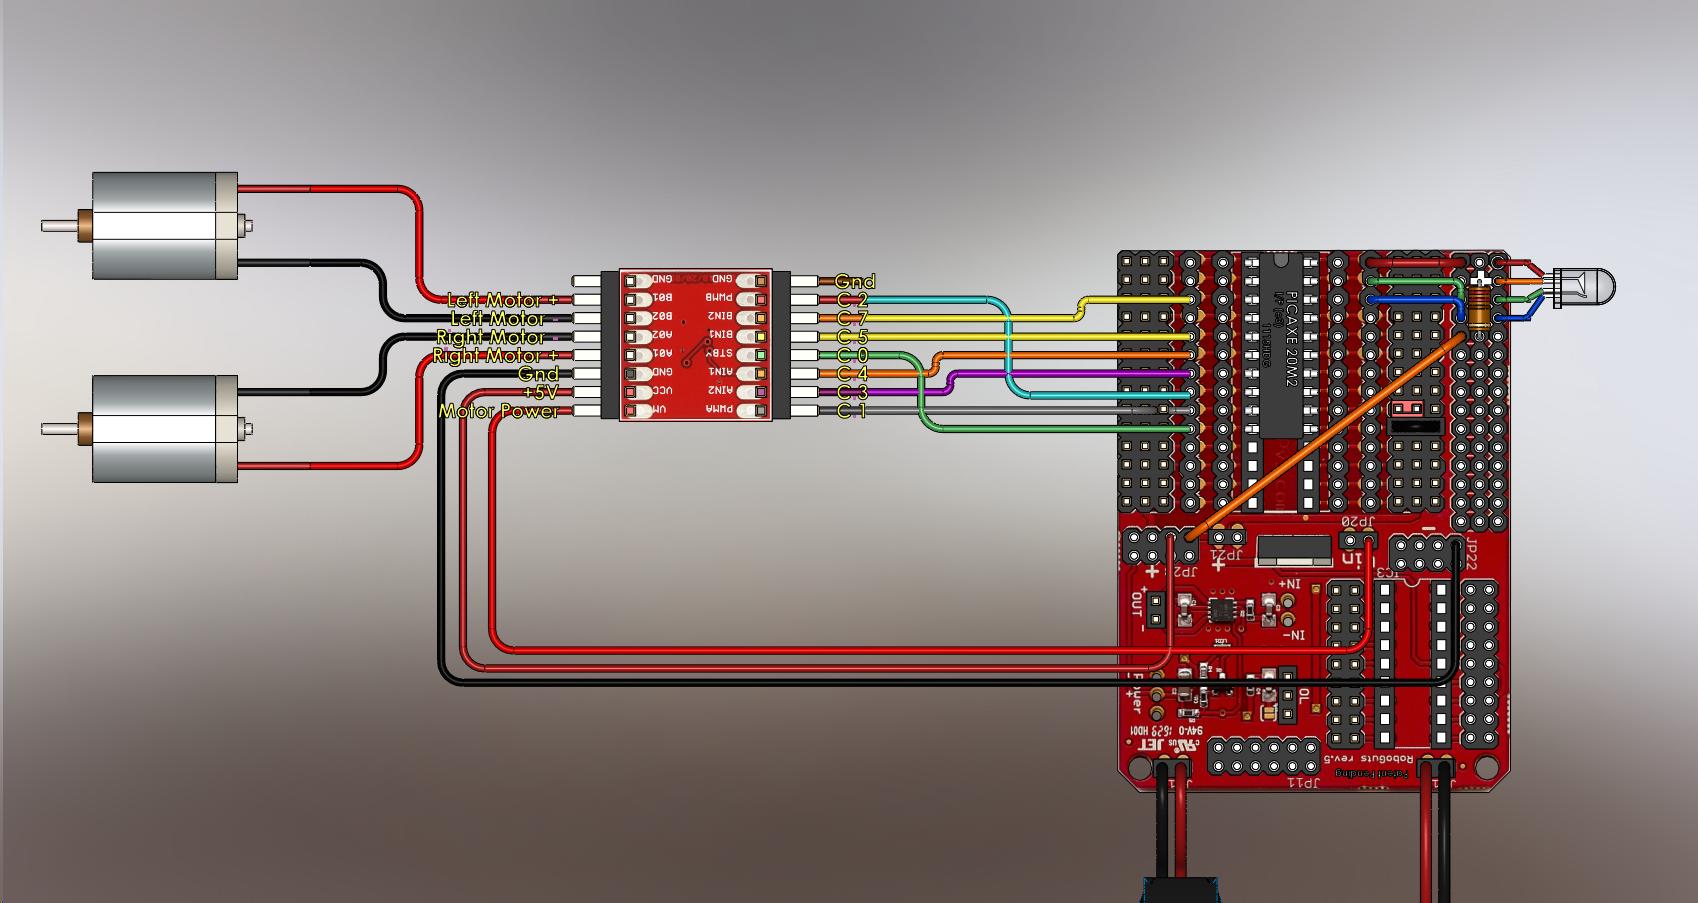
B.0 = RWheel, B.1 = LWheel B.7 = Red LED, B.6 = Green LED, B.5 = Blue LED C.0 = Talk & Song
The PIXYbot is a miniFloppyBot with a RoboGuts™ and a PIXY CMUcam5.
A Skull that moves its Jaw and Turns its Neck while it Talks
B.0 = Neck, B.1 = RArm, B.2 = LArm, B.3 = RWheel, B.4 = LWheel
HOME
Ready-2-Play Robotics
5t4nd1ng @ th3 3dg3 0f 5p3ct4t10n!
Teach a child how to make their own toys, and they're happy for life!
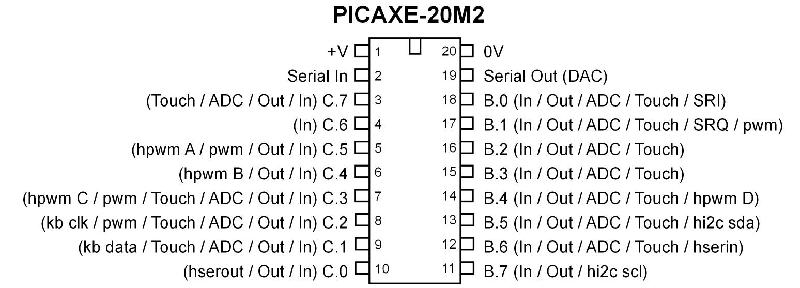
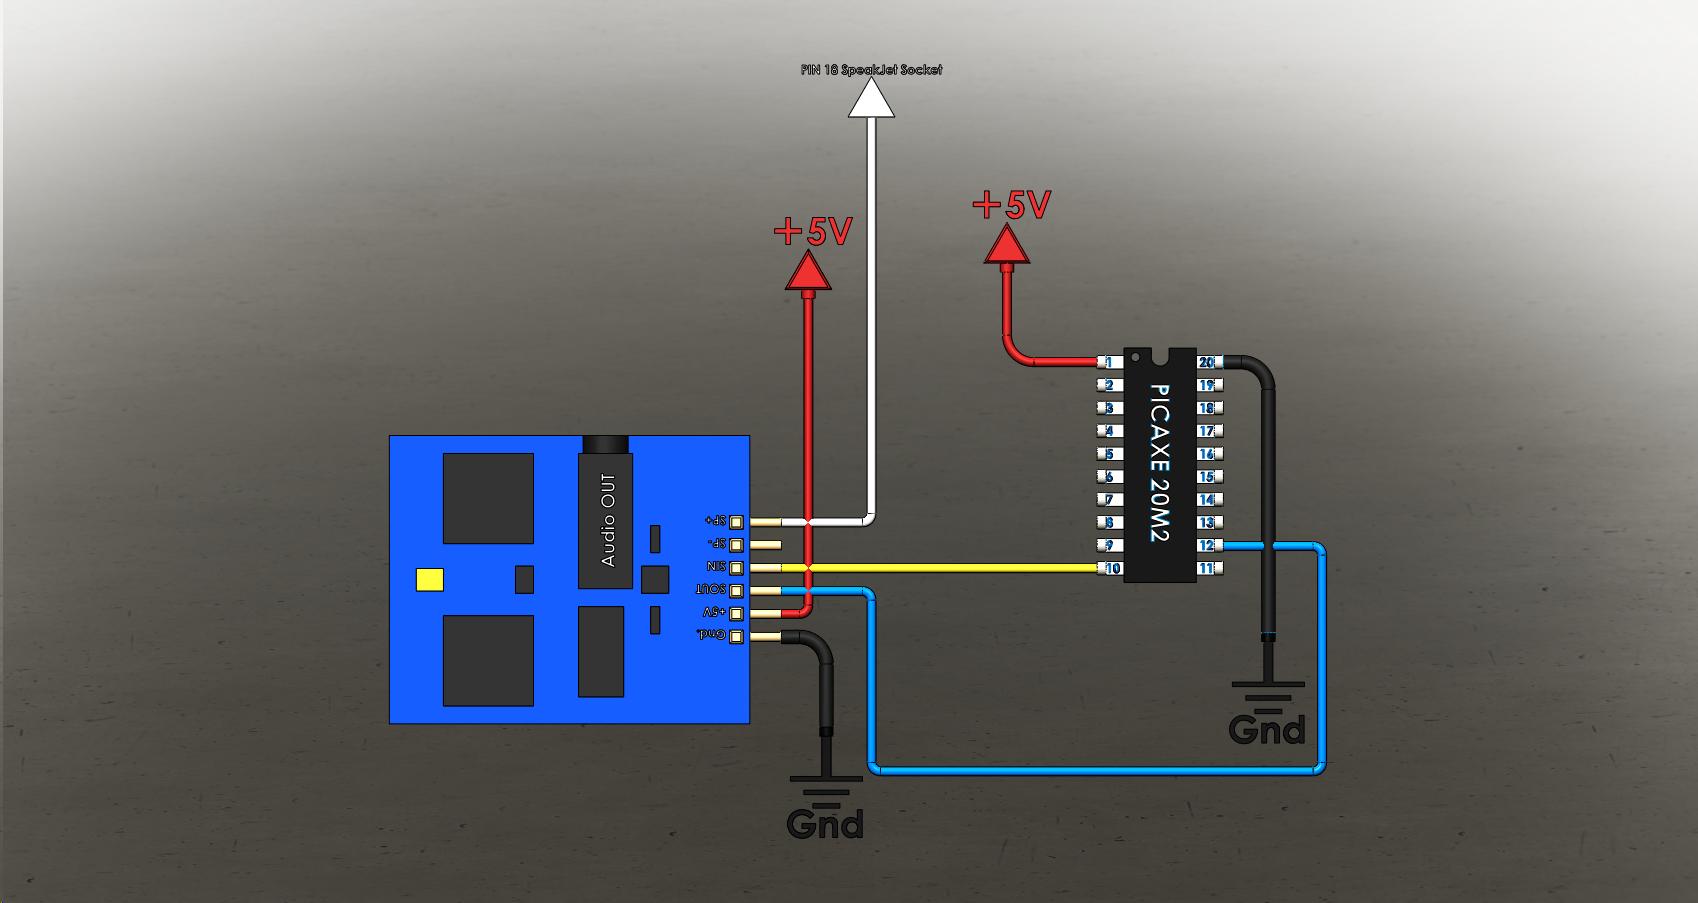
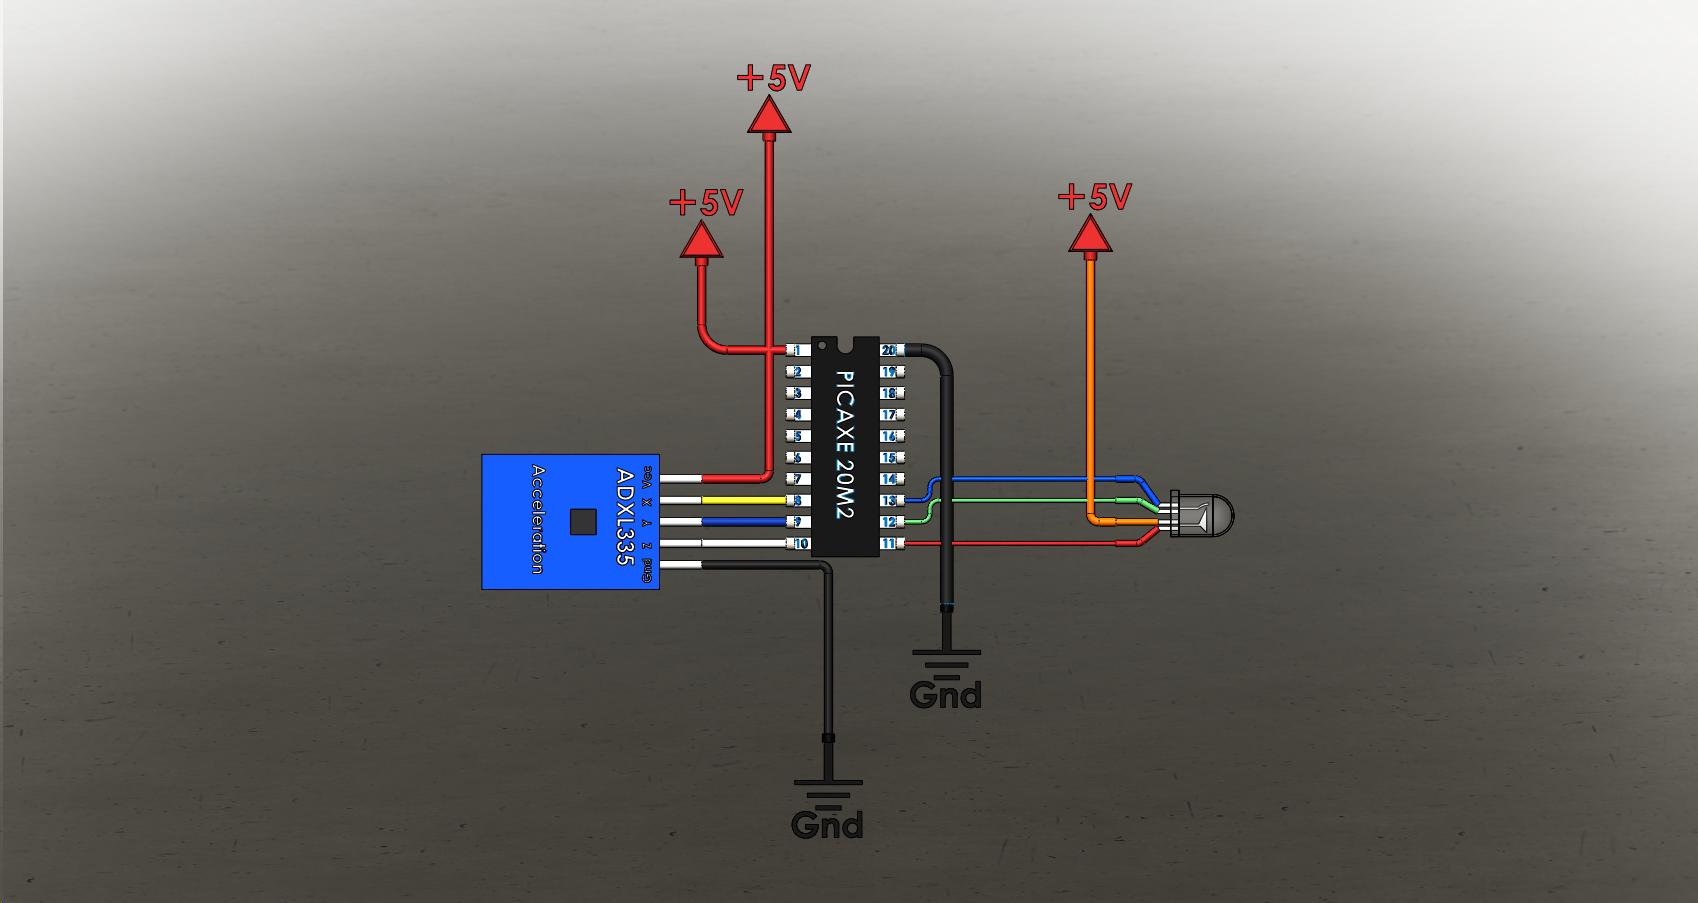
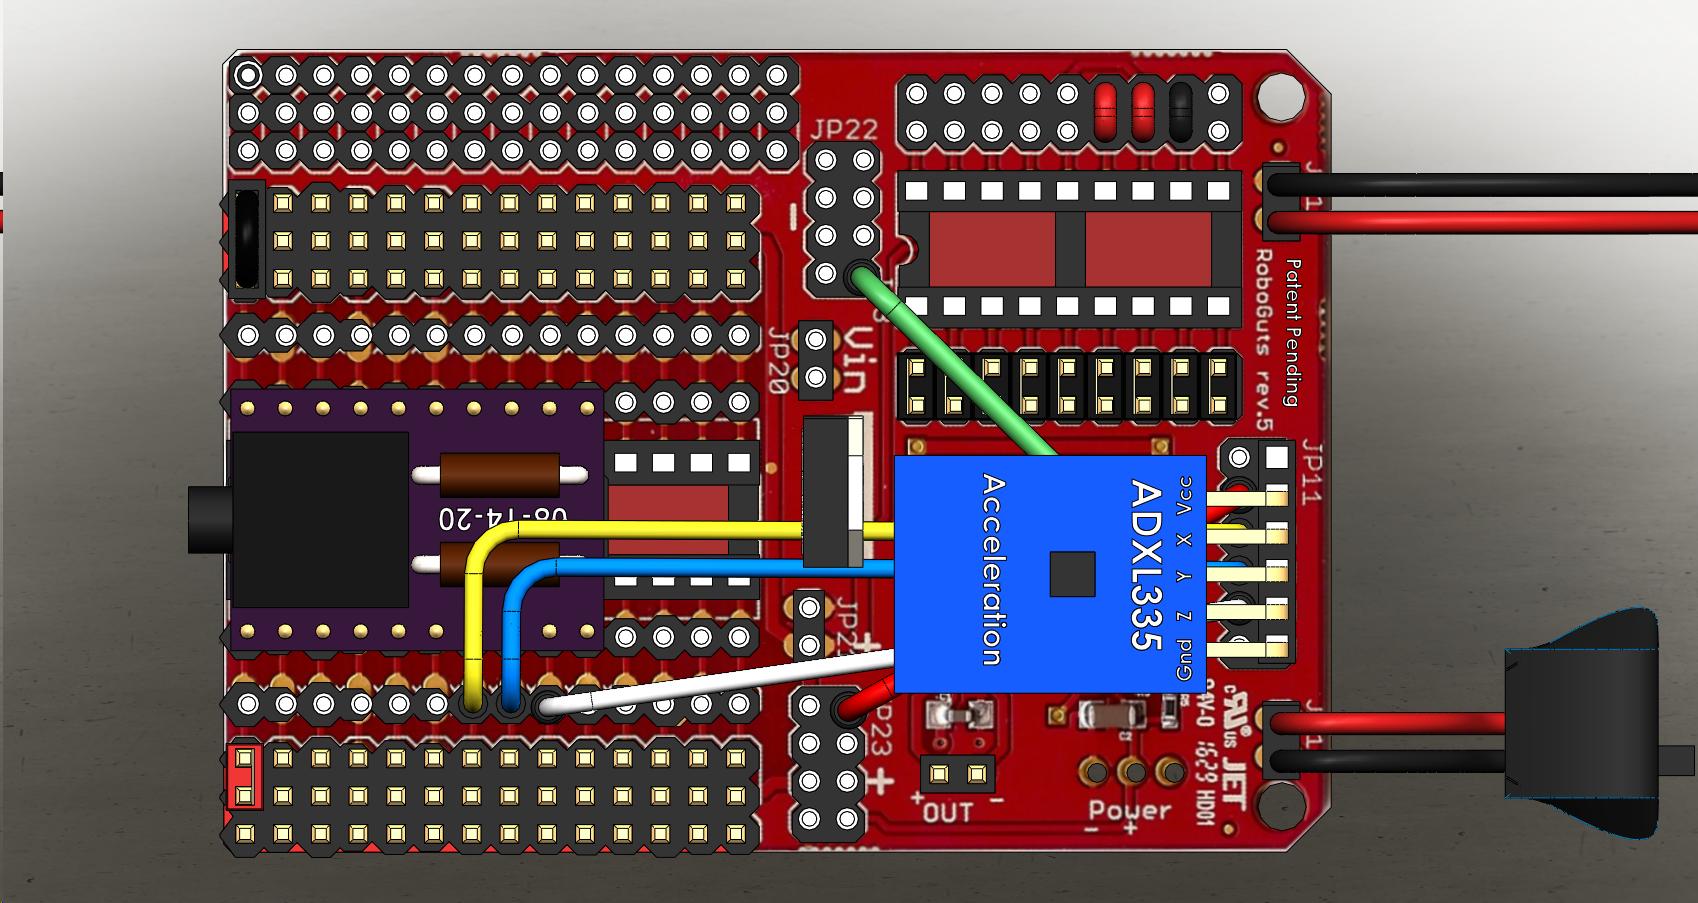
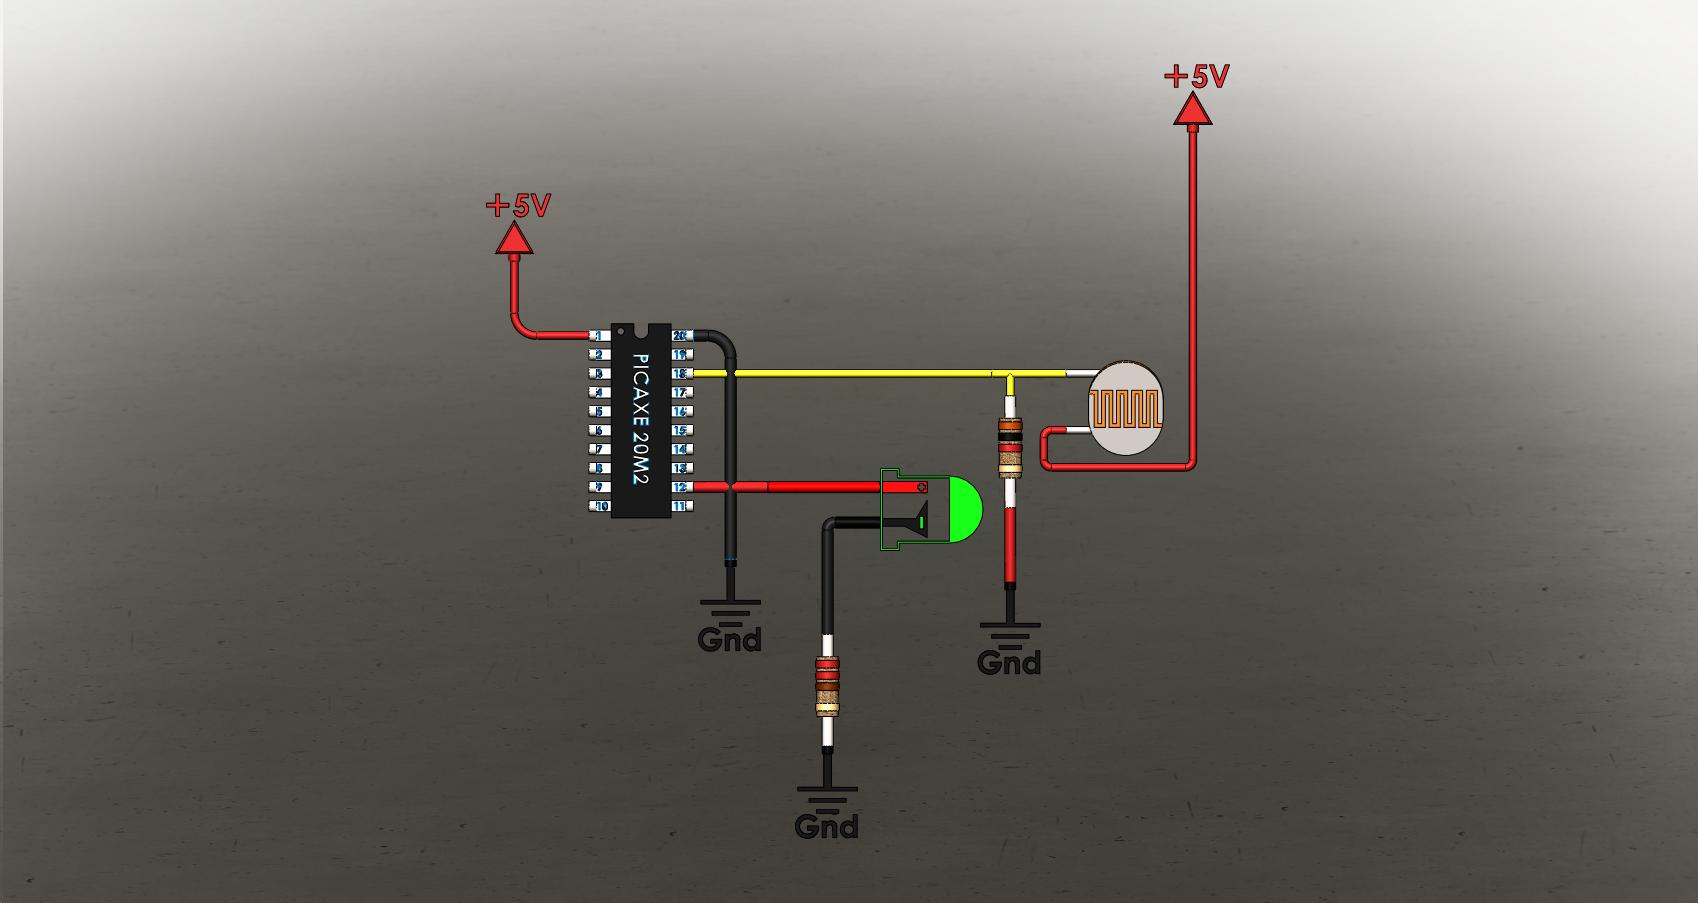
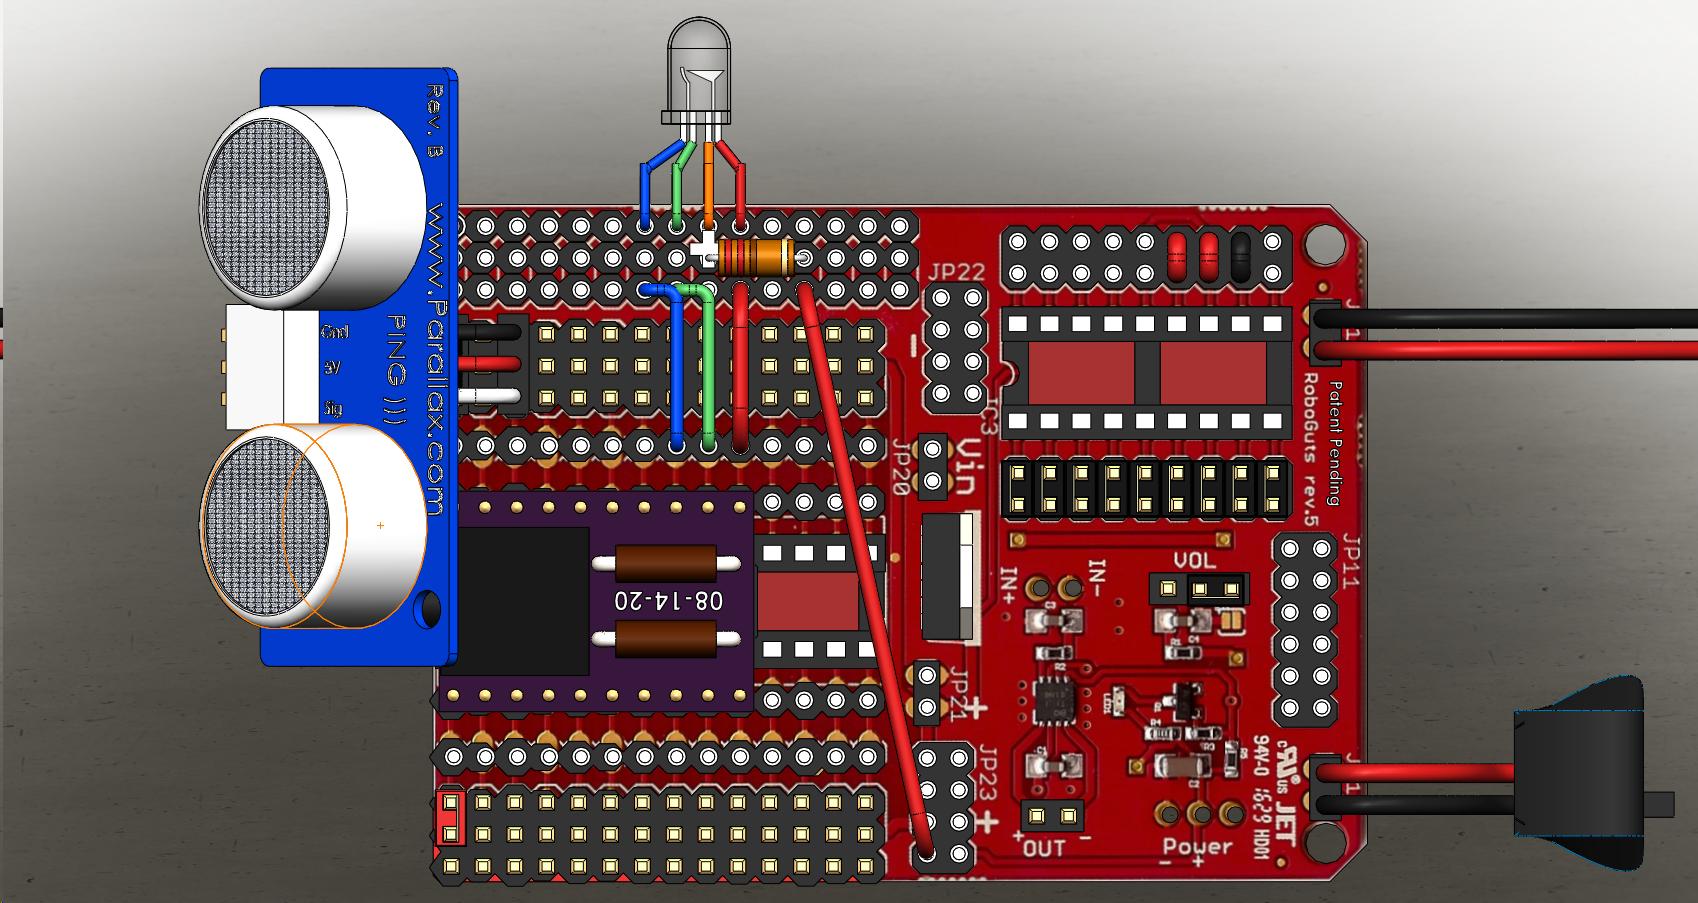
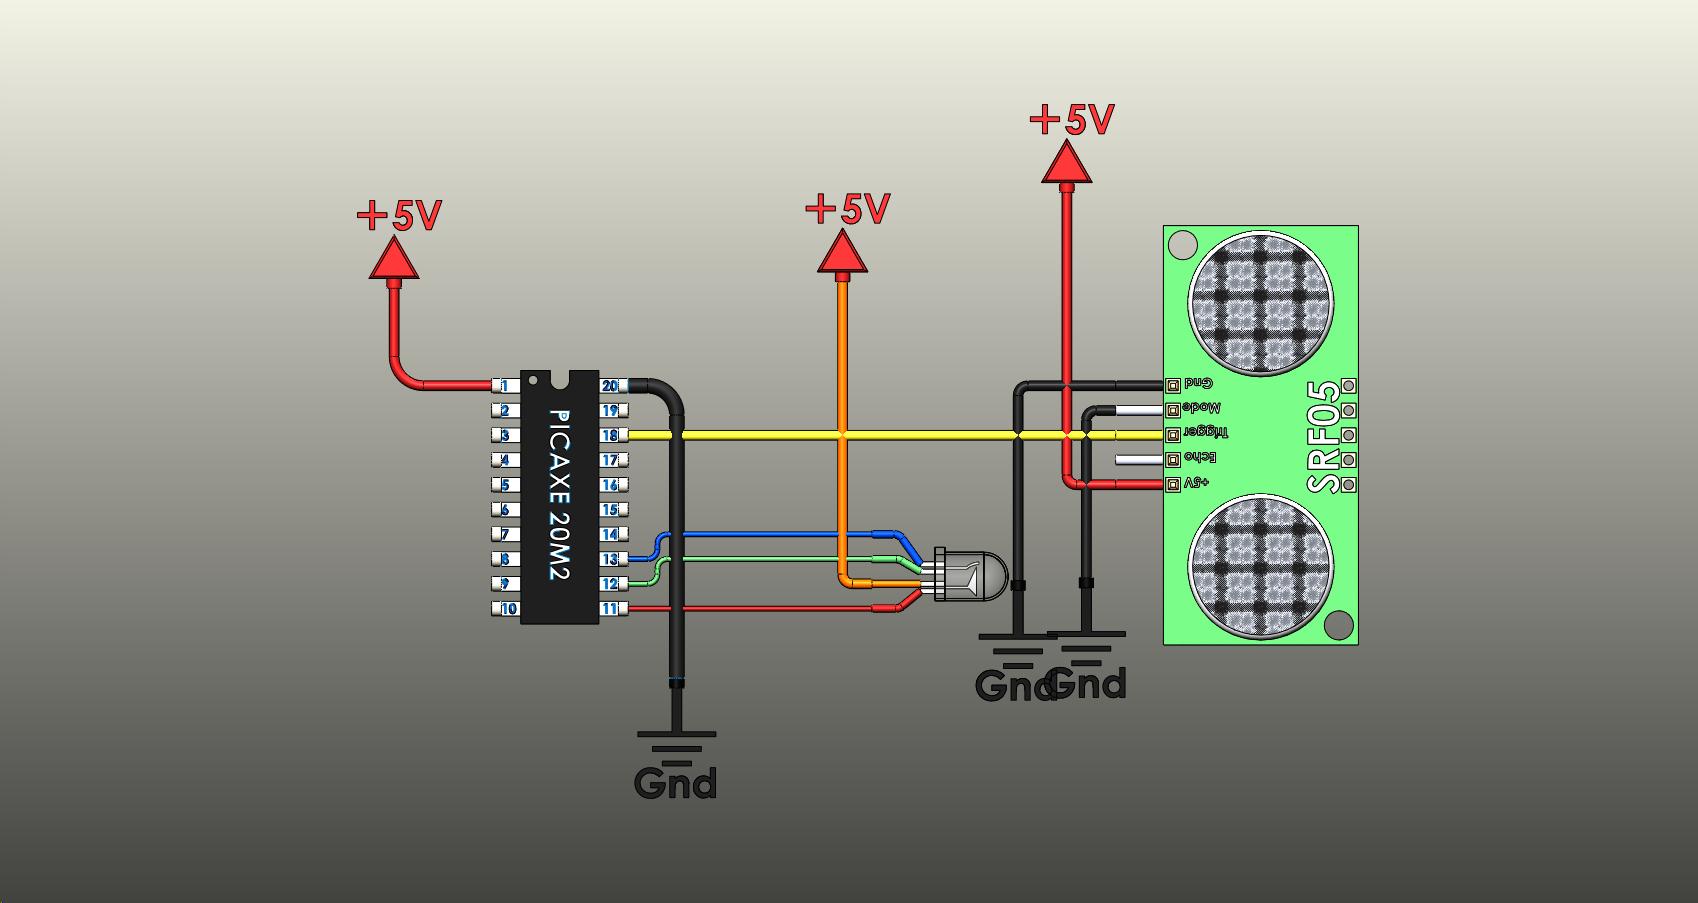
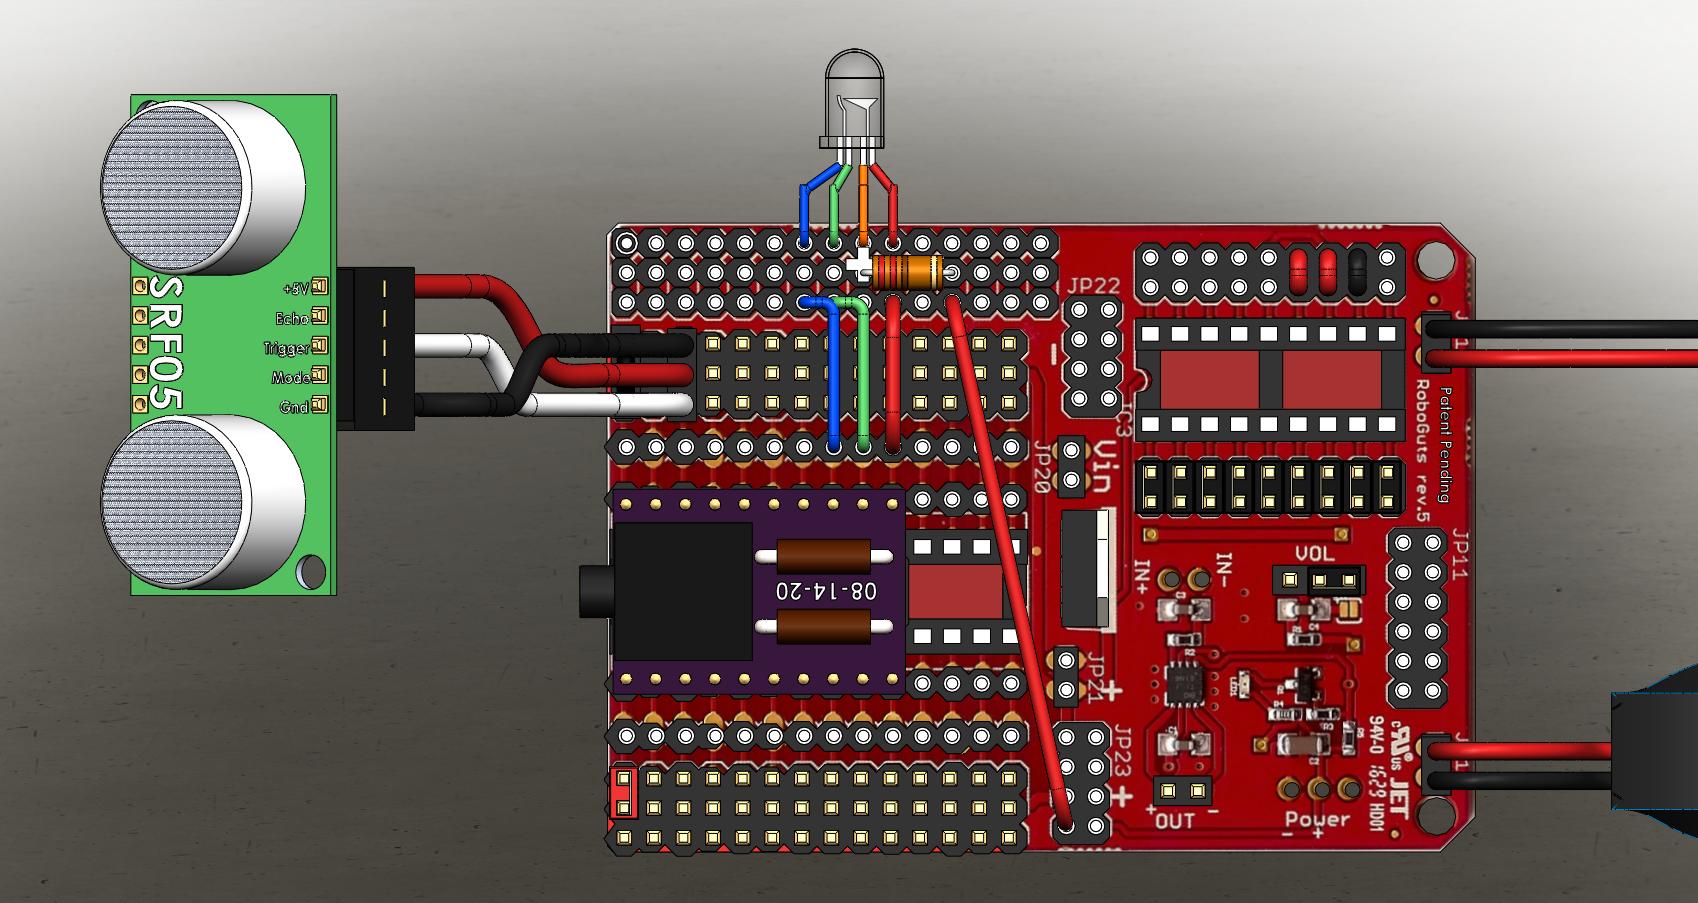
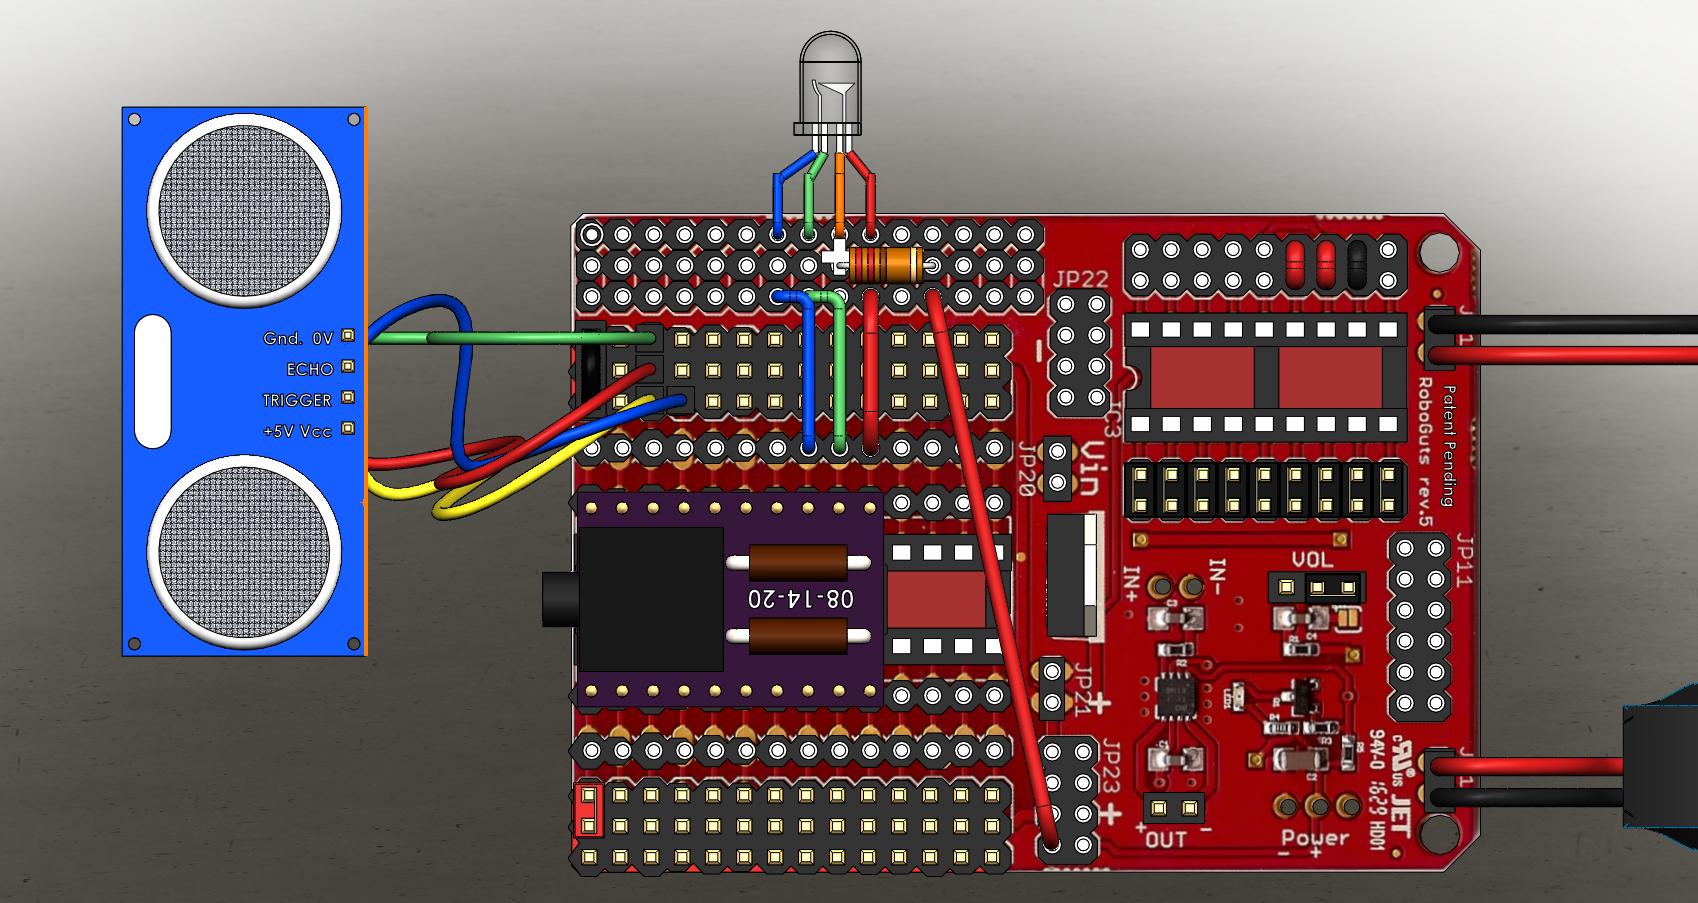
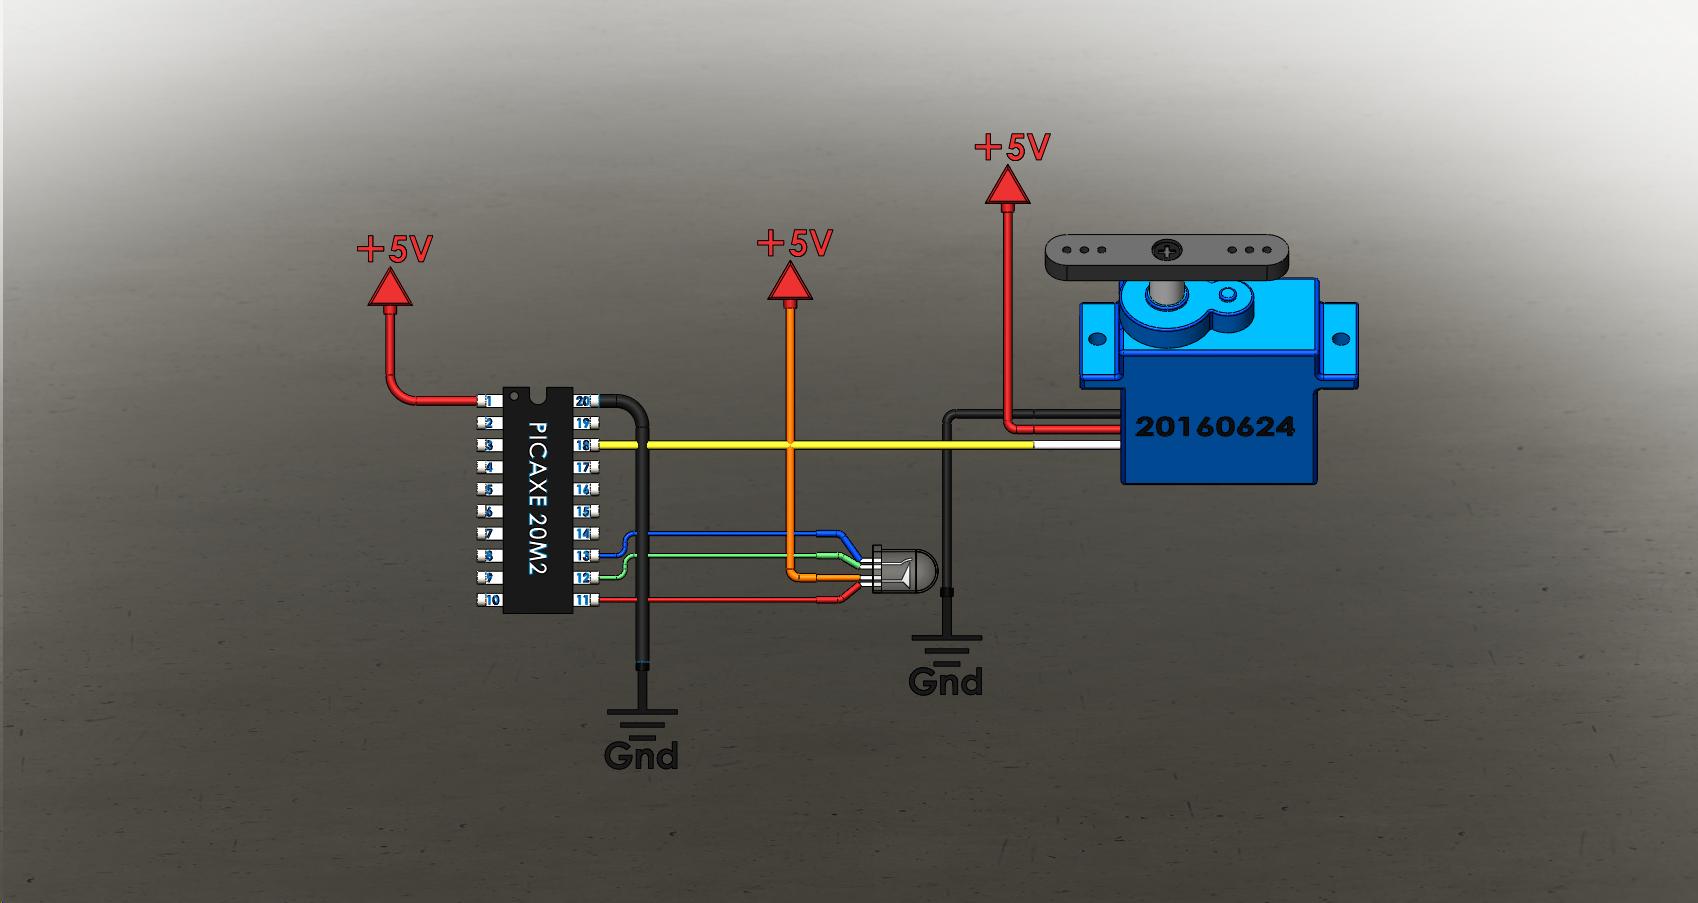
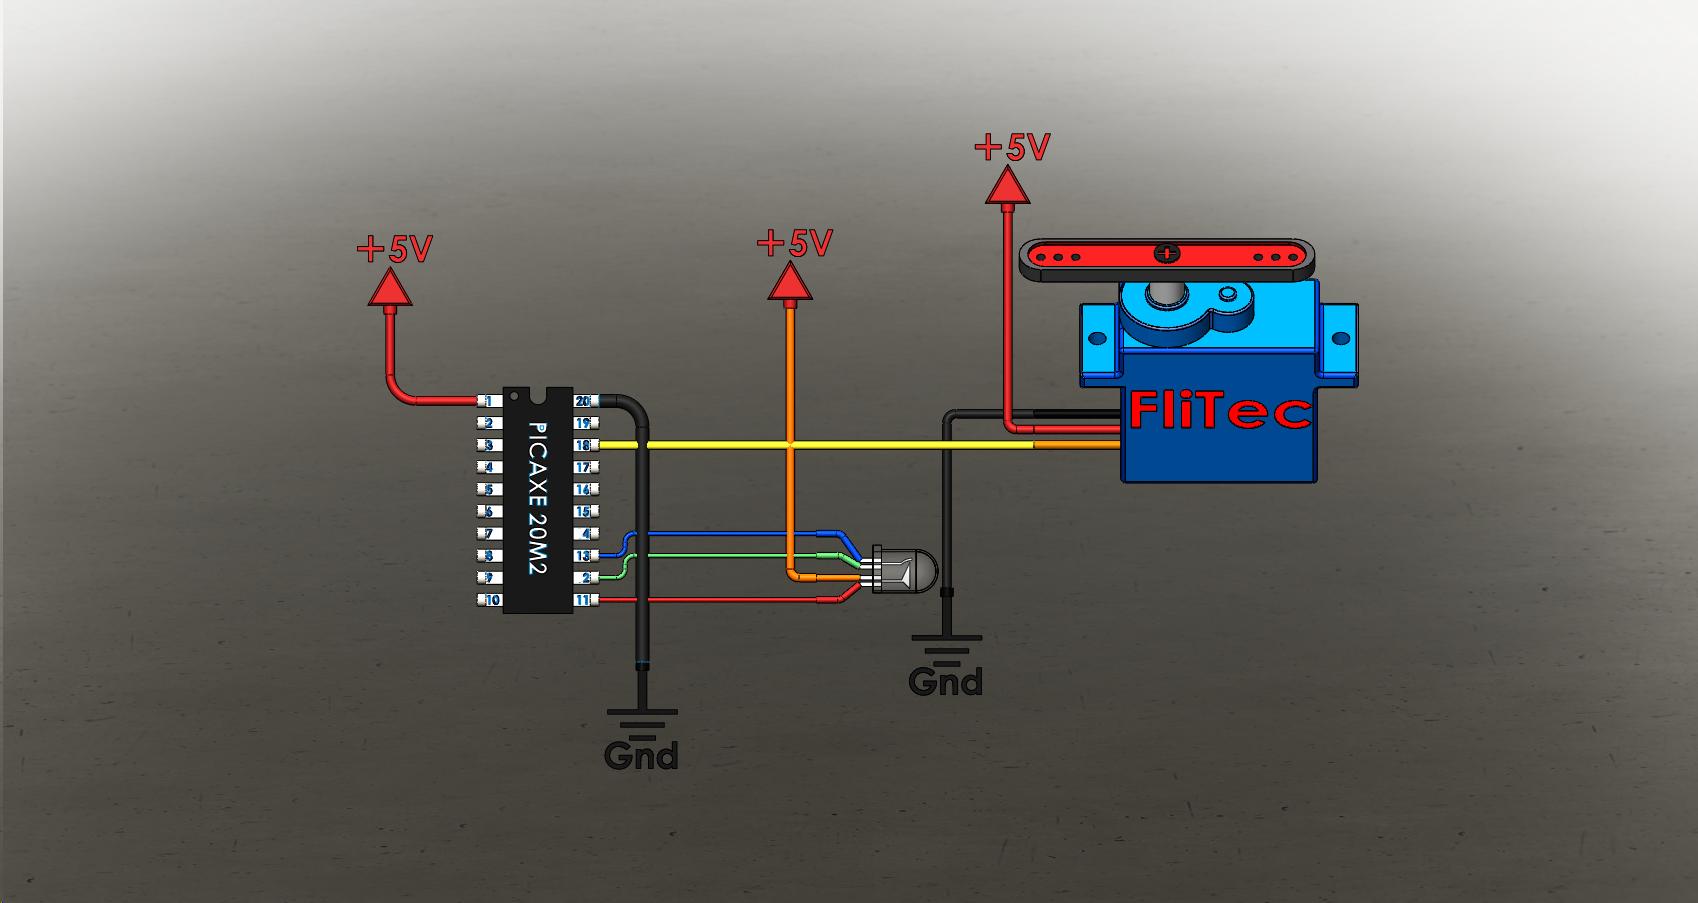
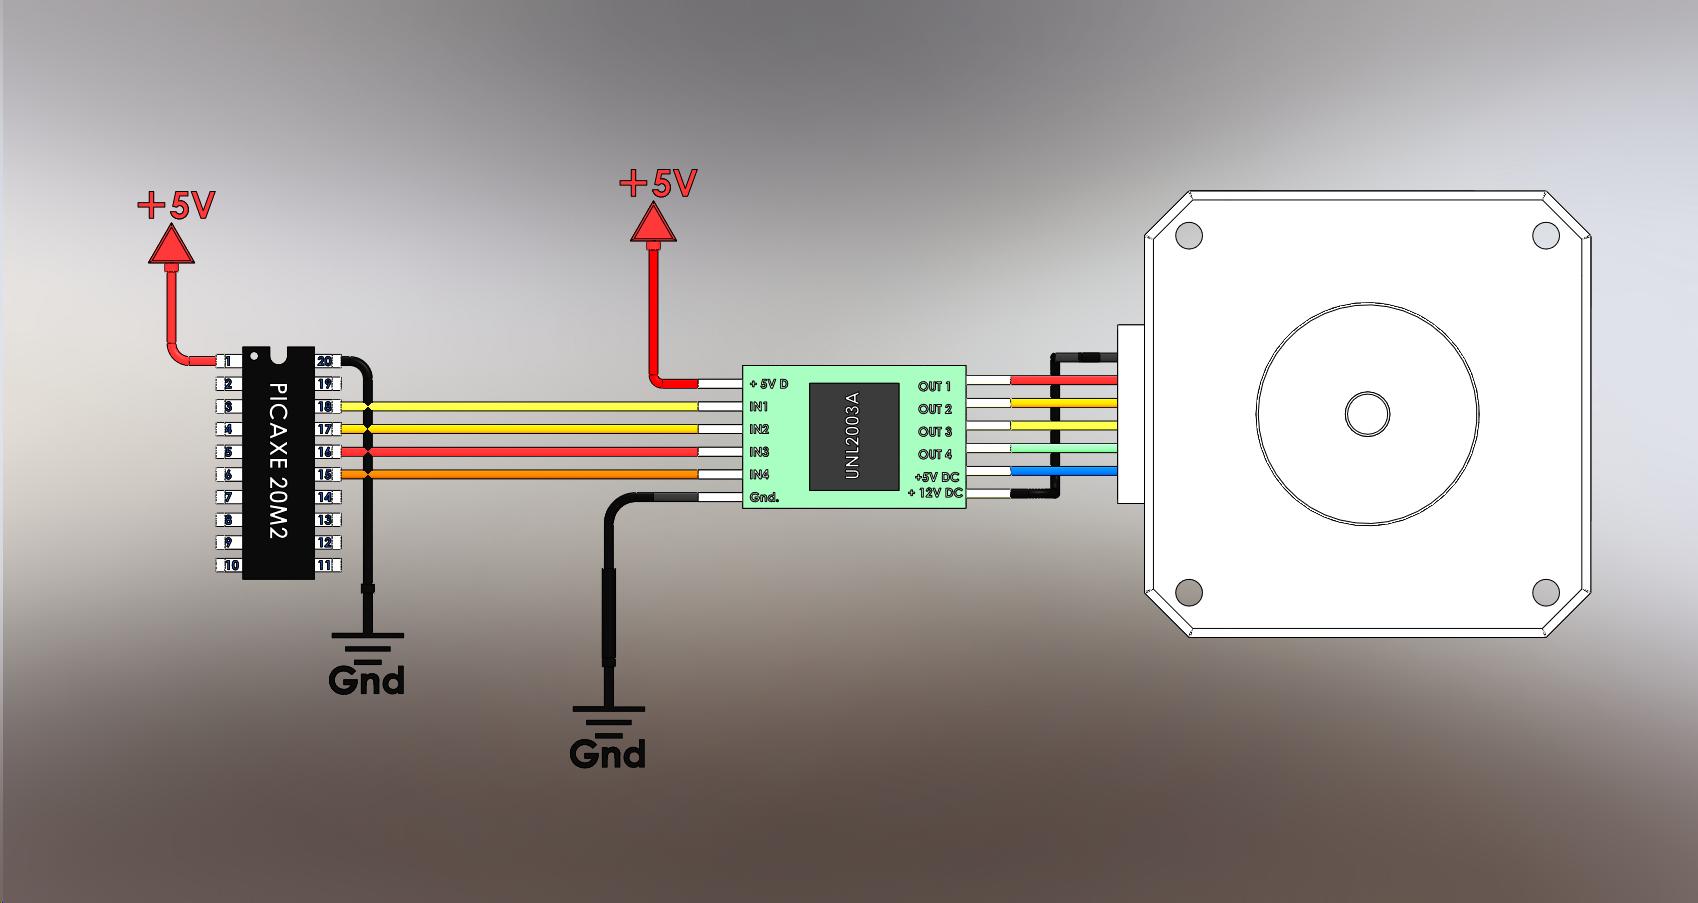
You learn the chip PINs NOT the programming board PINs!
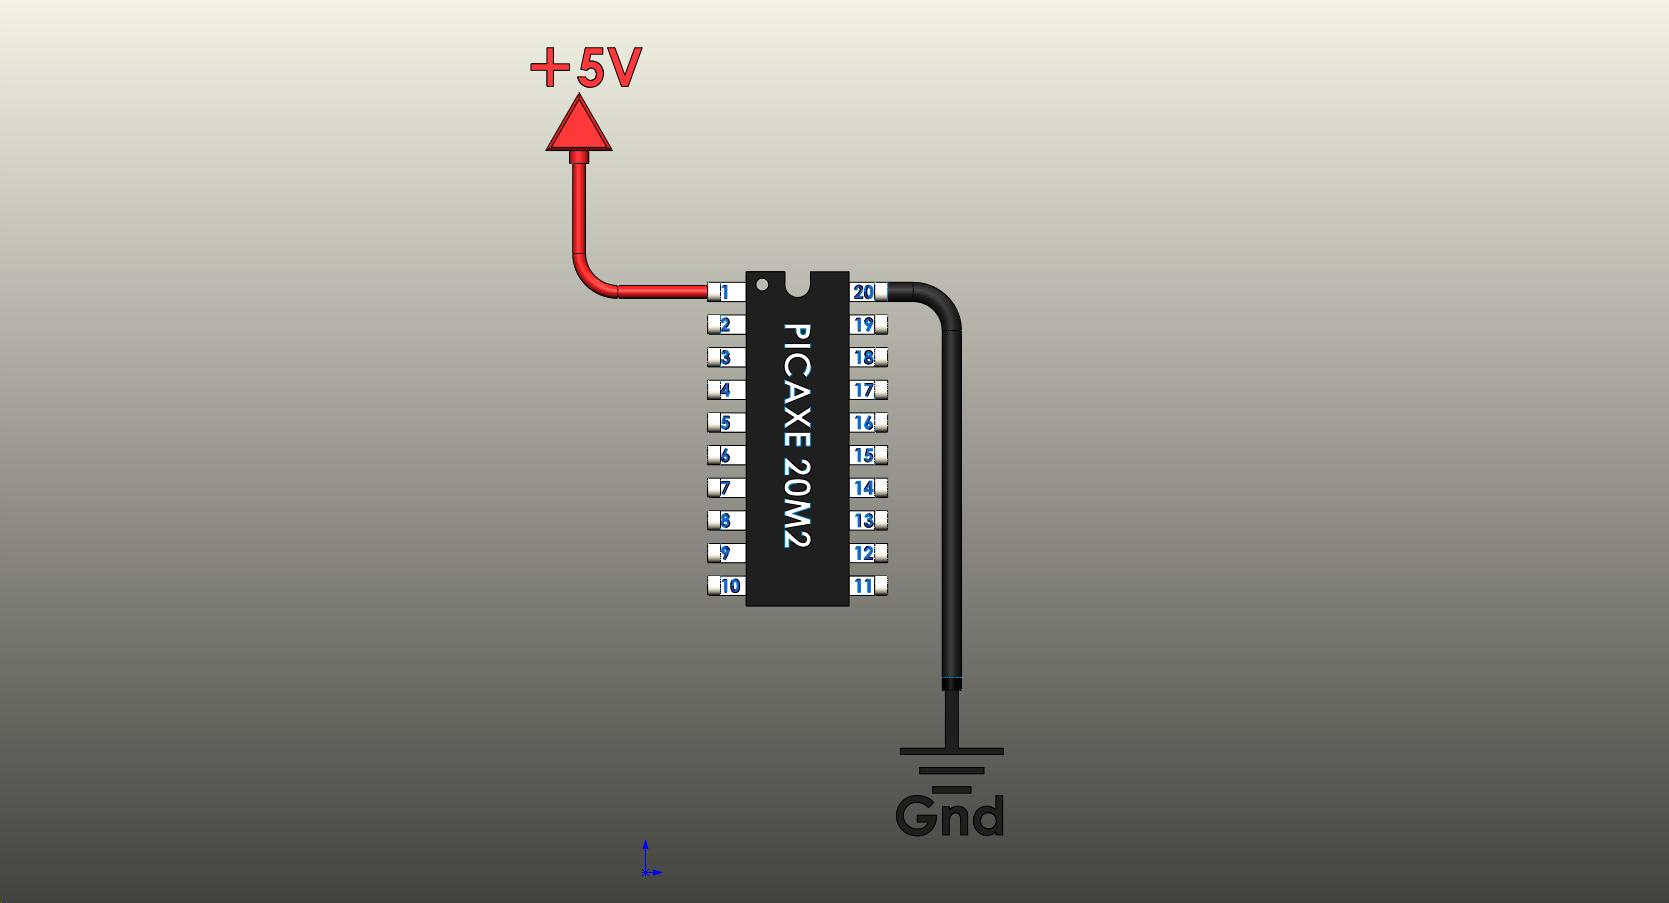
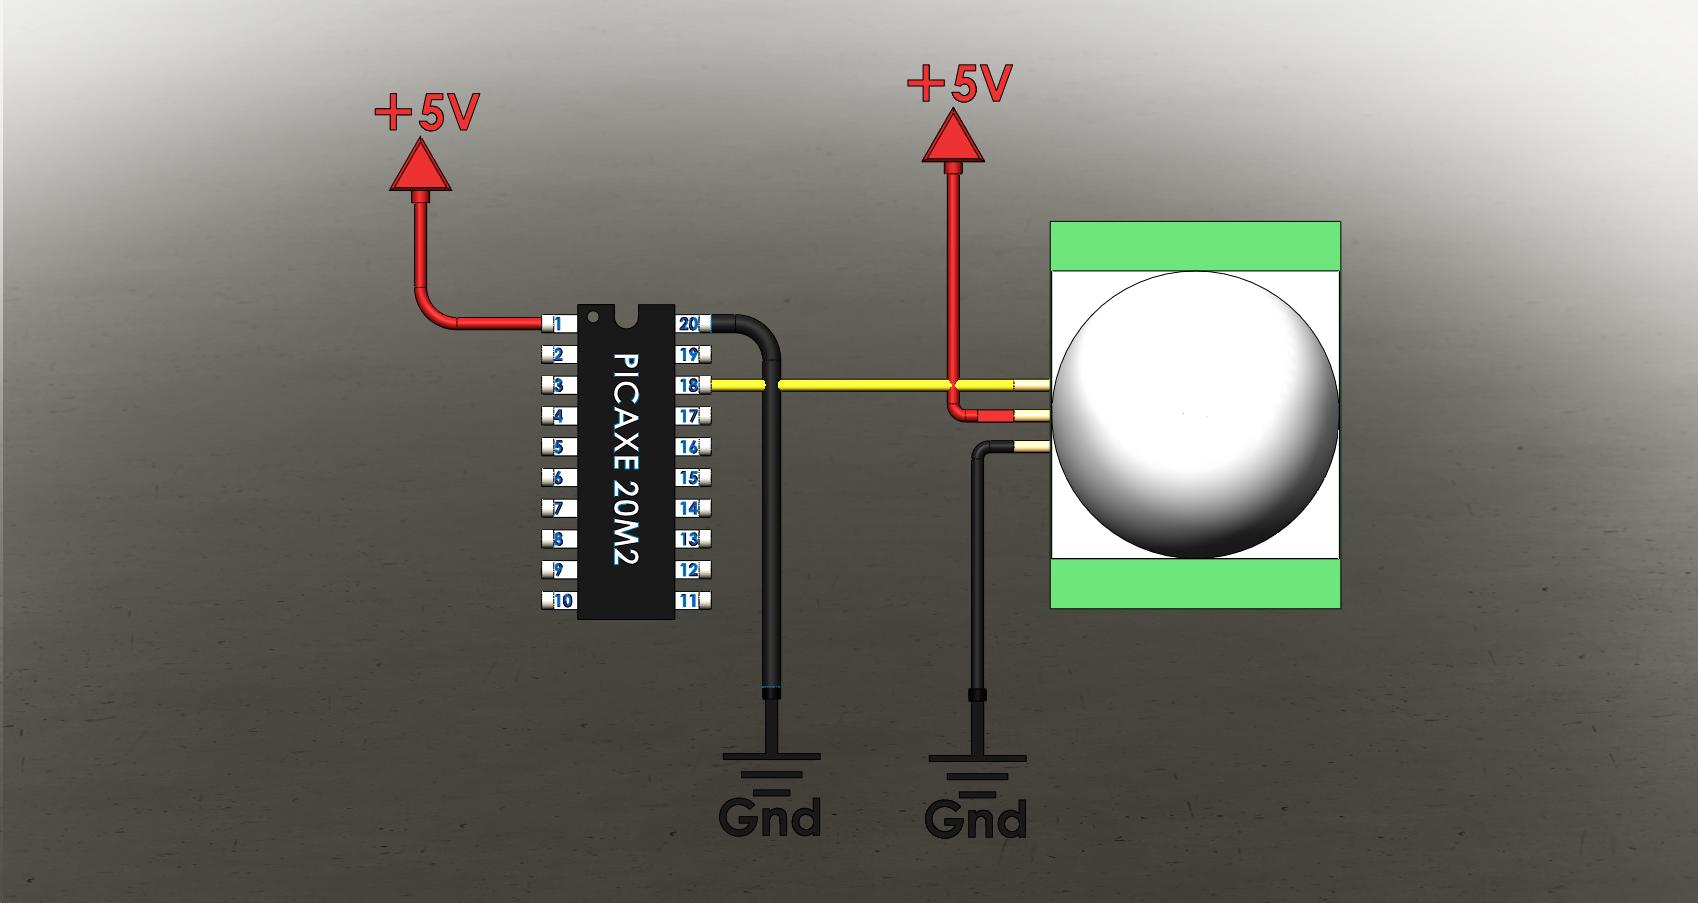
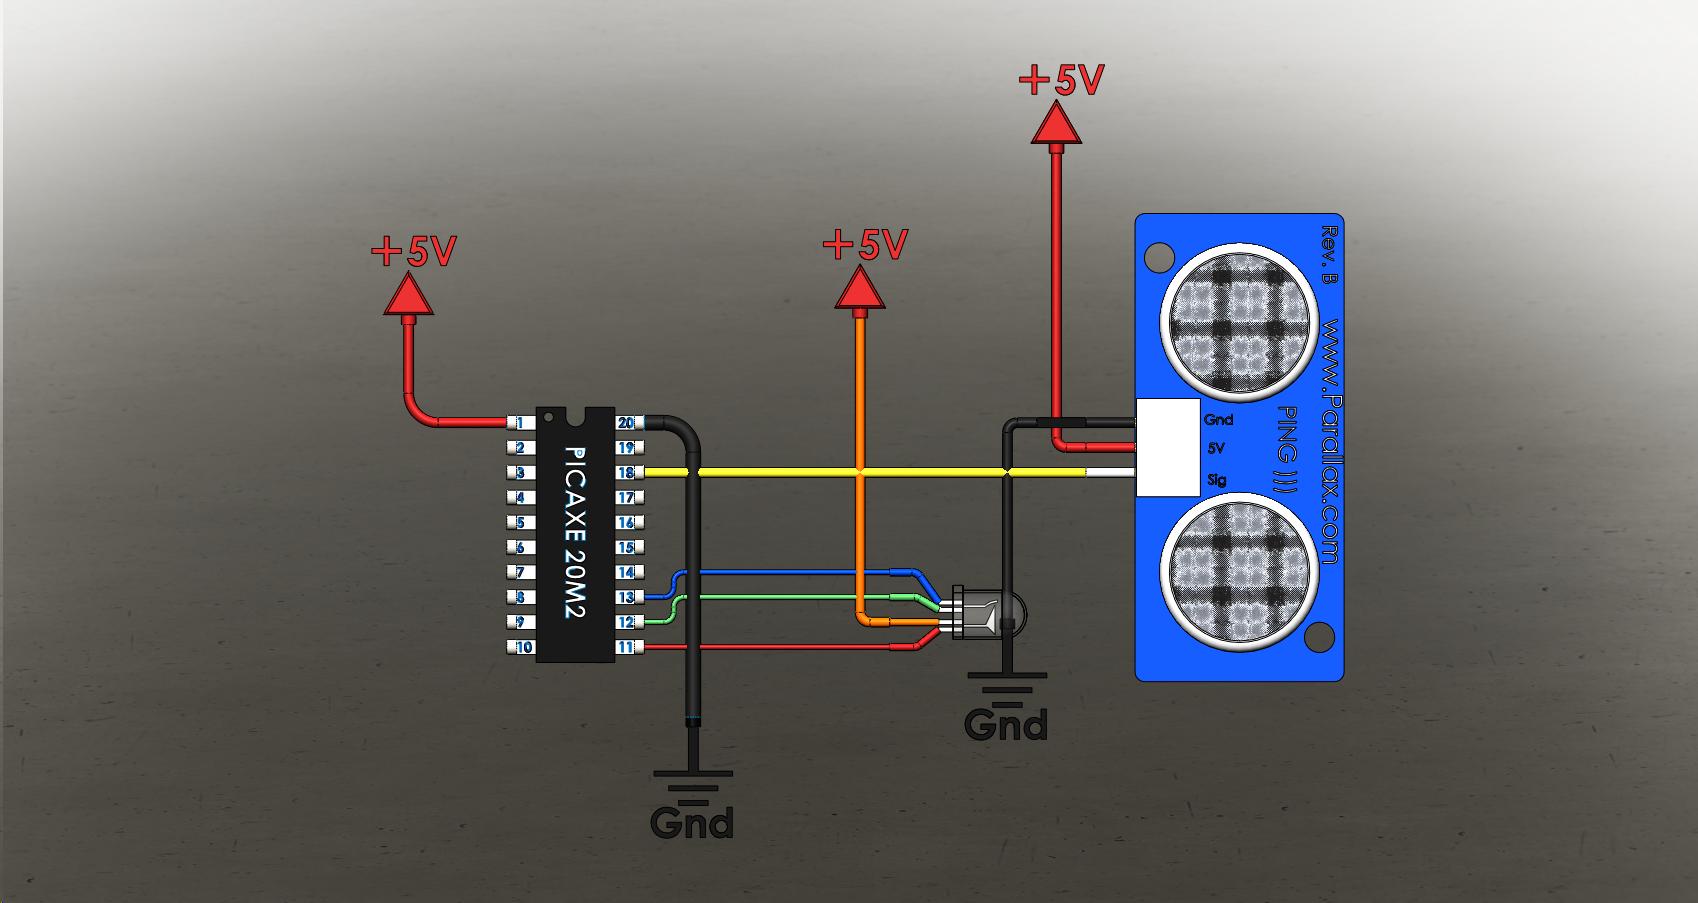
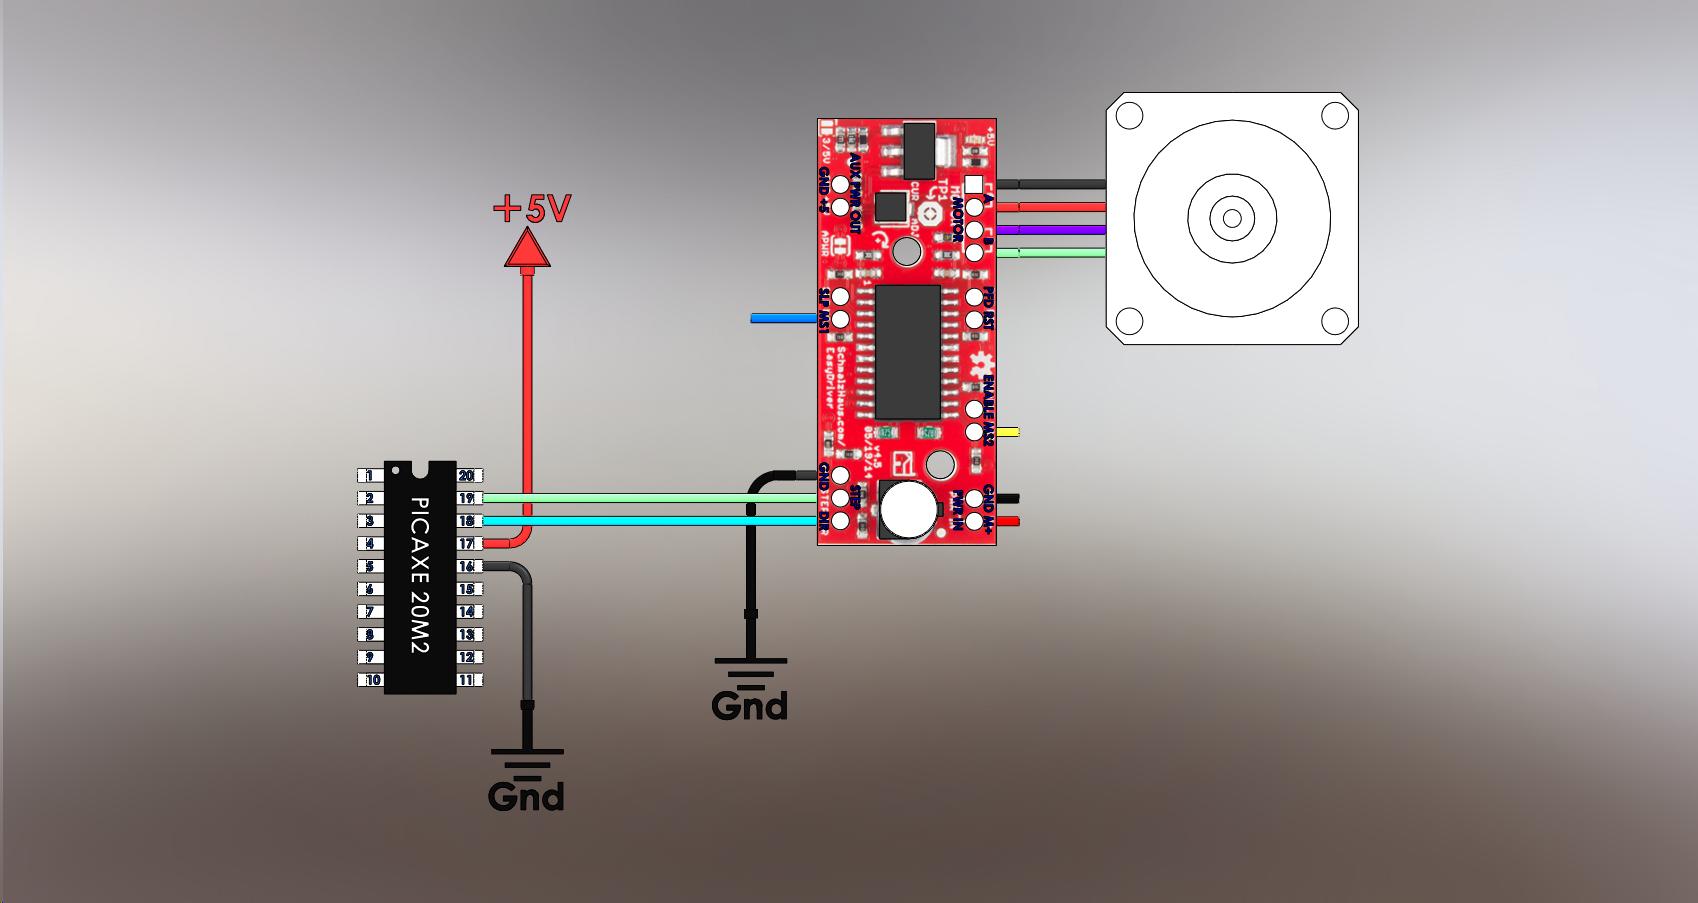
Power IN for the PICAXE 20M2 and PICAXE 20X2 chip is +5V DC
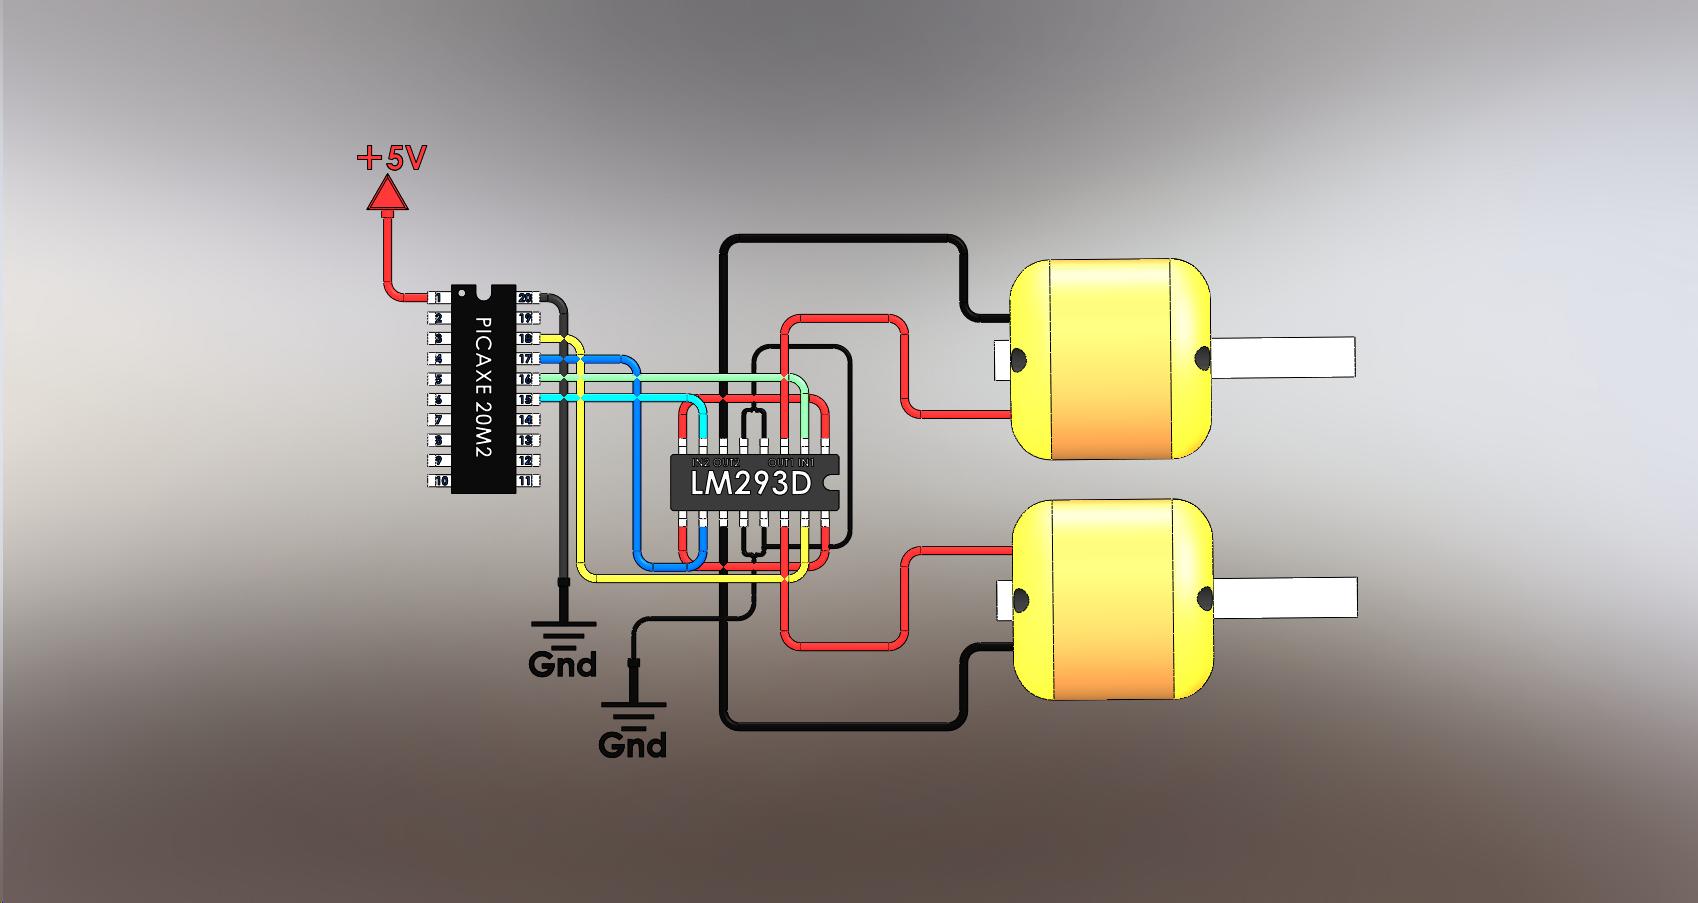
Animation 20M2 Experiment 00 Schematic
Animation 20M2 Experiment 01 Schematic

Animation 20M2 Experiment 02 Schematic
Animation 20M2 Experiment 03 Schematic
Animation 20M2 Experiment 04 Schematic
Animation 20M2 Experiment 05 Schematic
Animation 20M2 Experiment 06 Schematic
Animation 20M2 Experiment 07 Schematic
Animation 20M2 Experiment 09 Schematic

Animation 20M2 Experiment 10 Schematic
Animation 20M2 Experiment 11 Schematic

Animation 20M2 Experiment 12 Schematic
Animation 20M2 Experiment 13 Schematic

Animation 20M2 Experiment 14 Schematic
Animation 20M2 Experiment 15 Schematic

Animation 20M2 Experiment 16 Schematic
Animation 20M2 Experiment 17 Schematic
Animation 20M2 Experiment 18 Schematic

Animation 20M2 Experiment 19 Schematic
Animation 20M2 Experiment 20 Schematic
Animation 20M2 Experiment 21 Schematic
TeacherNotes


END Main Lessons

BEGIN the 3D Printable Robot Projects

Click on the picture above to see the programming code
----------------------------------------------------------------------------------------------------------------
ALL the .STL part files are waiting for KickStarter campaign to be funded.
----------------------------------------------------------------------------------------------------------------

The bot sees a color, displays the color in its body 3-color LED and speaks about the color it sees.
. . . . . . . . . .
recognize colors correctly. Color lights and bacck-lit objects do not work with the PIXY CMUcam5.


----------------------------------------------------------------------------------------------------------------
ALL the .STL part files are waiting for KickStarter campaign to be funded.
----------------------------------------------------------------------------------------------------------------

Easy to build other than painting the parts and soldering up the audio amplifier PINs.

The RoboGuts™ are so simple!
B.7 = Red LED, B.6 = Green LED, B.5 = Blue LED
C.0 = Talk & Song

----------------------------------------------------------------------------------------------------------------
ALL the .STL part files are waiting for KickStarter campaign to be funded.
----------------------------------------------------------------------------------------------------------------
Designed for the PICAXE 28X2 module with enough memory for all the movements, although smaller chips can still make movable eyes.


How to Buy a RoboGuts™ Kit
or donate to the cause ...
